SOLERA
®
POWER AWNING ARM REPLACEMENT
TI-230
AWNINGS
7. Remove the #8 wax screws that hold the drive head shaft to the end cap on the roll tube.
Make sure the roll tube is adequately supported before removing the support arm assembly. Failure
to do so may result in serious personal injury or property damage.
Fig. 4
Fig. 5
As a supplier of components to the RV industry, safety, education and customer satisfaction are our primary concerns.
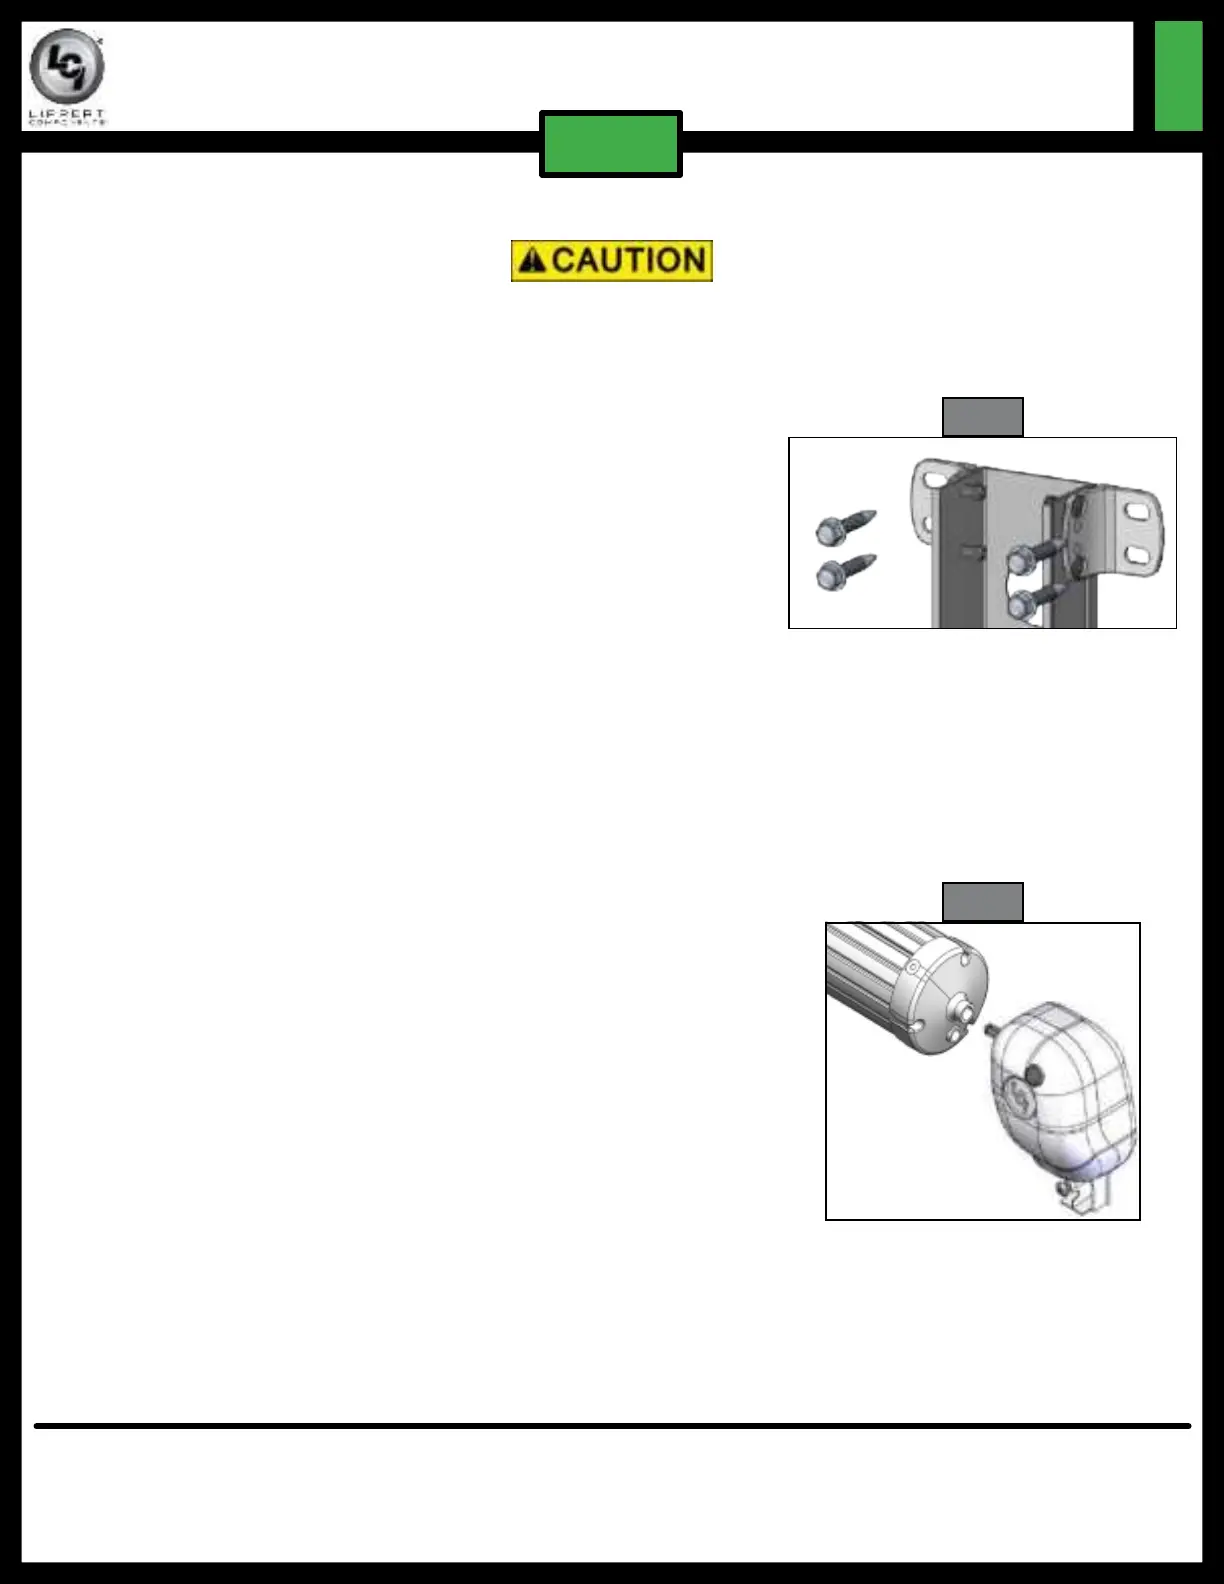
8. Remove the 4 fasteners from the angle bracket
at the top of the arm. These are the last of the
fasteners holding the support arm assembly to the
unit (Fig 4).
9. Remove the support arm assembly from the end
cap. It should be completely free now and can be
removed from the working area.
10. Take the new support arm assembly and slide the
head shaft into the end cap on the roll tube (Fig 5).
11. Mount the support arm assembly to the wall using
similar fasteners that were previously in the old arm.
One fastener will hold the awning in place at this
time.
NOTE: The first fastener should be placed in the bottom
of the angle bracket on the inside of the mount
arm, as this is the easiest one to access.
12. Install the #8 wax screws back into the end cap to
secure head shaft.
13. Cut the zip tie and install the remaining 3 fasteners
into the angle brackets at the top of the arm.
14. Pull the wires out of the bottom of the awning arm.
If the arm is a top mount, wires can be removed
from the top as well. Use the cordless battery and
extend the awning fully.
15. Install the remaining fasteners, 2 at bottom and 2 in
the middle of the mount arm.
16. Reconnect the wires from the motor to the unit.
Check the switch. If the awning is running reverse of
what the switch indicates, reverse the wires.
17. If unit was equipped with a light, run the wire down
the arm and reconnect it to the unit wiring. In order
for the system to work properly the power wire
MUST go to red and ground to black.
18. Seal all areas at this time.