13
INSTALLING BATTERIES
If securing to a railing, make sure the railing is made of suitable material, and screw directly through
the openings in the base stand into the railing until secure.
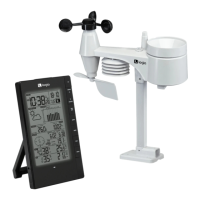
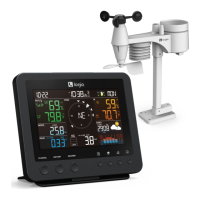
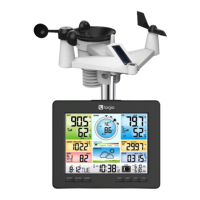
Your display console can pair with the wireless weather sensor as well as up to seven (7) optional
wireless hygro-thermo outdoor sensors (not included).
5. The mounting location should be within 492 ft. (150 m) of the location where you will be keeping
the display console with few obstructions and relatively clear sightlines. If there are multiple walls/
levels/buildings in between the sensor and the display console, the functionality could be
compromised and you will need less space between the two.
6. Use the built-in level to make sure the sensor is parallel with the ground.
1. Remove the battery door on the rear of the console unit.
2. Insert six (6) new AA batteries, making sure the polarities match up with the polarities marked
inside the compartment.
3. Replace the battery door.
DISPLAY CONSOLE SETUP
5
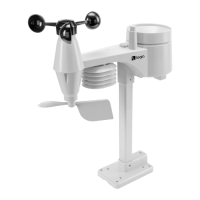
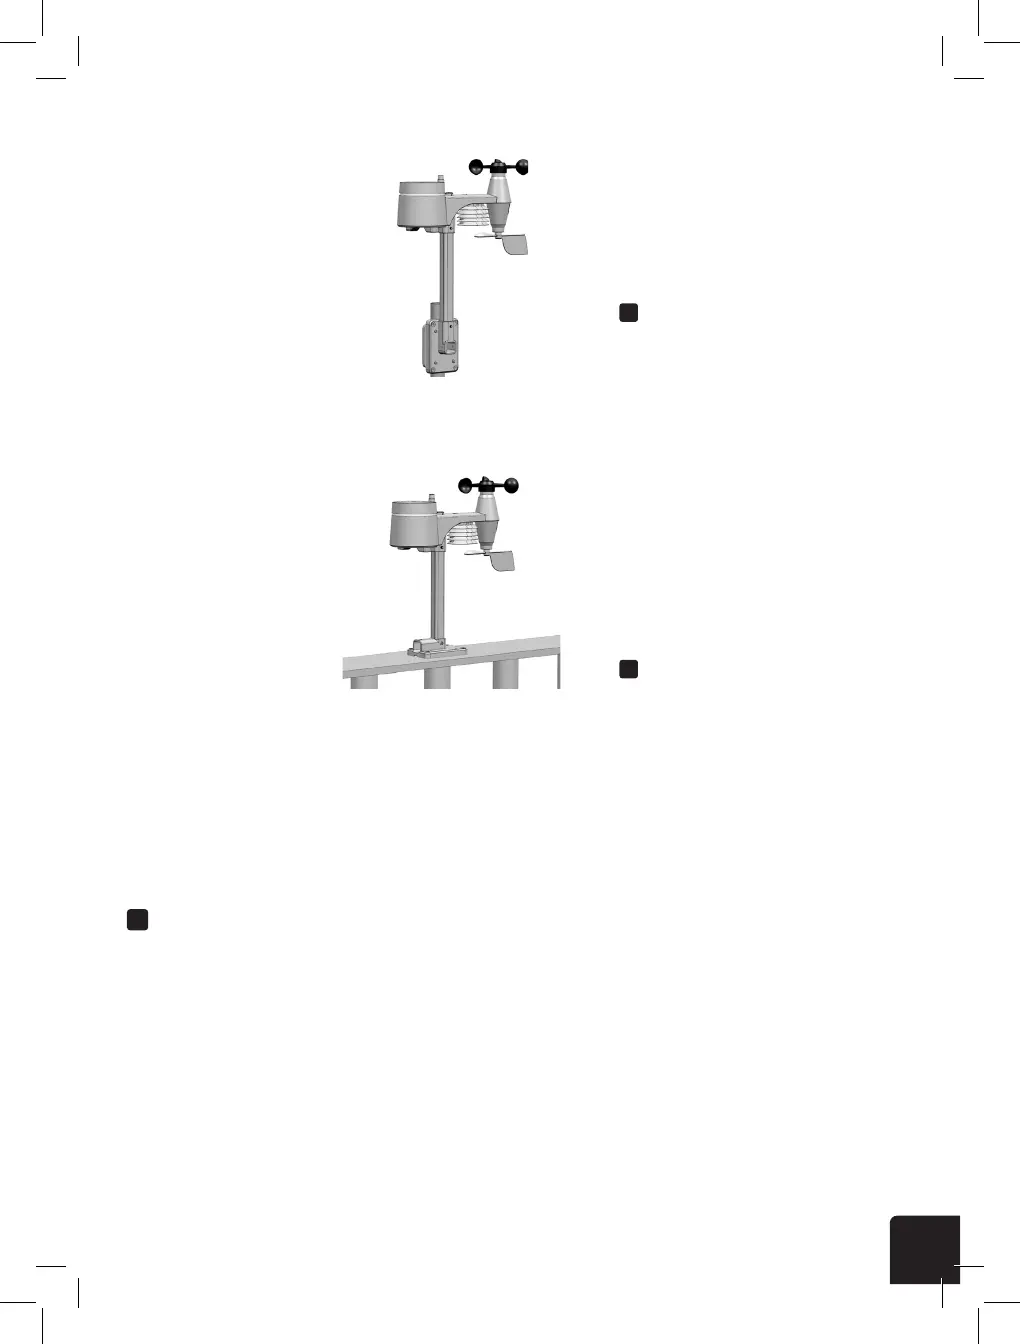
Step 4
Place the nut in the hexagon hole of the stand,
then insert the screw in other side and then
tighten it by the screw driver.
Install the wireless 5-IN-1 sensor
in an open location with no
obstructions above and around
the sensor for accurate rain
and wind measurement. Install
the sensor with the smaller end
facing the North to properly orient
the wind direction vane.
Secure the mounting stand and
clamps (included) to a post or
pole, and allow minimum 1.5m
off the ground.
1.5 meter off
the ground
Add rubber
pads before
mount on
the pole
Point to
NORTH
MOUNTING GUIDELINES
1. Install the wireless 5-IN-1 sensor at least 1.5m off the ground for better and more accurate
wind measurements.
2. Choose an open area within 150 meters from the LCD console.
3. Install the wireless 5-IN-1 sensor as level as possible to achieve accurate rain and wind
measurements.
4. Mount the wireless 5-IN-1 sensor with the wind meter end pointing to the North to correctly
orient direction of the wind vane.
A. Mounting on pole (Pole Diameter 1"~1.3")
(25~33mm)
B. Mounting on the railing
5
Step 4
Place the nut in the hexagon hole of the stand,
then insert the screw in other side and then
tighten it by the screw driver.
Install the wireless 5-IN-1 sensor
in an open location with no
obstructions above and around
the sensor for accurate rain
and wind measurement. Install
the sensor with the smaller end
facing the North to properly orient
the wind direction vane.
Secure the mounting stand and
clamps (included) to a post or
pole, and allow minimum 1.5m
off the ground.
1.5 meter off
the ground
Add rubber
pads before
mount on
the pole
Point to
NORTH
MOUNTING GUIDELINES
1. Install the wireless 5-IN-1 sensor at least 1.5m off the ground for better and more accurate
wind measurements.
2. Choose an open area within 150 meters from the LCD console.
3. Install the wireless 5-IN-1 sensor as level as possible to achieve accurate rain and wind
measurements.
4. Mount the wireless 5-IN-1 sensor with the wind meter end pointing to the North to correctly
orient direction of the wind vane.
A. Mounting on pole (Pole Diameter 1"~1.3")
(25~33mm)
B. Mounting on the railing
A
B
MOUNTING ON POLE
(POLE DIAMETER 1”-1.3”)
(25-33MM)
MOUNTING ON A RAILING
 Loading...