- All heavy or sharp-edged objects in the vehicle ( e.g. on the parcel shelf) are secured.
- All persons in the vehicle have their seat belts fastened.
For the protection of all passengers in the vehicle: In the case of an emergency stop or an accident ,
unsecured persons or objects may cause injury to other passengers. Please always check that :
- The backrests of the vehicle seats are locked. (i.e. that a foldable rear seat bench latch is engaged)
- The child safety seat is always secured when it is in the vehicle , even without transported child.
To protect your vehicle:
Some vehicle seat covers are from sensitive materials ( e.g. velour, leather,etc.)and may develop wear marks
when child seats are used. This can be avoided, by placing a blanket or towel under the child safety seat.
2.Adjusting the length of the belts
2.1. Slack the belts: Press the button for belts adjusting "8 " (Picture 3) and at the same time pull both
shoulder straps “ 11 “. (Picture 4) Note: Do not pull the shoulder pads .
2 .2. Tightening the belt: Place your child in the seat, fasten both belts in the buckle in the centre and pull the
bar in the middle of the seat. (Picture 8;9 )
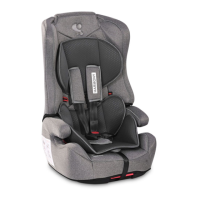
1. Adjusting the tilt of the seat
The child seat can be adjusted in 4 positions. (Picture 1; 2) Recline position “4” for Group 0+;
Position 1;2;3 for Group I; Position 1 for Group II;III . Pull the positioning handle in the front part under
the seat and then push or pull the seat forward or bakward. Release the handle to the desired position and
press down until you hear a "click". Make sure the seat is locked.
3 Fastening the seat belt
3 .1. Combine the two metal pieces at the end of the belt (Picture 5) and place them in the central buckle
(Picture 6) until it clicks into place.
3.2. Make sure the belt is locked by pulling the shoulder straps up.
3.3. To release belt, press down the red button “ 22 “ on the central buckle. (Picture 7)
4. Removing the upholstery
4.1. Remove the upholstery of the seat and backrest as shown in Fig.52;53
5. Adjustment of the height of headrest and shoulder belts :
The headrest can be set at 11 different heights .
Adjustment of the height of the shoulder belts is done simultaneously with the adjustment of the height of the
headrest. Pull up the adjusting handle (16) Fig.10 move the headrest to the desired position up or down
according to the height of your child. Release the handle and you must hear a clicking sound that is signal that
the backrest is locked. It is important to make sure the headrest fit properly to head. Pic. 11 Group 0 +; I: The
correct height of the shoulder belts is attained when the belt disappears into the shell slightly above the
shoulder of the child. Make sure that the harness straps fit properly over the shoulders of the child.
Group II; III The head rest of the safety seat should be adjusted to provide about two fingers between the
child's shoulder and the lower edge of safety seat head . Picture 12
12
o
2. The cover should be washed by hand at a maximum temperature of 30 C. Do not put in the dryer, just
airing it.
3. The plastic parts can be cleaned by using a wettish drapery. Please, do not use any solvate.
1. The car seat can be cleaned using lukewarm water and soap. Do not use aggressive cleaners like
abrasives or thinner.
WASHING INSTRUCTIONS
3. ISO FIX Release button
2. ISO FIX Connector
5. Release handle for rotation of the seat
1. ISO FIX Guides
7. Harness Adjustment Strap
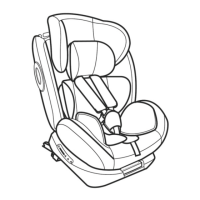
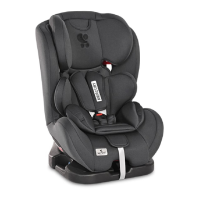
Features
Picture A
4. Base
8. Adjustment Device
9. Buckle Pads
6. Recline Adjustment Handle
10. Harness Buckle
11. Harness Strap
17. TT Release button
16. Headrest Handle
22. Release button
23. Guide hook
14. Head Pillow
24. Guide hole
15. Headrest
19. Cover
20. Shoulder belt guide
18. Top Tether Strap
21. Shell
12. Shoulder Pads
13. Baby Insert