Installation4
4.2.2 Ceiling Mounting
To ceiling mount the camera:
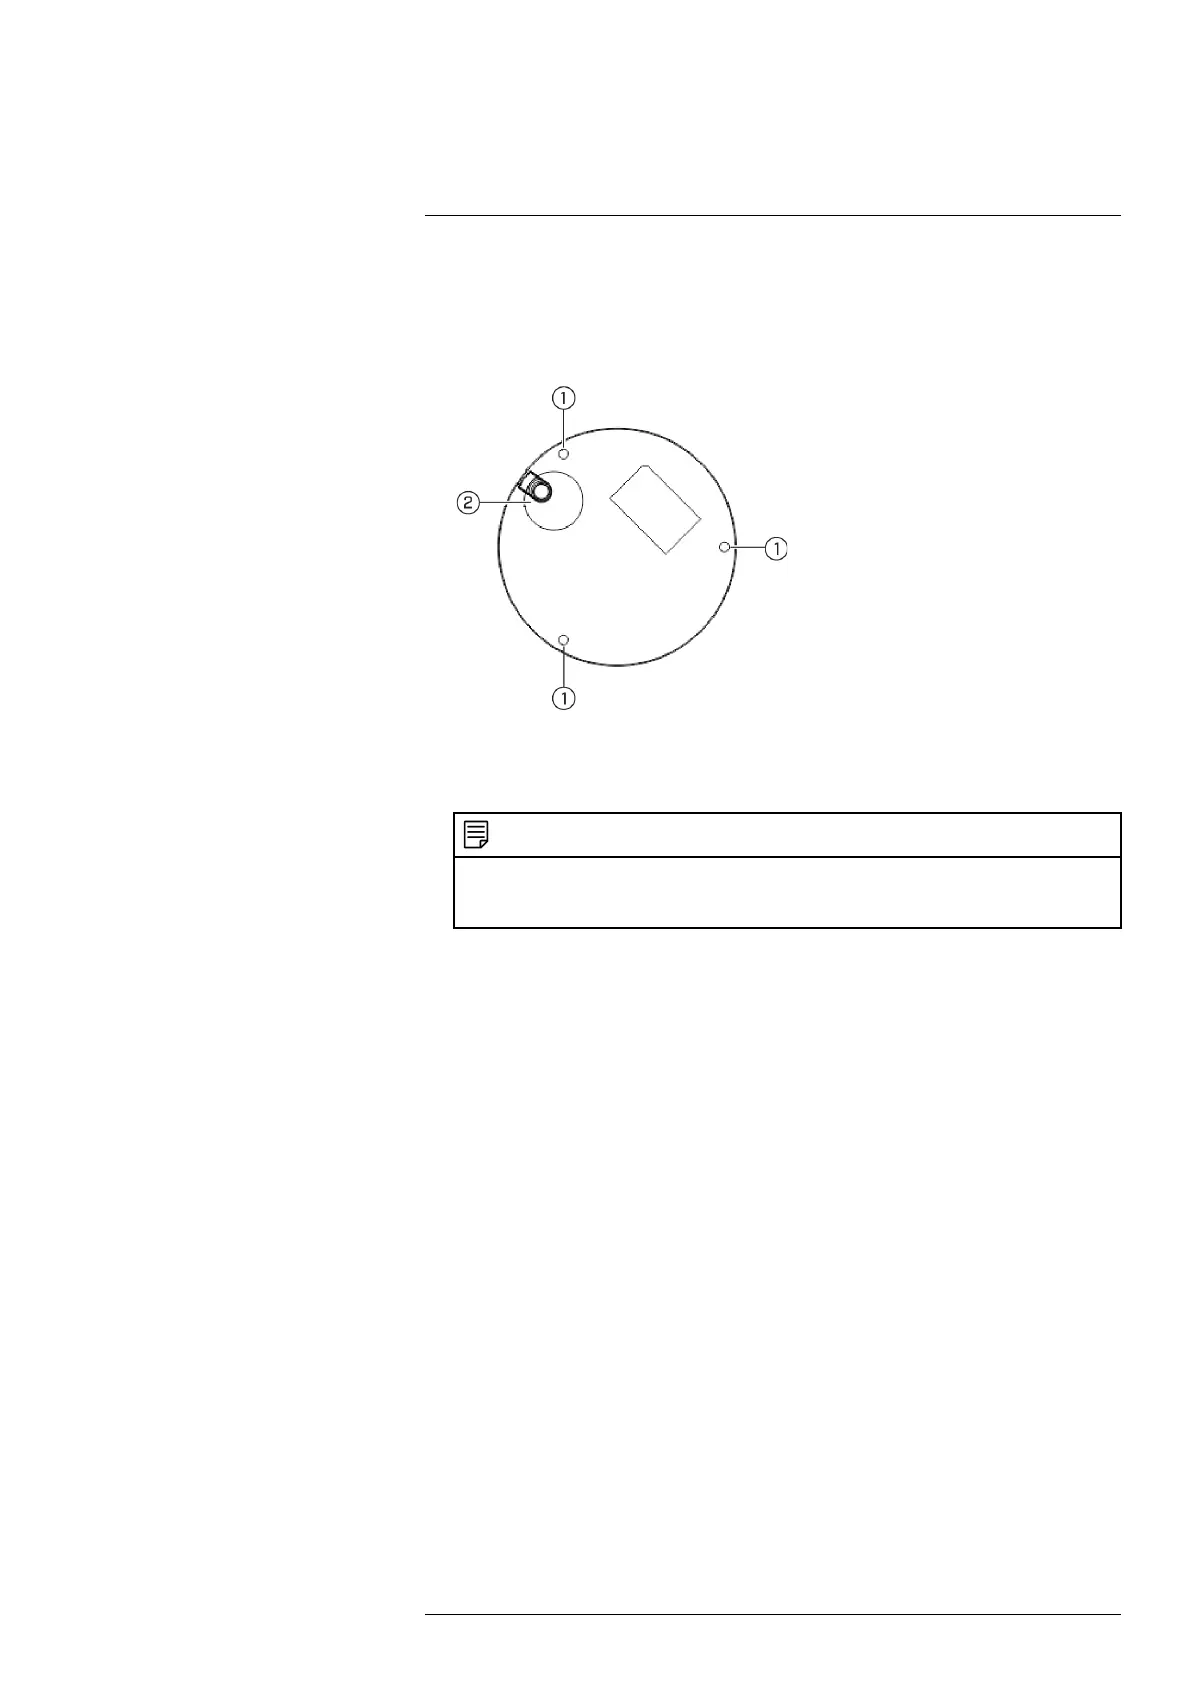
1. Use the mounting template included with the camera mounting kit to mark holes for the
mounting screws (x3) and camera cable.
1. Mounting screw holes; 2. Camera cable hole (Optional)
2. Drill holes for the mounting screws, drywall anchors (optional) and camera cable (optional).
NOTE
• Use the included drywall anchors if installing on a drywall surface.
• If you are planning on running the cables along the mounting surface, there is no need to drill a hole for
the camera cable.
3. Use the Allen key included with the camera mounting kit to loosen the dome camera cover
screws (x3). Remove the dome camera cover.
4. Connect the camera cables as shown in 3 Connecting the Camera.
5. Mount the dome camera base to the mounting surface using the mounting screws (x3) and
drywall anchors (x3) (optional) included with the camera mounting kit.
6. Replace the dome camera cover and tighten the dome camera cover screws using the in-
cluded Allen key.
7. Remove the vinyl film from the dome cover once installation is complete.
#LX400075; r. 4.0/58710/58717; en-US 13
 Loading...