10 Inserción de la tarjeta microSD (opcional) y
reconfiguración de la cámara
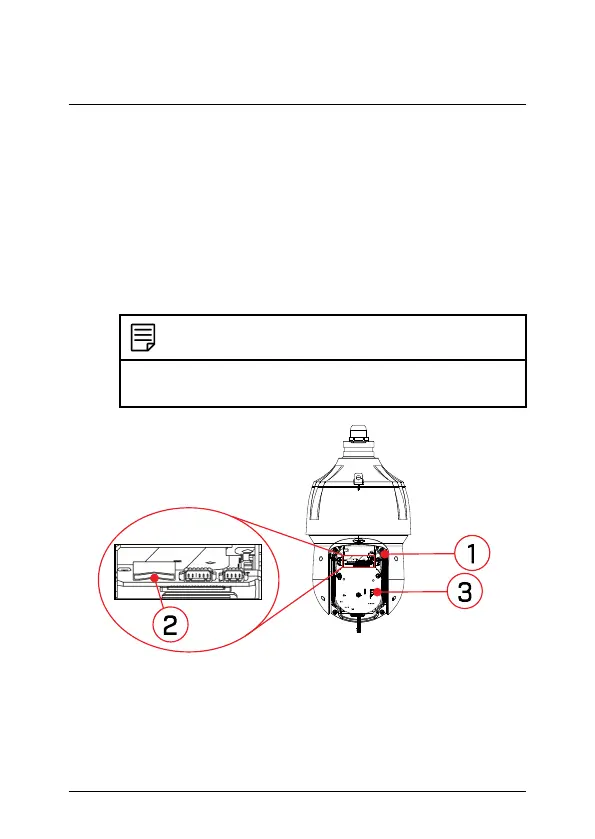
3. El panel de servicio le permite realizar las siguientes funciones:
• Inserte una tarjeta microSD en la ranura para la tarjeta mi-
croSD. Para una grabación local, puede instalar una tarjeta
microSD hasta de 128 GB. Se recomiendan tarjetas micro SD
marca SanDisk™ o Kingston™. Se requieren tarjetas mi-
croSD Clase 10 o superior.
• Presione el botón de reinicio y manténgalo presionado por
10 segundos para restablecer la cámara a las configuracio-
nes predeterminadas.
NOTA
Puede tomar unos minutos para que la imagen de la cá-
mara aparezca en la pantalla.
1. Panel de servicio
2. Dos ranuras para tarjeta microSD
3. Botón de reinicio
#; r. 4.0/47056/47056; es-MX 42
 Loading...