English -
10
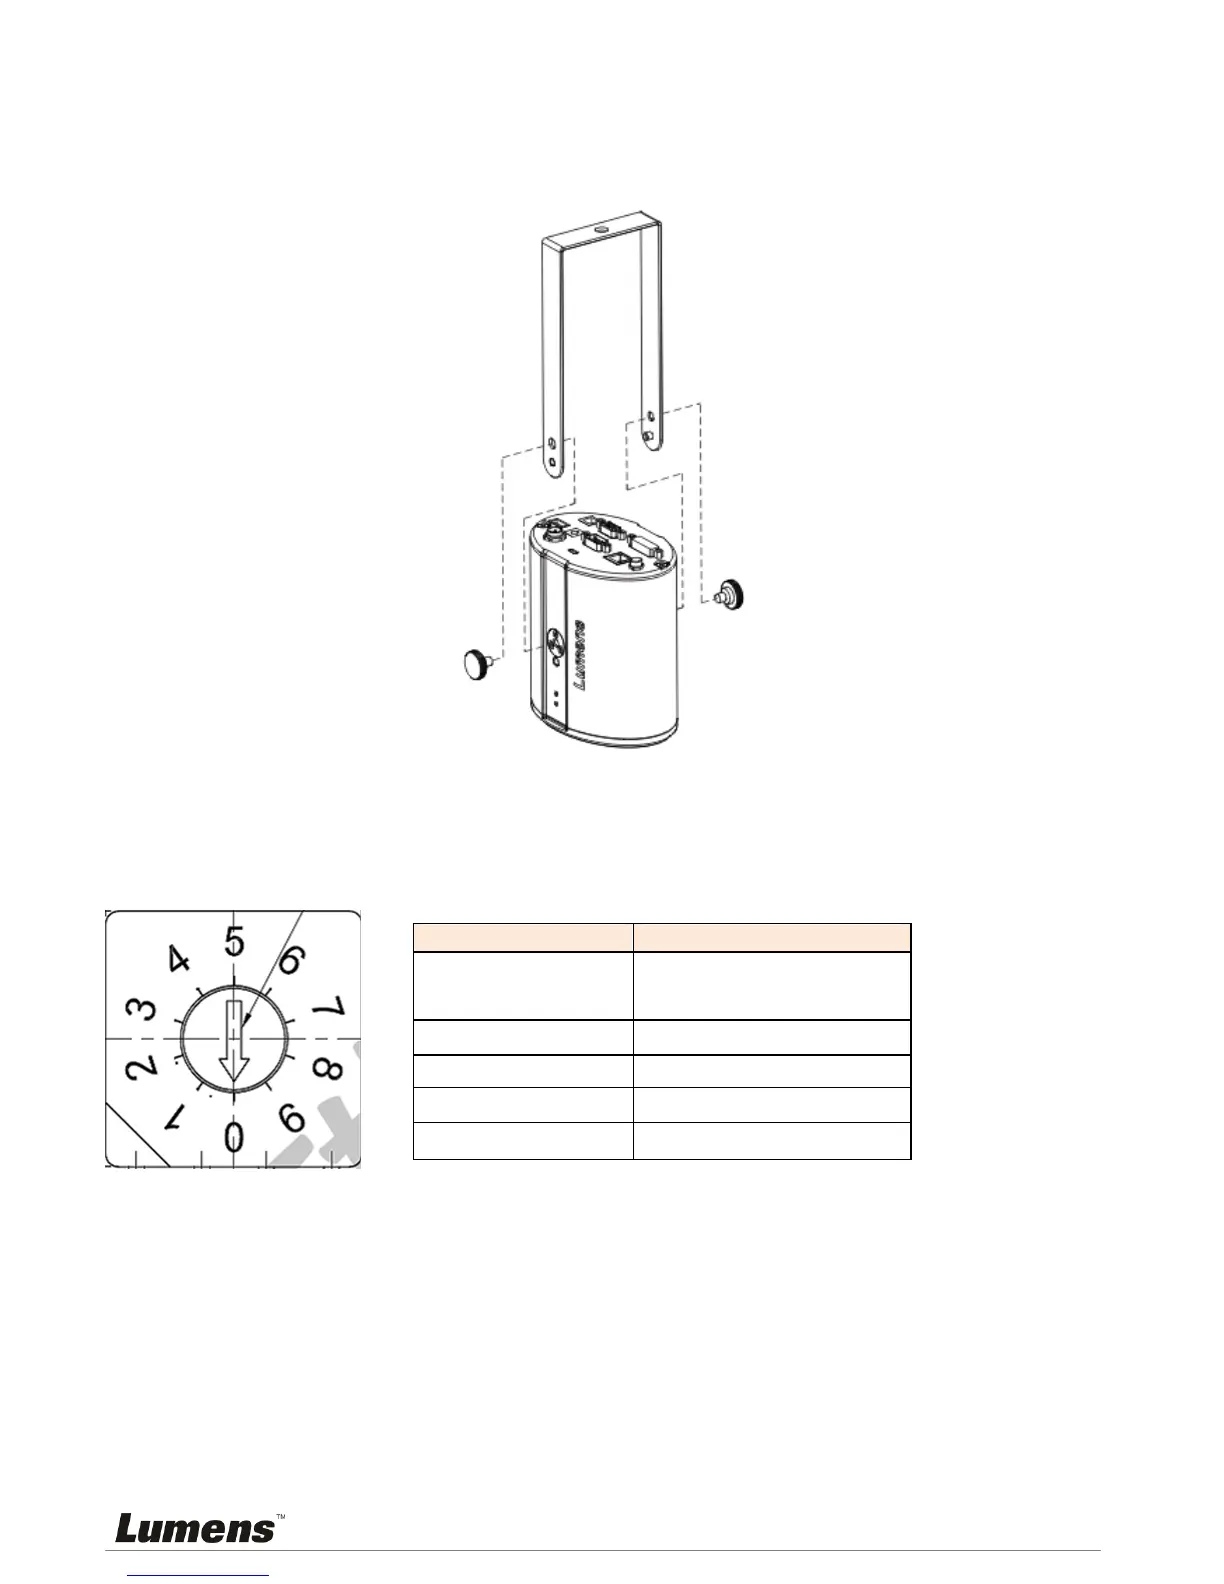
4.1.5.2 Installation steps
Adjust the DIP SWITCH to the desired output specifications
Assemble the U-hanger and the device using screws supplied.
Please follow the instruction for the screw hanger to install it on the ceiling.
Screw the device onto the screw hanger and complete the installation.
4.2 Switch setting
<Note> You should unplug and reconnect the power cord, and then restart the CL510 for all
DIP switch settings to take effect.
Output Mode Position of DIP Switch
Default
(XGA)
0
SXGA
1
WXGA
2
UXGA
3
1080P
4
 Loading...