Hardware Connections
3.4.2 Digital Mixer
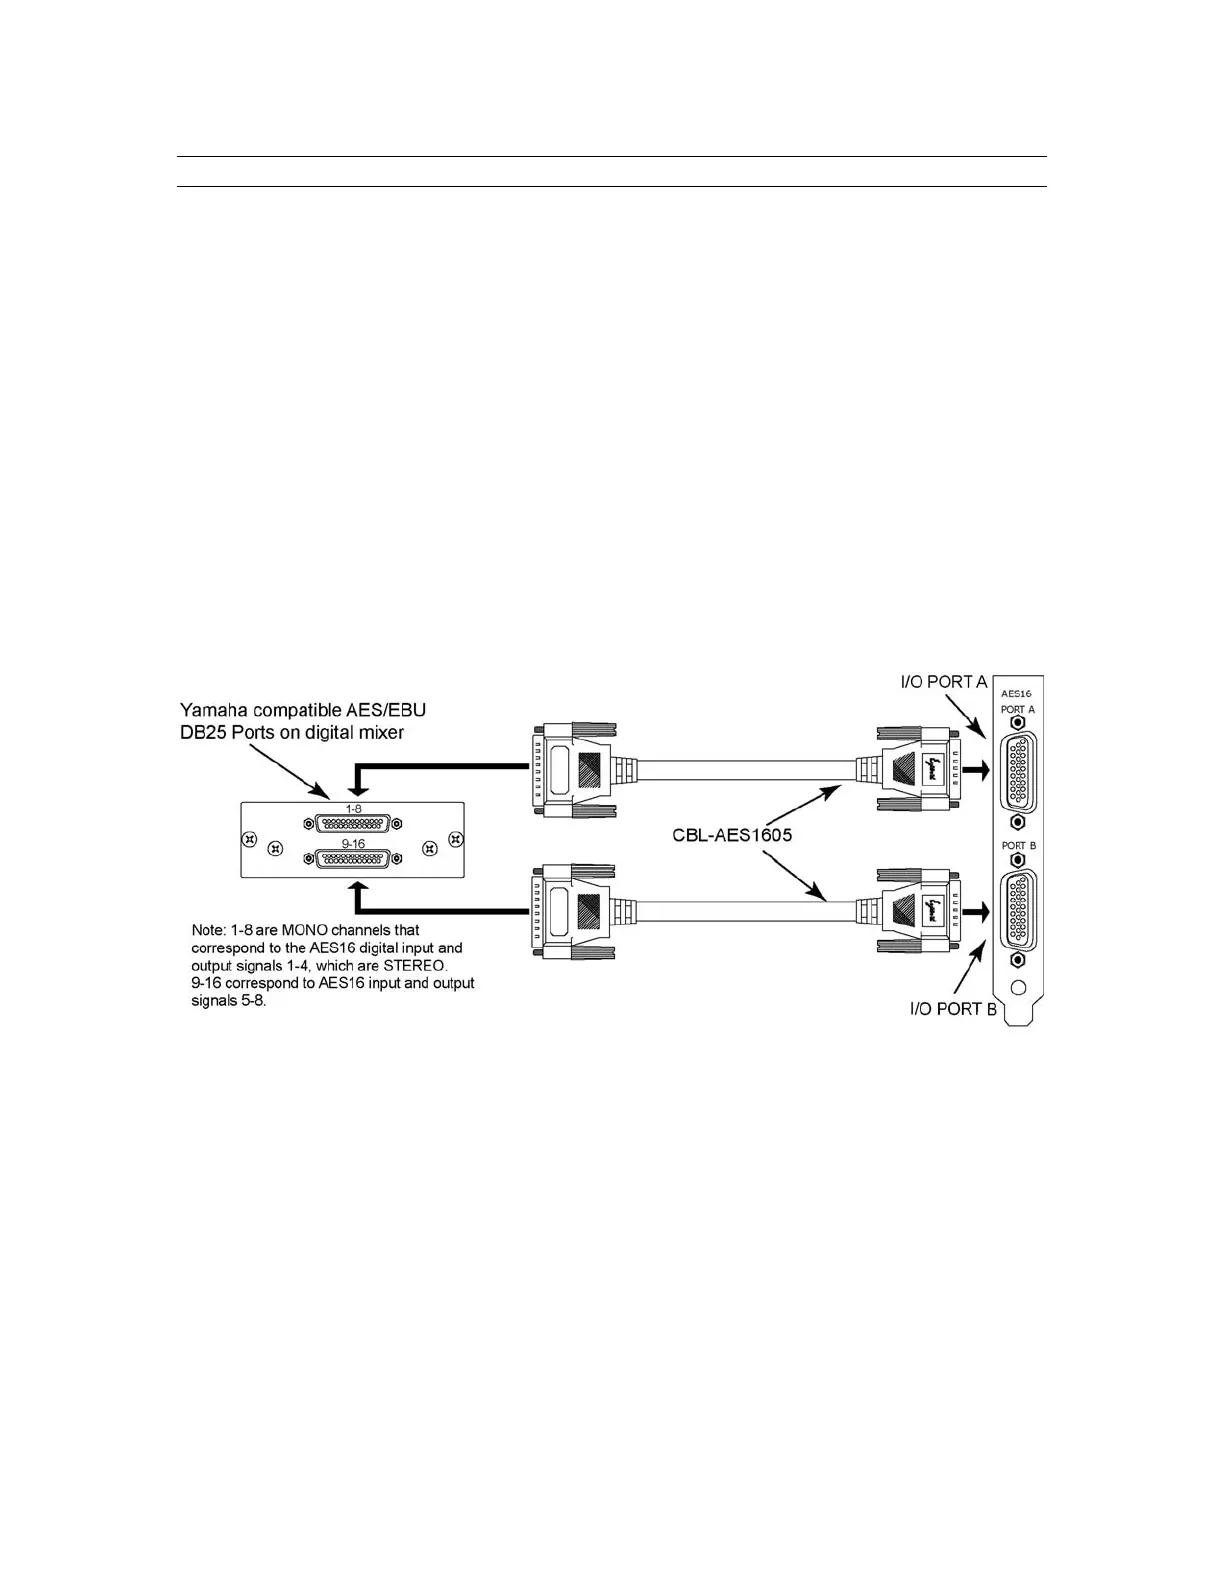
The figure below illustrates the connection to a digital mixer that has 16 channels of AES/EBU digital I/O.
The D-Sub ports on the mixer must be compatible with the Yamaha multi-channel digital I/O standard.
Each of these ports provides eight channels of input and eight channels of output.
In this setup, either the digital mixer or AES16 can act as the system clock master depending on the clock
settings of each device. In each case, the clock is transmitted to the receiving device via the AES/EBU
connection.
I/O Configuration Jumper Settings
Confirm that the jumpers are set to the factory default 4/4 CHNL mode which accommodates the use of the
CBL-AES1605 XLR cable. See Section 12.1 I/O Configuration Jumpers for more information.
AES16 and External Equipment Clock Settings
To use the digital mixer as the clock master: set the Sample Clock Source in the Adapter window of the
Lynx Mixer to Digital In 1. Set the Reference to Word. Change the clock source setting of the digital mixer
to select its internal clock.
To use the AES16 as the clock master: set the Sample Clock Source in the Adapter window of the Lynx
Mixer to Internal. Change the clock source setting of the digital mixer to select one of its digital inputs.
AES16 User Manual 29