D8B Manual • Chapter 4 • page 100
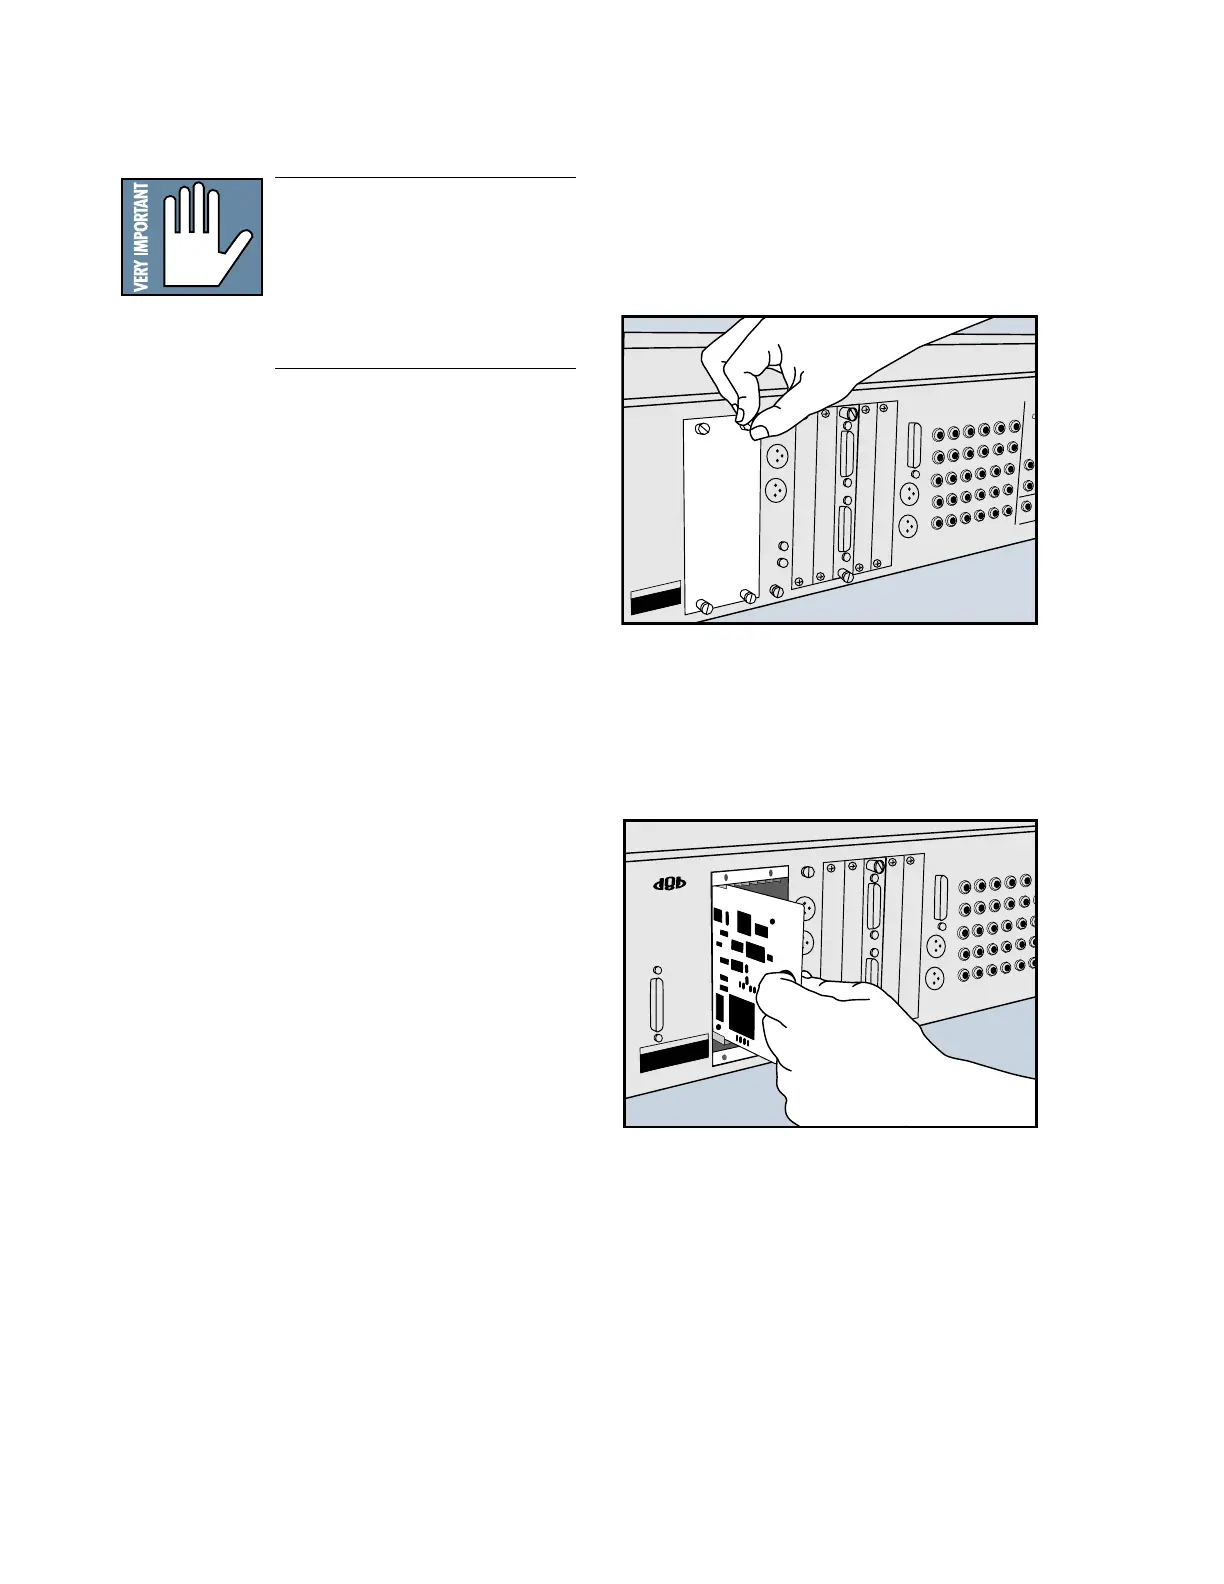
FX Card Installation
FX Card Cover Plate Removal
Installation of FX Cards
IMPORTANT: Shut off power to the
Digital 8•Bus’ Remote CPU before
installing or removing cards. Also,
install your FX cards in order. For
example, put your first FX card in the
slot marked “A,” your second FX card
in slot “B,” etc.
1. Loosen the four spring-loaded screws on the blank
cover plate to the FX card slot you want to fill.
2. With your finger in the hole on the FX card (and
the components on the circuit board facing to the
left), push the card firmly into the white connector
slots so it fits snugly. Do not touch any of the
circuit board components or solder joints.
3. Replace the cover plate and tighten the screws
securely using a slotted screwdriver. DO NOT
OVERTIGHTEN THE SCREWS, or you run the
risk of stripping the threads in the D8B.
 Loading...