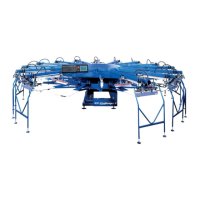
Omni/Uni Flash Operation
M&R Printing Equipment, Inc. - Glen Ellyn, Illinois
4.To check the current process temperature, press the
“PV/SV” key so the red L.E.D. lights beside the PV
(Measured Value) indication. The number displayed will be
the current process temperature as measured by the ther-
mocouple in the flash panel.
5. To lower the process temperature, press the PV/SV key
so the green L.E.D. light beside the SV indicator comes on.
Press the key. Under each digit that you want to
change, you will use the key to decrease the num-
ber value on each digit to get the numbers to flash. Once
the programmed temperature has been selected, press the
enter key. The display will stop flashing. Now press the
PV/SV key so the red L.E.D. light beside the PV is showing
the temperature as measured by the thermocouple, in the
flash panel (See Fig. 13).
WARNING! The electrical power switch
for the Challenger Series II must NOT
be turned “OFF” before the flash cure
panel has cooled down to at least 99
degrees or lower.
WARNING! Be careful not to adjust the
inboard or outboard speed too fast.
Higher speeds can lead to premature
failure of the infrared heat panel due to
mechanical shock generated by the
higher inboard/outboard speed. Always
adjust the inboard or outboard speed
so the heat panel moves in and out of
position smoothly without jerking
motion or vibration.
11. Adjust the digital temperature control for optimum flash
curing of garments. We suggest that you run a few tests to
determine the proper heat setting before beginning produc-
tion. Proper cure temperature will be determined in large
part by the type and weight of the garment. In addition, the
type of ink used will also have an effect on the proper cure
temperature. 100% cotton t-shirt, start at 800 degrees F.
For 100% cotton sweat shirts, start at 850 degrees F. (See
Fig. 12)
Operation of the Temperature Controller:
1. Turn “On” the electrical power to the Omni/Uni Flash cure
unit.
2. Press the “PV/SV” key so that the green L.E.D. beside the
“PV” (Present Value) or “SV” (Set Value) on the display illu-
minates.
3. To set the desired process temperature, press the key
under each individual numeric number. For example- to set
for 250 degrees, push the 10 digit key one time. The 10 indi-
cation will flash. Push the 10 digit key 5 times to indicate 5.
The display will read 0050. Now press the 100 digit key. The
100 digit indication will flash. Push the 100 digit key 2 times
so the number 2 appears in the indicator. The display will
now read 0250. Press the ENTER key. The display will stop
flashing, and the set value of 250 degrees will now be indi-
cated on the display.
26
WARNING!
WARNING!
Fig. 11
V
V
Fig. 13
Press this
key to
indicate
the set
value.
Press ENT
to Enter
set value
into the
control.
Press this
key to set
the 100
digit
value.
Press this
key to set
1 digit
value.
Press this
key to set
10 digit
value.
 Loading...