E3/1
E3/1
22
11
E3/2E3/2
33
E3/3E3/3
44
55
E5/1E5/1
11
E5/2E5/2
33
44
22
E3 - GEAR BOX OILE3 - GEAR BOX OIL
DRAINDRAIN
E4 - GEAR BOX SUMP STRAINERE4 - GEAR BOX SUMP STRAINER
CLEANCLEAN
Place the lift truck on level ground with the I.C. engine stopped, the gear box oil stillPlace the lift truck on level ground with the I.C. engine stopped, the gear box oil still
warm.warm.
DRAINING THE OILDRAINING THE OIL
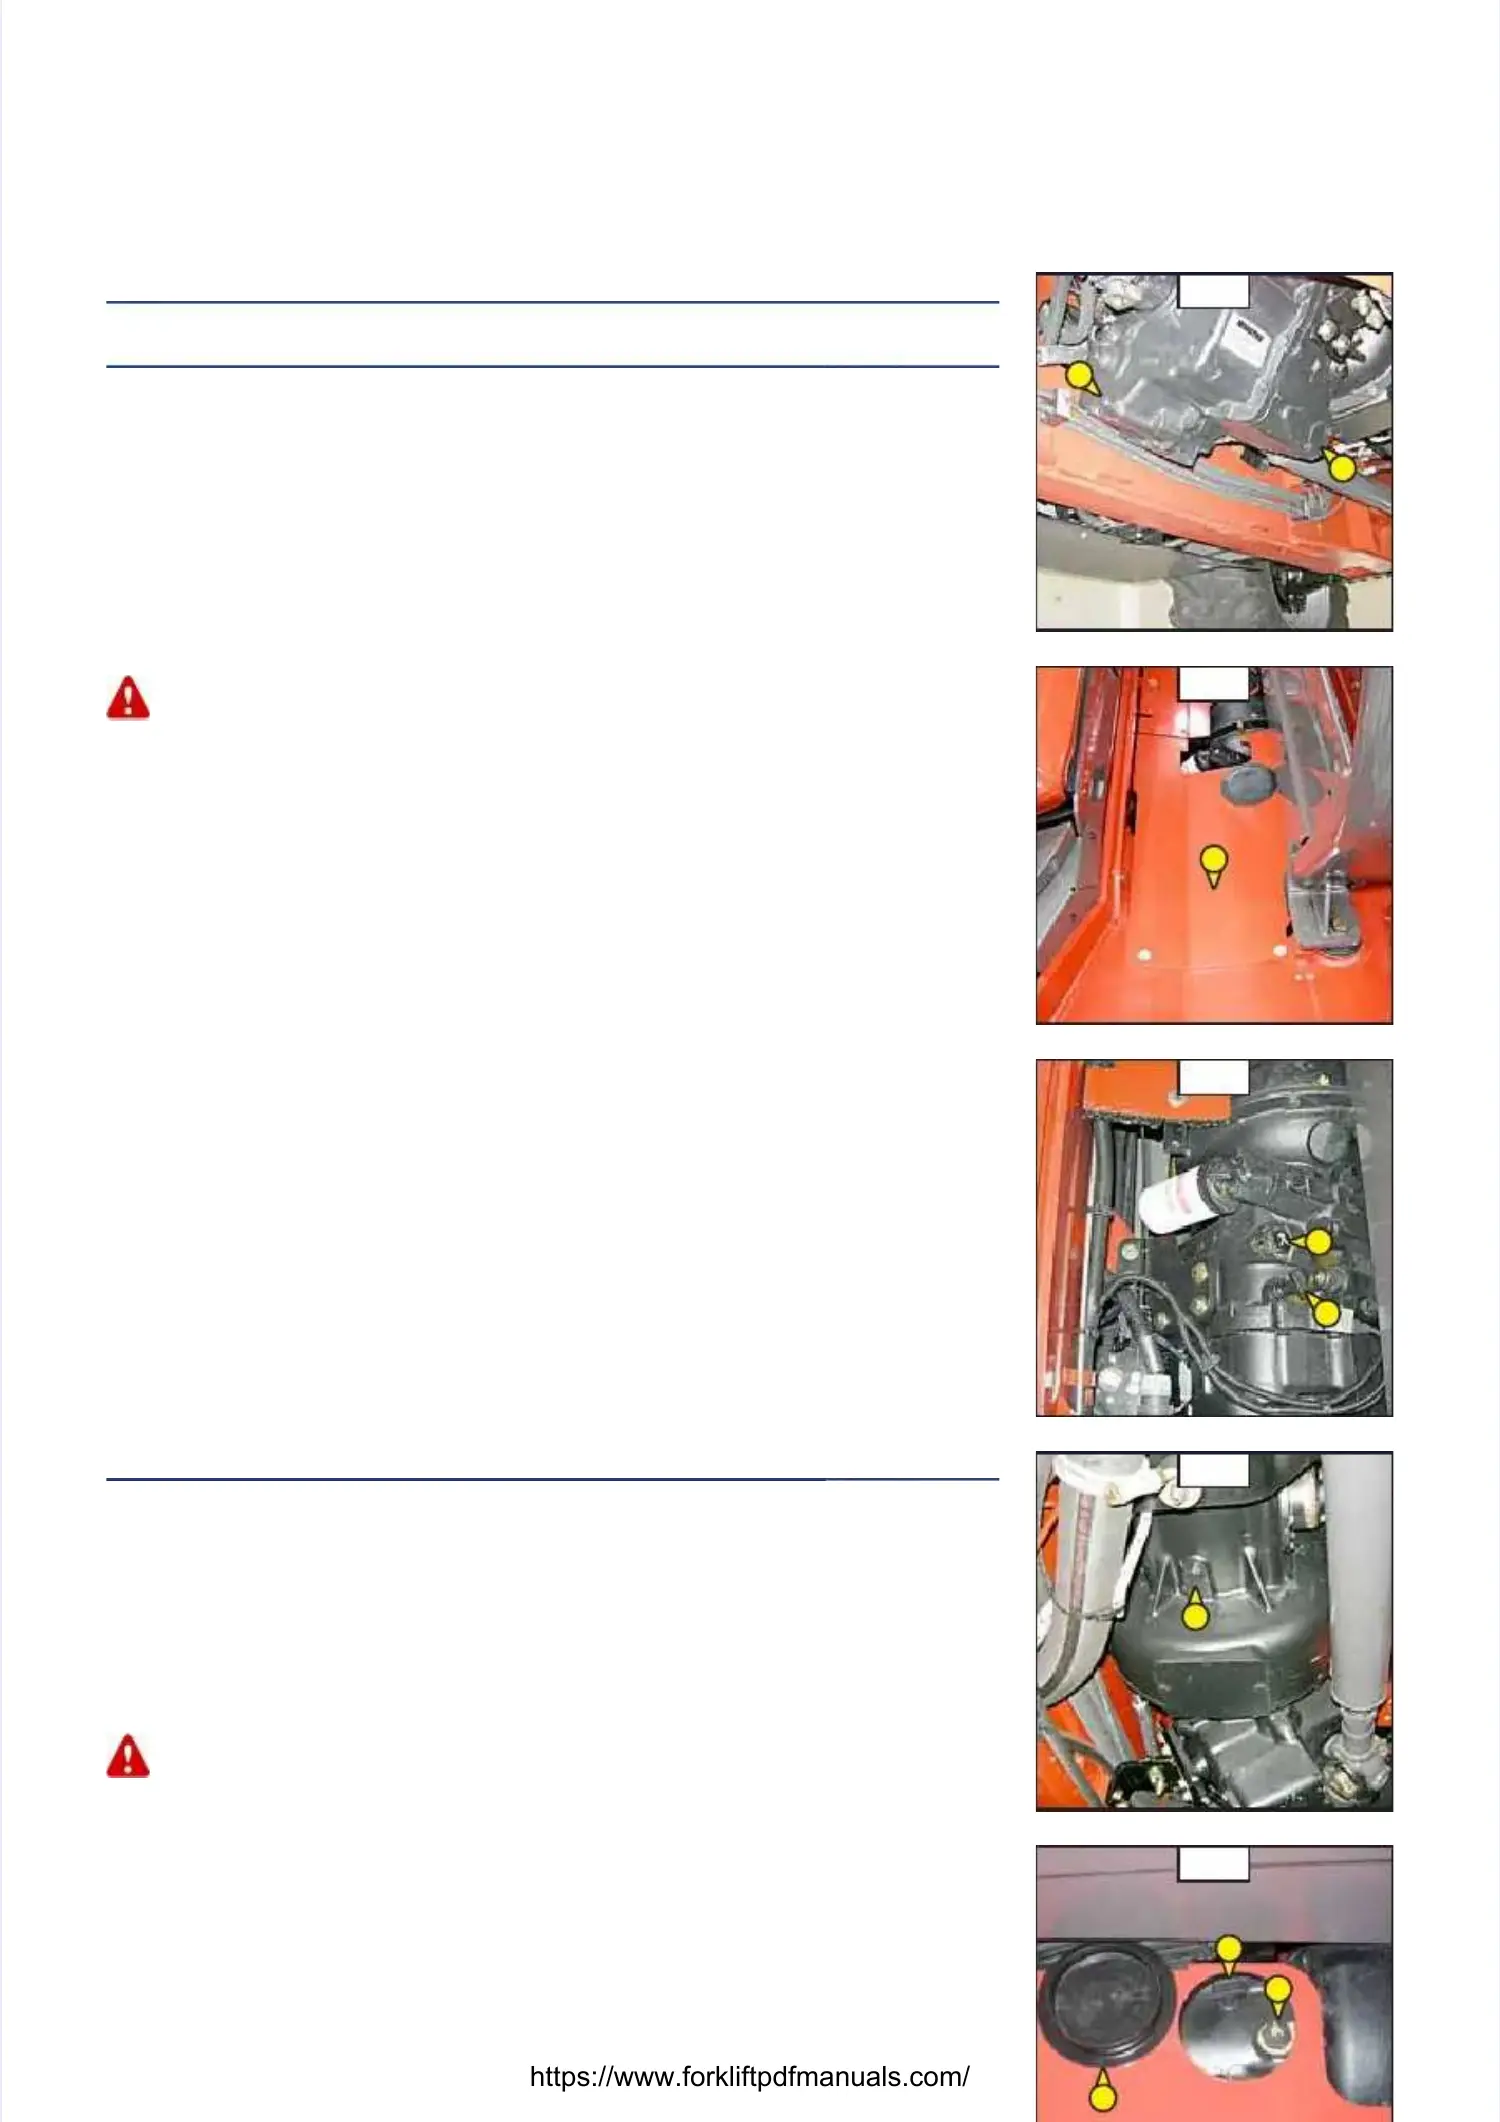
-- Place a container under drain Place a container under drain plug 1 (fig. E3/1) and under cover plug 1 (fig. E3/1) and under cover 2 (fig. E3/1) and unscrew2 (fig. E3/1) and unscrew
the drain plug.the drain plug.
- Remove cover plate 3 (fig. E3/2).- Remove cover plate 3 (fig. E3/2).
-- Remove dipstick 4 (fig. E3/Remove dipstick 4 (fig. E3/3) and unscrew filler cap 5 (3) and unscrew filler cap 5 (fig. E3/3) in order to ensufig. E3/3) in order to ensure thatre that
the oil is drained prthe oil is drained properly.operly.
Dispose of the drain oil in Dispose of the drain oil in an ecological manneran ecological manner..
CLEANING THE STRAINERCLEANING THE STRAINER
- Remove cover 2 (fig. E3/1) and set - Remove cover 2 (fig. E3/1) and set aside the O-ring joint and aside the O-ring joint and sealing washer.sealing washer.
- Allow the rest - Allow the rest of the oil to drain of the oil to drain away.away.
- Remove and clean the strainer using - Remove and clean the strainer using a compressed air jet.a compressed air jet.
- Clean the magnetic section on the - Clean the magnetic section on the plate.plate.
-- Refit the assembly and Refit the assembly and tighten up plate 2 (fig. E3/1) tighten up plate 2 (fig. E3/1) (tightening torque 18 to 31 N.m).(tightening torque 18 to 31 N.m).
FILLING UP THE OILFILLING UP THE OIL
-- Refit and tighten drain plug 1 (Refit and tighten drain plug 1 (fig. E3/1) (tightening torque 34 to fig. E3/1) (tightening torque 34 to 54 N.m).54 N.m).
-- Fill up with oil (see: 3 - MAINTENANCE: LUBRICFill up with oil (see: 3 - MAINTENANCE: LUBRICANTS AND FUEL) by filler port 5 (fig. E3/3)ANTS AND FUEL) by filler port 5 (fig. E3/3)
and refit the filler cap.and refit the filler cap.
- Start the I.C. engine and let it run for a few minutes.- Start the I.C. engine and let it run for a few minutes.
- Check any possible leaks from the - Check any possible leaks from the drain plug or cover.drain plug or cover.
-- Stop the I.C. engine, aStop the I.C. engine, and within 5 minutes of the I.C. nd within 5 minutes of the I.C. engine being stopped, check on theengine being stopped, check on the
dipstick 4 (fig. E3/3) the correct level between the two MIN and MAX. marks.dipstick 4 (fig. E3/3) the correct level between the two MIN and MAX. marks.
- Top up the level if necessar- Top up the level if necessary.y.
- Refit the shroud 3 (fig. E- Refit the shroud 3 (fig. E3/2).3/2).
E5 - ANGLE GEARBOX OILE5 - ANGLE GEARBOX OIL
DRAINDRAIN
Place the lift truck on level ground with the I.C. engine stopped, the angle gear box oil stillPlace the lift truck on level ground with the I.C. engine stopped, the angle gear box oil still
warm.warm.
- Place a container under drain plug 1 (fig. E5/1) and unscrew the plug.- Place a container under drain plug 1 (fig. E5/1) and unscrew the plug.
- Remove the plastic cap 2 - Remove the plastic cap 2 (fig. E5/2).(fig. E5/2).
-- Remove dipstick 3 (fig. E5/Remove dipstick 3 (fig. E5/2) and unscrew filler cap 4 (2) and unscrew filler cap 4 (fig. E5/2) in order to ensufig. E5/2) in order to ensure thatre that
the oil is drained prthe oil is drained properly.operly.
Dispose of the drain oil in Dispose of the drain oil in an ecological manneran ecological manner..
-- Refit and tighten drain plug 1 (Refit and tighten drain plug 1 (fig. E5/1) (tightening torque 20 to fig. E5/1) (tightening torque 20 to 29 N.m).29 N.m).
-- Fill up with oil (see: 3 - MAINTENANCE: LUBRICFill up with oil (see: 3 - MAINTENANCE: LUBRICANTS AND FUEL) by filler port 4 (fig. E5/2)ANTS AND FUEL) by filler port 4 (fig. E5/2)
and refit the filler cap.and refit the filler cap.
-- Check the correct level between the MIN and Check the correct level between the MIN and MAX marks on dipstick 3 (fig. MAX marks on dipstick 3 (fig. E5/2).E5/2).
- Check for any possible leaks at - Check for any possible leaks at the drain plug.the drain plug.

 Loading...