C2/1C2/1
C1/1C1/1
22
33
11
44
C1/2C1/2
22
33
C2/3C2/3
44
33
44
44
C2/2C2/2
11
11
11
22
11
C - EVERY 250 HOURS SERVICEC - EVERY 250 HOURS SERVICE
Carry out the operations described previously as well as Carry out the operations described previously as well as the following operations.the following operations.
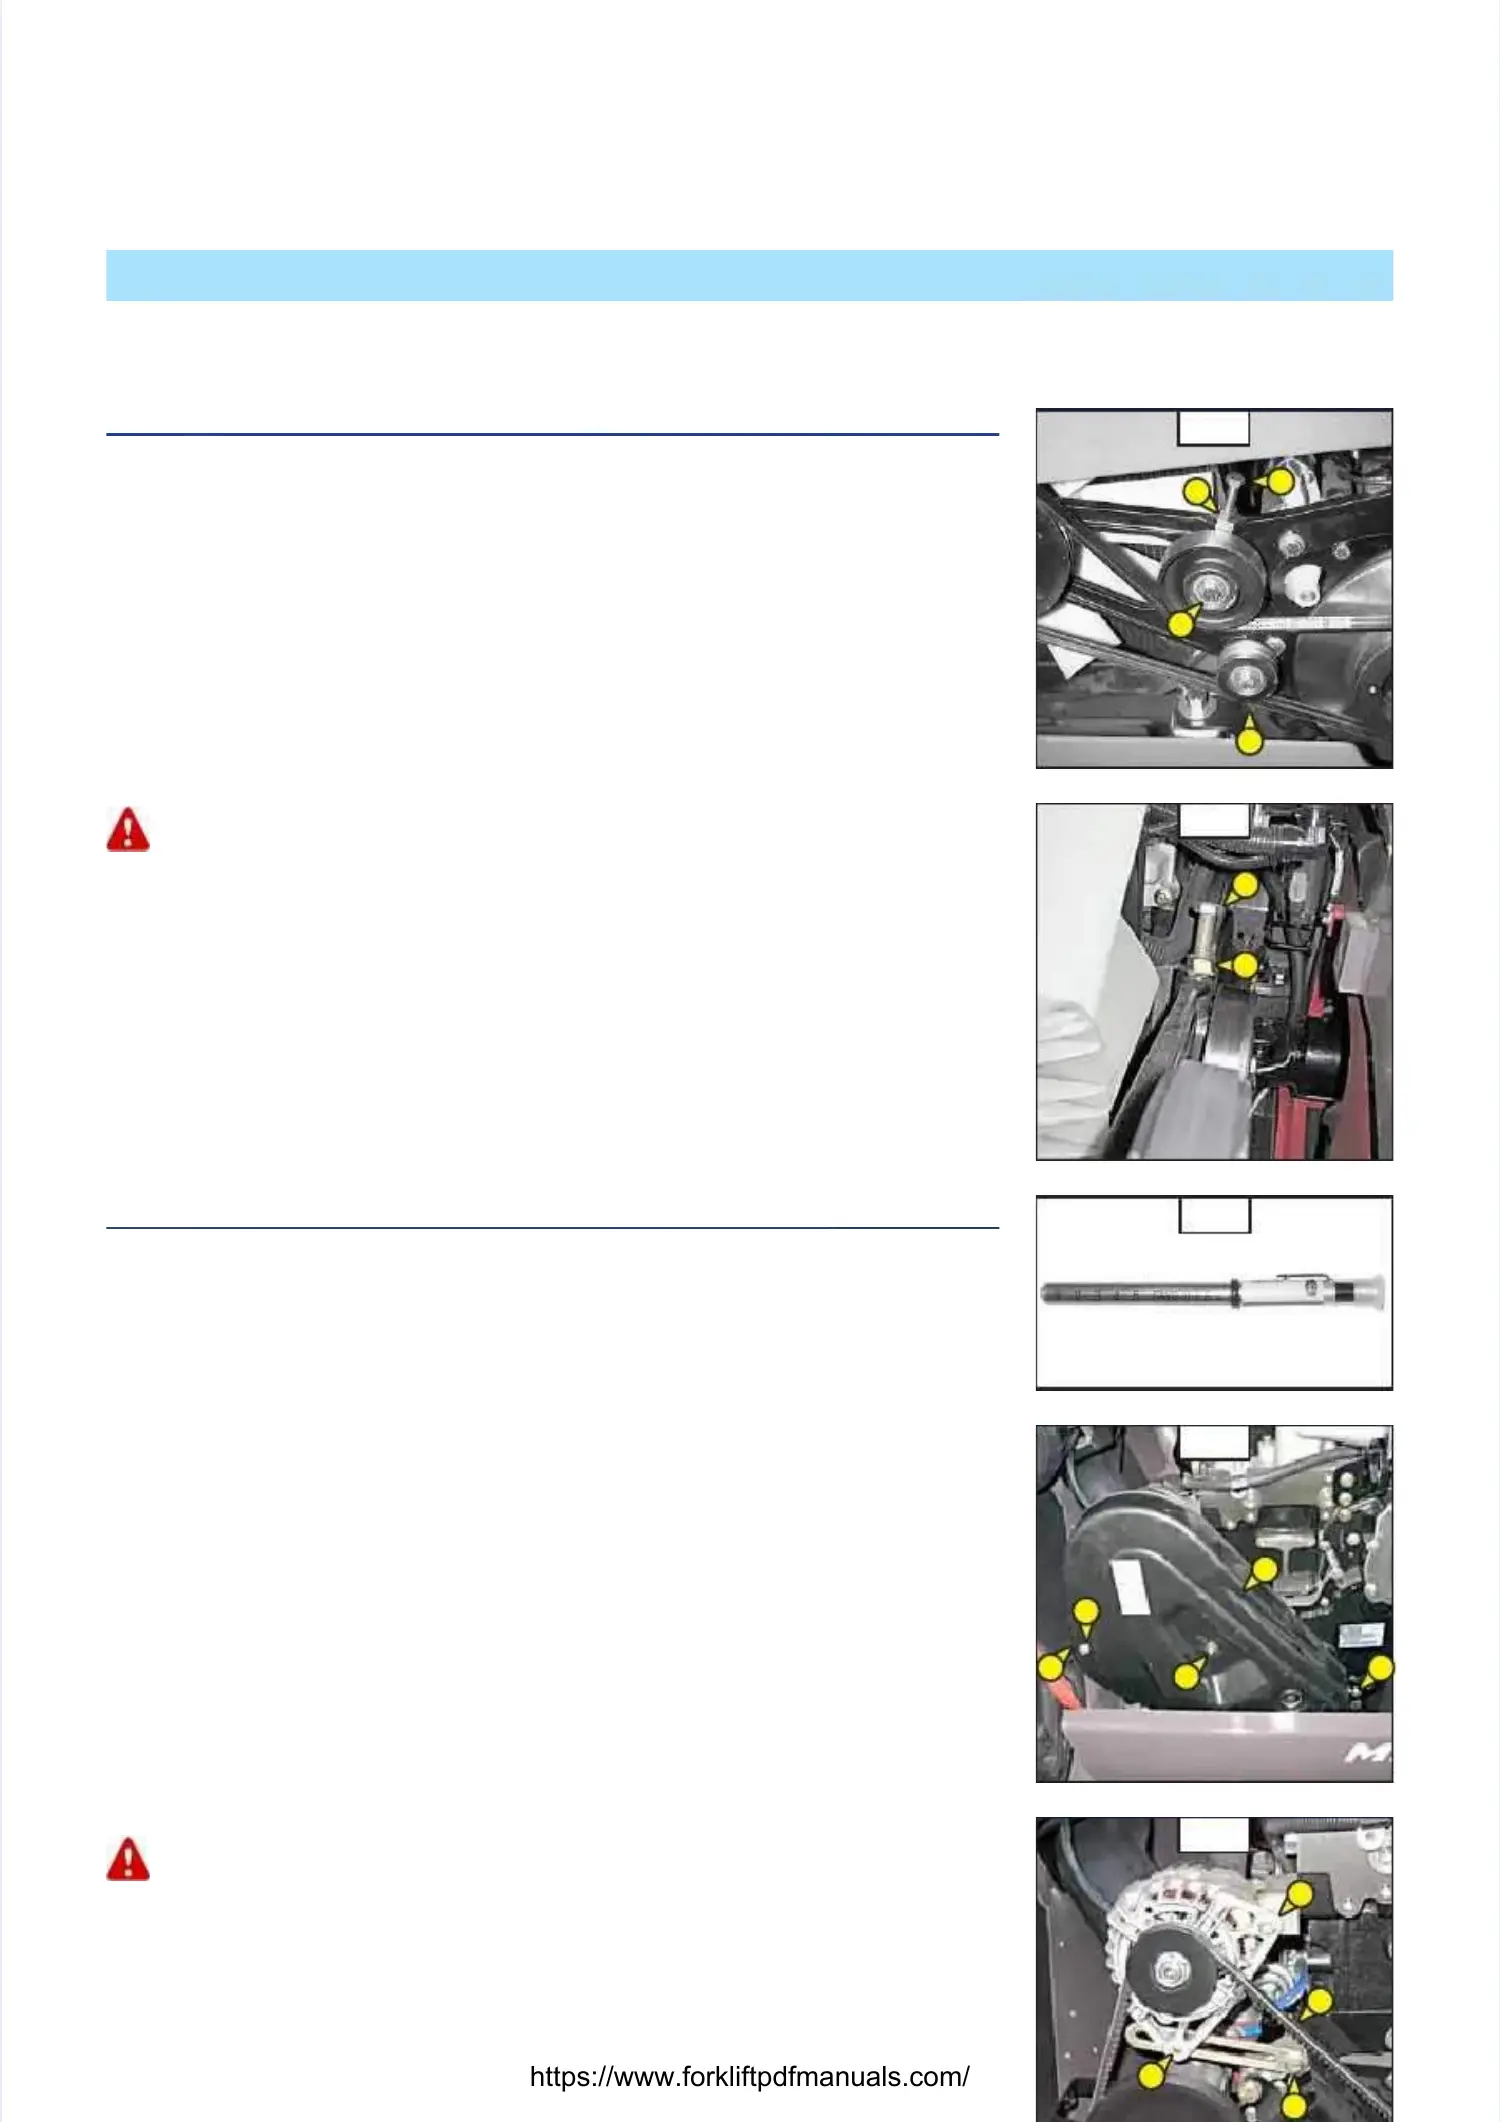
C1 - FAN BELT TENSIONC1 - FAN BELT TENSION
CHECK – ADJUSTCHECK – ADJUST
- Open the I.C. engine bonnet.- Open the I.C. engine bonnet.
-- Check the belt for signs of Check the belt for signs of wear and cracks and change if wear and cracks and change if necessary (see: 3 - MAINTENANCE:necessary (see: 3 - MAINTENANCE:
FILTERS CARTRIDGES AND BELTS).FILTERS CARTRIDGES AND BELTS).
- Loosen screw 1 (fig. C1/1) on the - Loosen screw 1 (fig. C1/1) on the tension pulley.tension pulley.
- Loosen lock nut 2 - Loosen lock nut 2 (fig. C1/1 and C1/2) and screw 3 (fig. C1/1 and (fig. C1/1 and C1/2) and screw 3 (fig. C1/1 and C1/2).C1/2).
-- Tighten the screw 2 (fig. C1/Tighten the screw 2 (fig. C1/1 and C1/2) until the belt 1 and C1/2) until the belt is as close as possis as close as possible to theible to the
groove of the pulley 4 groove of the pulley 4 (fig. C1/1).(fig. C1/1).
-- Make a mark on the head of screw 3 (fig. C1/1 and C1/2) aMake a mark on the head of screw 3 (fig. C1/1 and C1/2) and tighten, turning it 5nd tighten, turning it 5
times.times.
- Tighten the lock nut - Tighten the lock nut 2 (fig. C1/1 and C1/2).2 (fig. C1/1 and C1/2).
- Retighten screw 1 (fig. C1/1) on the - Retighten screw 1 (fig. C1/1) on the tension pulley.tension pulley.
When changing the fanbelt, tighten screw 3 (fig. C1/1 When changing the fanbelt, tighten screw 3 (fig. C1/1 and C1/2) by one and C1/2) by one and a half turns, having allowedand a half turns, having allowed
the I.C. engine to idle for 30 the I.C. engine to idle for 30 minutes.minutes.
C2 - ALTERNATOR/CRANKSHAFT BELT TENSIONC2 - ALTERNATOR/CRANKSHAFT BELT TENSION
CHECK – ADJUSTCHECK – ADJUST
For this operation, we advise you to use the MANITOU tension meter (fig. C2/1) referenceFor this operation, we advise you to use the MANITOU tension meter (fig. C2/1) reference
167418.167418.
- Open the I.C. engine bonnet.- Open the I.C. engine bonnet.
- Unscrew the fastening screws 1 (fig. - Unscrew the fastening screws 1 (fig. C2/2).C2/2).
- Lay down the protective guard 2 (fig. C2/2).- Lay down the protective guard 2 (fig. C2/2).
-- Check the belt for signs of Check the belt for signs of wear and cracks and change if wear and cracks and change if necessary (see: 3 - MAINTENANCE:necessary (see: 3 - MAINTENANCE:
FILTERS CARTRIDGES AND BELTS).FILTERS CARTRIDGES AND BELTS).
- Check the belt tension between the - Check the belt tension between the pulleys of the crankshaft and of the alterpulleys of the crankshaft and of the alternator.nator.
NEW BELT:NEW BELT:
-- At a pressure of 15 N ± At a pressure of 15 N ± 0,4 on strap 3 (fig. C2/3)0,4 on strap 3 (fig. C2/3), the displaceme, the displacement must be about 3,7 mm.nt must be about 3,7 mm.
BELT AFTER 20 HOURS OF OPERATION:BELT AFTER 20 HOURS OF OPERATION:
-- At a pressure of 13 N ± At a pressure of 13 N ± 0,4 on strap 3 (fig. C2/3)0,4 on strap 3 (fig. C2/3), the displaceme, the displacement must be about 3,7 mm.nt must be about 3,7 mm.
- Carry out adjustments if necessary.- Carry out adjustments if necessary.
- Untighten screws 4 (fig. C2/3) by two to three thread turns.- Untighten screws 4 (fig. C2/3) by two to three thread turns.
- Swivel the alternator assembly so as to obtain the belt tension required.- Swivel the alternator assembly so as to obtain the belt tension required.
- Retighten screws 4 (fig. C2/3) (tightening torque - Retighten screws 4 (fig. C2/3) (tightening torque 22 N.m).22 N.m).
- Put the protective guard back 2 (fig. C2/2).- Put the protective guard back 2 (fig. C2/2).
If the alternator belt has to be If the alternator belt has to be changed, check the tension again after the first 20 hours of operation.changed, check the tension again after the first 20 hours of operation.

 Loading...