E - EVERY 1000 HOURS SERVICE
E - EVERY 1000 HOURS SERVICE
Carry out the operations described previously as well as Carry out the operations described previously as well as the following operations.the following operations.
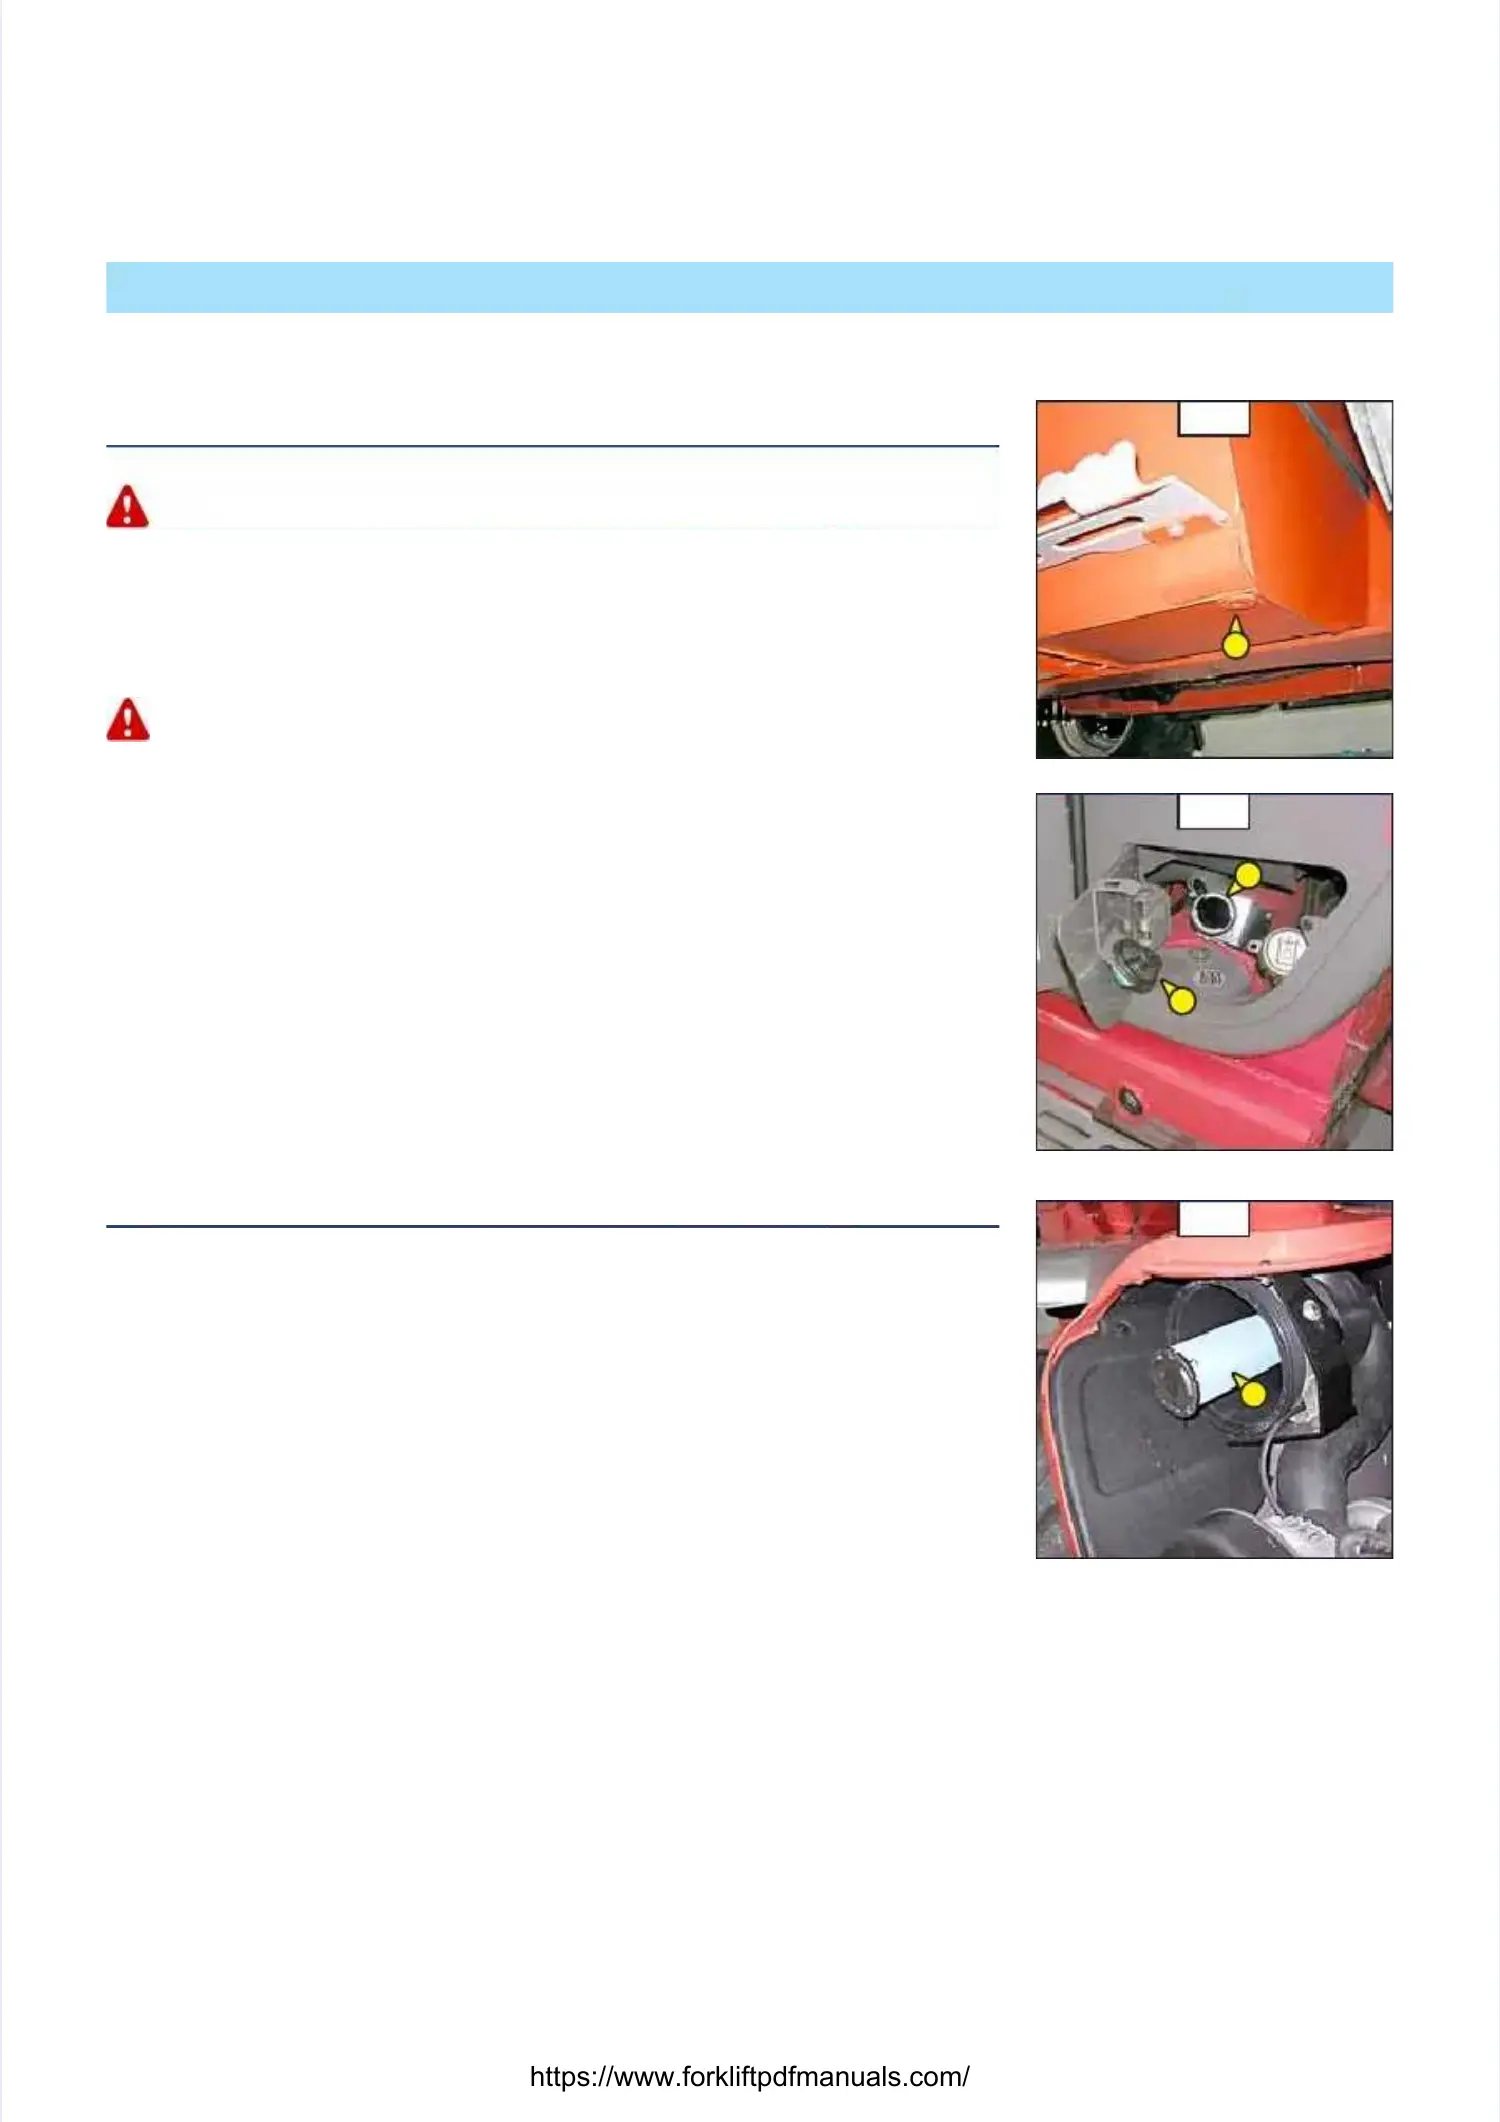
E1 - FUEL TANKE1 - FUEL TANK
CLEANCLEAN
While carrying out these operations, do not smoke or work near a While carrying out these operations, do not smoke or work near a flame.flame.
Place the lift truck on level ground with the I.C. engine stopped.Place the lift truck on level ground with the I.C. engine stopped.
-- Inspect the parts susceptible to Inspect the parts susceptible to leaks in the fuleaks in the fuel circuit and in the el circuit and in the tank.tank.
- In the event of a - In the event of a leak, contact your dealer.leak, contact your dealer.
Never try to carry out a weld or any other operation by yourself, this could provoke an explosion or aNever try to carry out a weld or any other operation by yourself, this could provoke an explosion or a
fire.fire.
- Place a container under drain plug 1 (fig. E1/1) and unscrew the plug.- Place a container under drain plug 1 (fig. E1/1) and unscrew the plug.
- Open the access panel for hydraulic oil filling.- Open the access panel for hydraulic oil filling.
- Remove cap 2 (fig. E1/2).- Remove cap 2 (fig. E1/2).
-- Let the fuel flow and clean with Let the fuel flow and clean with ten liters of clean fuel by ten liters of clean fuel by filler port 3 (fig. E1/2).filler port 3 (fig. E1/2).
-- Refit and tighten drain plug 1 (Refit and tighten drain plug 1 (fig. E1/1) (tightening torque 29 to fig. E1/1) (tightening torque 29 to 39 N.m).39 N.m).
- Fill the fuel tank with clean diesel filtered through the filler port.- Fill the fuel tank with clean diesel filtered through the filler port.
- Refit the filling cap.- Refit the filling cap.
-- If necessary, bleed the fuel If necessary, bleed the fuel circuit (see: 3 - MAINTENANCE: G1 - FUEL circuit (see: 3 - MAINTENANCE: G1 - FUEL SYSTEM).SYSTEM).
E2 - SAFETY DRY E2 - SAFETY DRY AIR FILAIR FILTER CARTRIDGETER CARTRIDGE
CHANGECHANGE
-- For the disassembly and reassembFor the disassembly and reassembly of the cartridge, see: 3 - MAINTENANCE: D3 - DRYly of the cartridge, see: 3 - MAINTENANCE: D3 - DRY
AIR FILTER CARTRIDGE.AIR FILTER CARTRIDGE.
-- Gently remove the dry air filter safGently remove the dry air filter safety cartridge 1 (fig. E2), tety cartridge 1 (fig. E2), taking care to avoid aking care to avoid spillingspilling
the dust.the dust.
- Clean the gasket surface on the filter with a damp, clean lint-free cloth.- Clean the gasket surface on the filter with a damp, clean lint-free cloth.
-- Before mounting check the Before mounting check the state of the nestate of the new safety cartridge (see: 3 - MAINTENANCE:w safety cartridge (see: 3 - MAINTENANCE:
FILTERS CARTRIDGES AND BELTS).FILTERS CARTRIDGES AND BELTS).
-- Introduce the cartridge into the filter axis and Introduce the cartridge into the filter axis and push it in, pressing push it in, pressing the edges and not the edges and not thethe
middle.middle.
NOTE:NOTE: The periodicity for chThe periodicity for changing the safety canging the safety carartridge is given for tridge is given for information only. information only. TheThe
safety cartridge must be changed for every two changes of the air filter cartridge.safety cartridge must be changed for every two changes of the air filter cartridge.
E1/1E1/1
11
E2E2
11
E1/2E1/2
33
22

 Loading...