D7/1
D7/1
11
22
33
D7/2D7/2
D8D8
33
22
11
11
11
D7 - HYDRAULIC D7 - HYDRAULIC RETURN OIL FILTER CARTRIDHGERETURN OIL FILTER CARTRIDHGE
CHANGECHANGE
Stop the I.C. engine and remove the pressure from the circuits by acting on the hydraulicStop the I.C. engine and remove the pressure from the circuits by acting on the hydraulic
controls.controls.
Thoroughly clean the outside of the filter and its surroundings before any intervention in order to preventThoroughly clean the outside of the filter and its surroundings before any intervention in order to prevent
any risk of polluting the hydraulic circuit.any risk of polluting the hydraulic circuit.
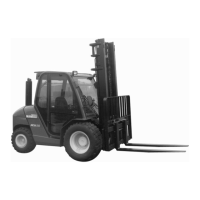
- Remove the shroud 1 (fig. D7/1).- Remove the shroud 1 (fig. D7/1).
- Unscrew the locking screws - Unscrew the locking screws of the cover 2 (fig. D7/2).of the cover 2 (fig. D7/2).
-- Remove the hydraulic return oil filter Remove the hydraulic return oil filter carcartridge 3 (fig. D7/2)tridge 3 (fig. D7/2), and fit new replacement, and fit new replacement
carcartridge (see: 3 - tridge (see: 3 - MAINTENANCE: FILTERMAINTENANCE: FILTERS CARTRIDGES AND BELTS).S CARTRIDGES AND BELTS).
- Make sure that the cartridge is correctly positioned and refit cover 2 (fig. D7/2).- Make sure that the cartridge is correctly positioned and refit cover 2 (fig. D7/2).
- Perform the operation on both filters.- Perform the operation on both filters.
- Put back the shroud - Put back the shroud 1 (fig. D7/1).1 (fig. D7/1).
D8 - FRONT AND RTEAR D8 - FRONT AND RTEAR AXLE DIFFERENTIAL OILAXLE DIFFERENTIAL OIL
DRAINDRAIN
Place the lift truck on level ground with the I.C. engine stopped and the differential oil stillPlace the lift truck on level ground with the I.C. engine stopped and the differential oil still
warm.warm.
Dispose of the drain oil in Dispose of the drain oil in an ecological manneran ecological manner..
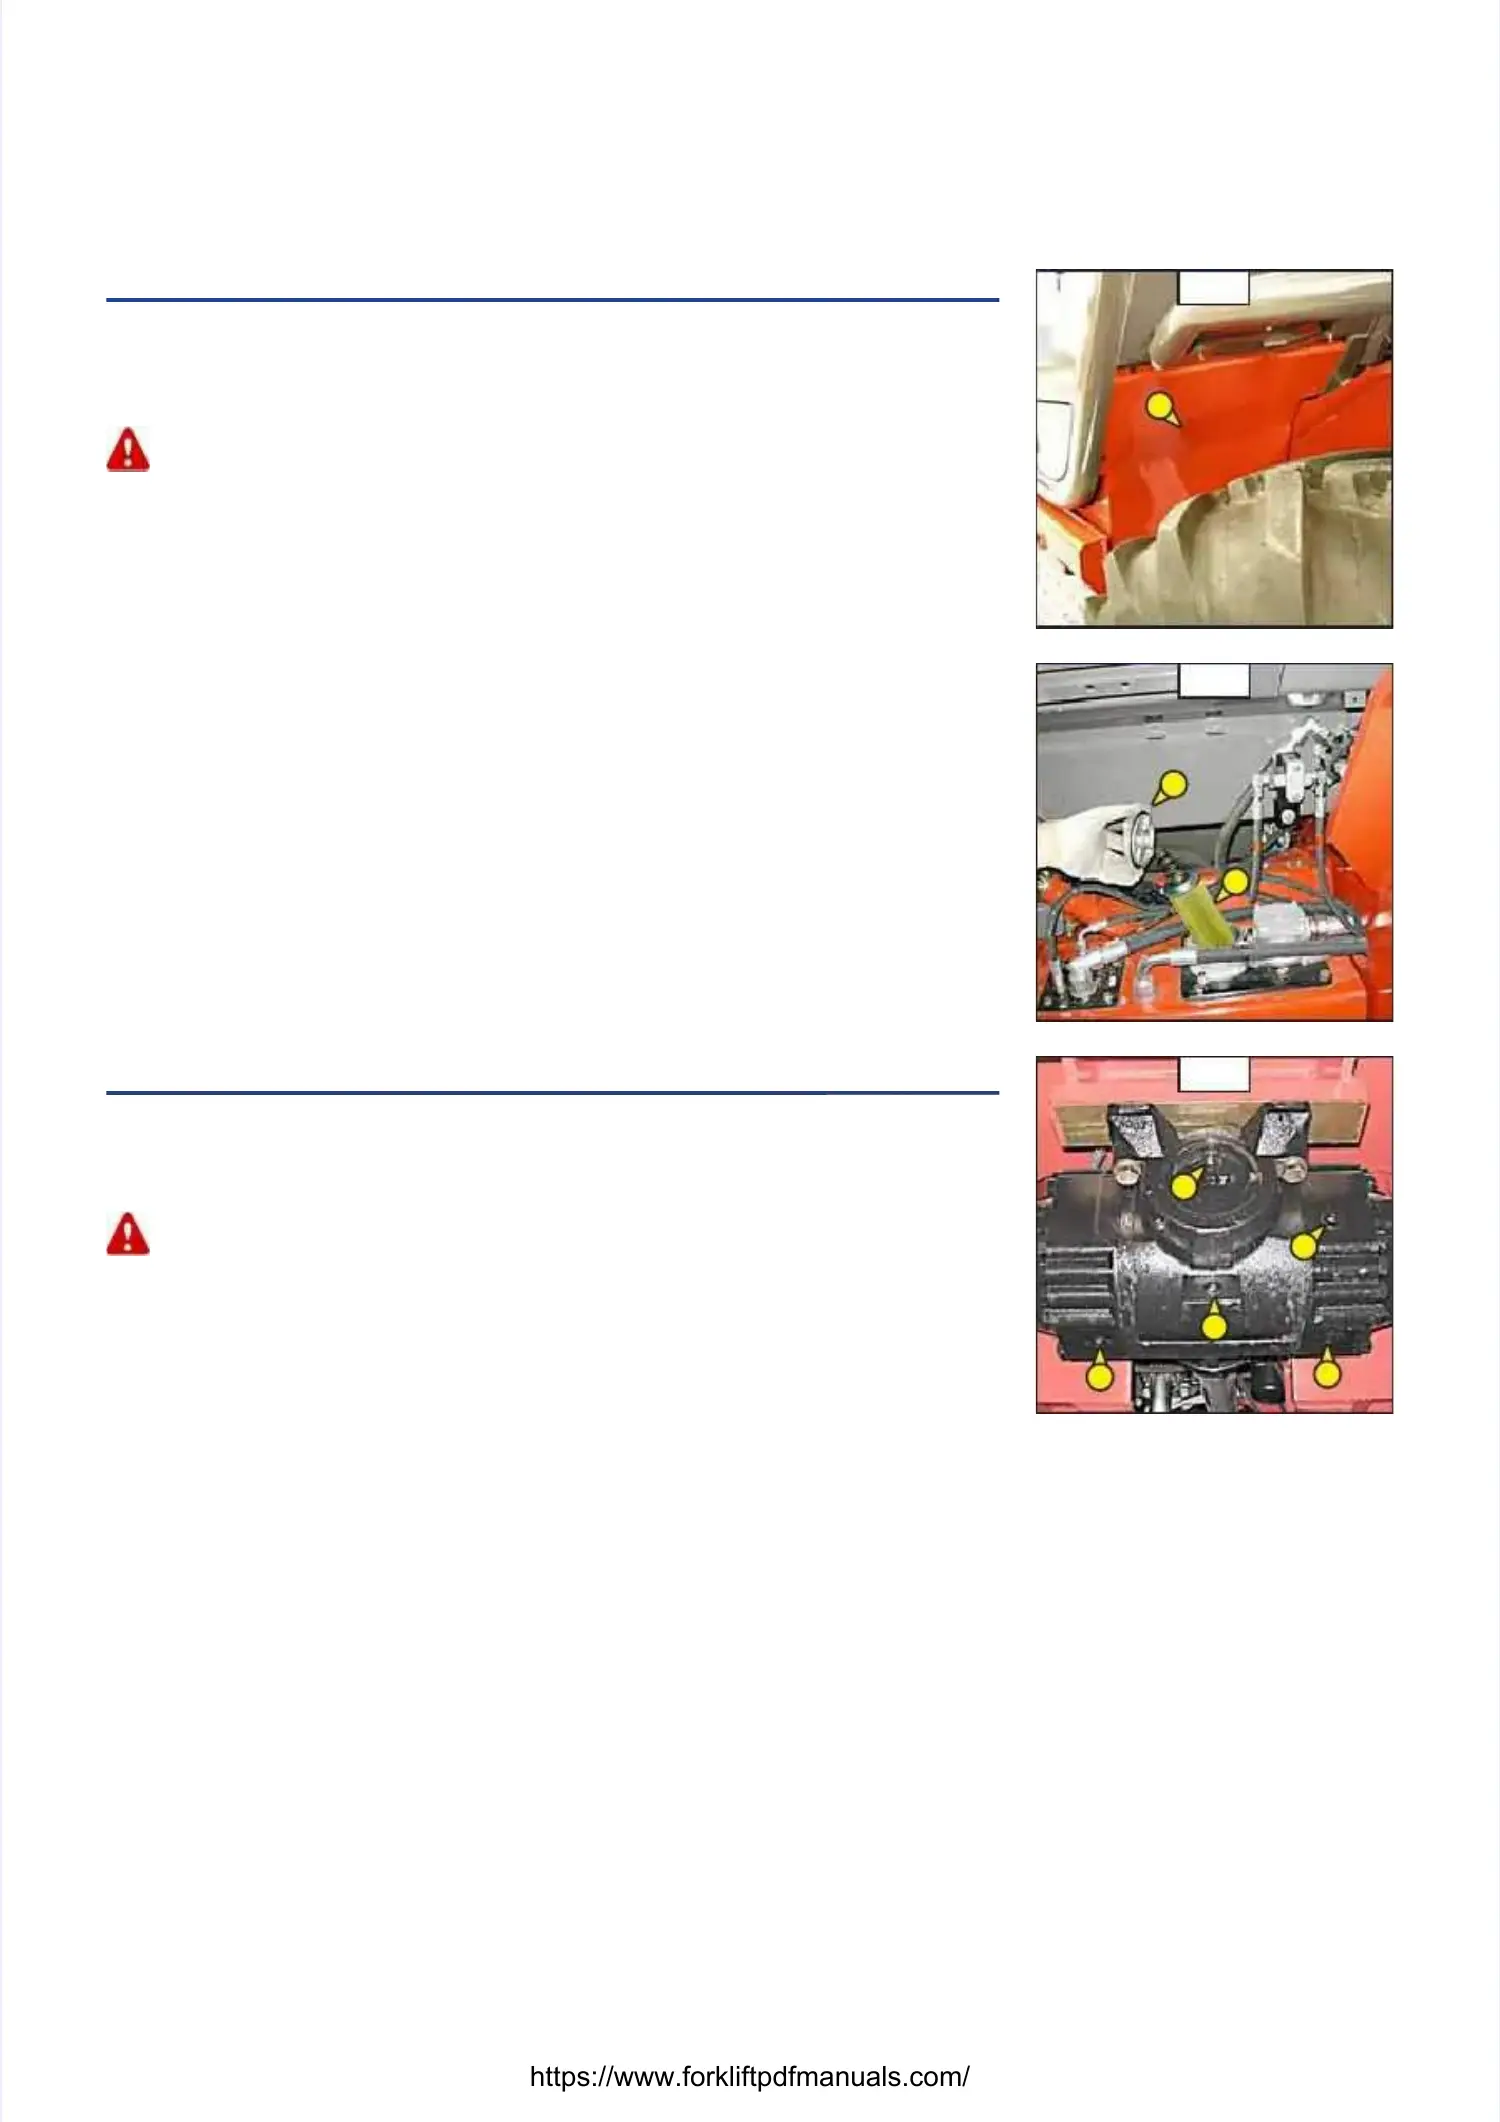
- Place a container under drain - Place a container under drain plugs 1 (fig. D8) and unscrew plugs 1 (fig. D8) and unscrew the plugs.the plugs.
-- Remove level plug 2 (fig. D8) and filler plug 3 (fig. Remove level plug 2 (fig. D8) and filler plug 3 (fig. D8) in order to ensure properD8) in order to ensure proper
emptying.emptying.
-- Refit and tighten drain plugs 1 Refit and tighten drain plugs 1 (fig. D8) (tightening torque 34 to (fig. D8) (tightening torque 34 to 49 N.m).49 N.m).
-- Fill up with oil (see: 3 - MAINTENANCE: LUBFill up with oil (see: 3 - MAINTENANCE: LUBRICANTS AND FUEL) thRICANTS AND FUEL) through filler port 3 (fig. D8).rough filler port 3 (fig. D8).
- The level is correct when the oil level is flush with the edge of port 2 (fig. D8).- The level is correct when the oil level is flush with the edge of port 2 (fig. D8).
- Check for any possible leaks at - Check for any possible leaks at the drain plugs.the drain plugs.
-- Refit and tighten level cap 2 (fig. D8Refit and tighten level cap 2 (fig. D8) (tightening torque 34 to 49 N.m) and f) (tightening torque 34 to 49 N.m) and filler port iller port 3 (fig. D8) (tightenin3 (fig. D8) (tightening torque 34 to 49 N.m).g torque 34 to 49 N.m).
- Repeat this operation for the rear axle differential.- Repeat this operation for the rear axle differential.

 Loading...