C3/2C3/2
33
33
C3/1C3/1
11
11
11
22
11
C4C4
22
11
33
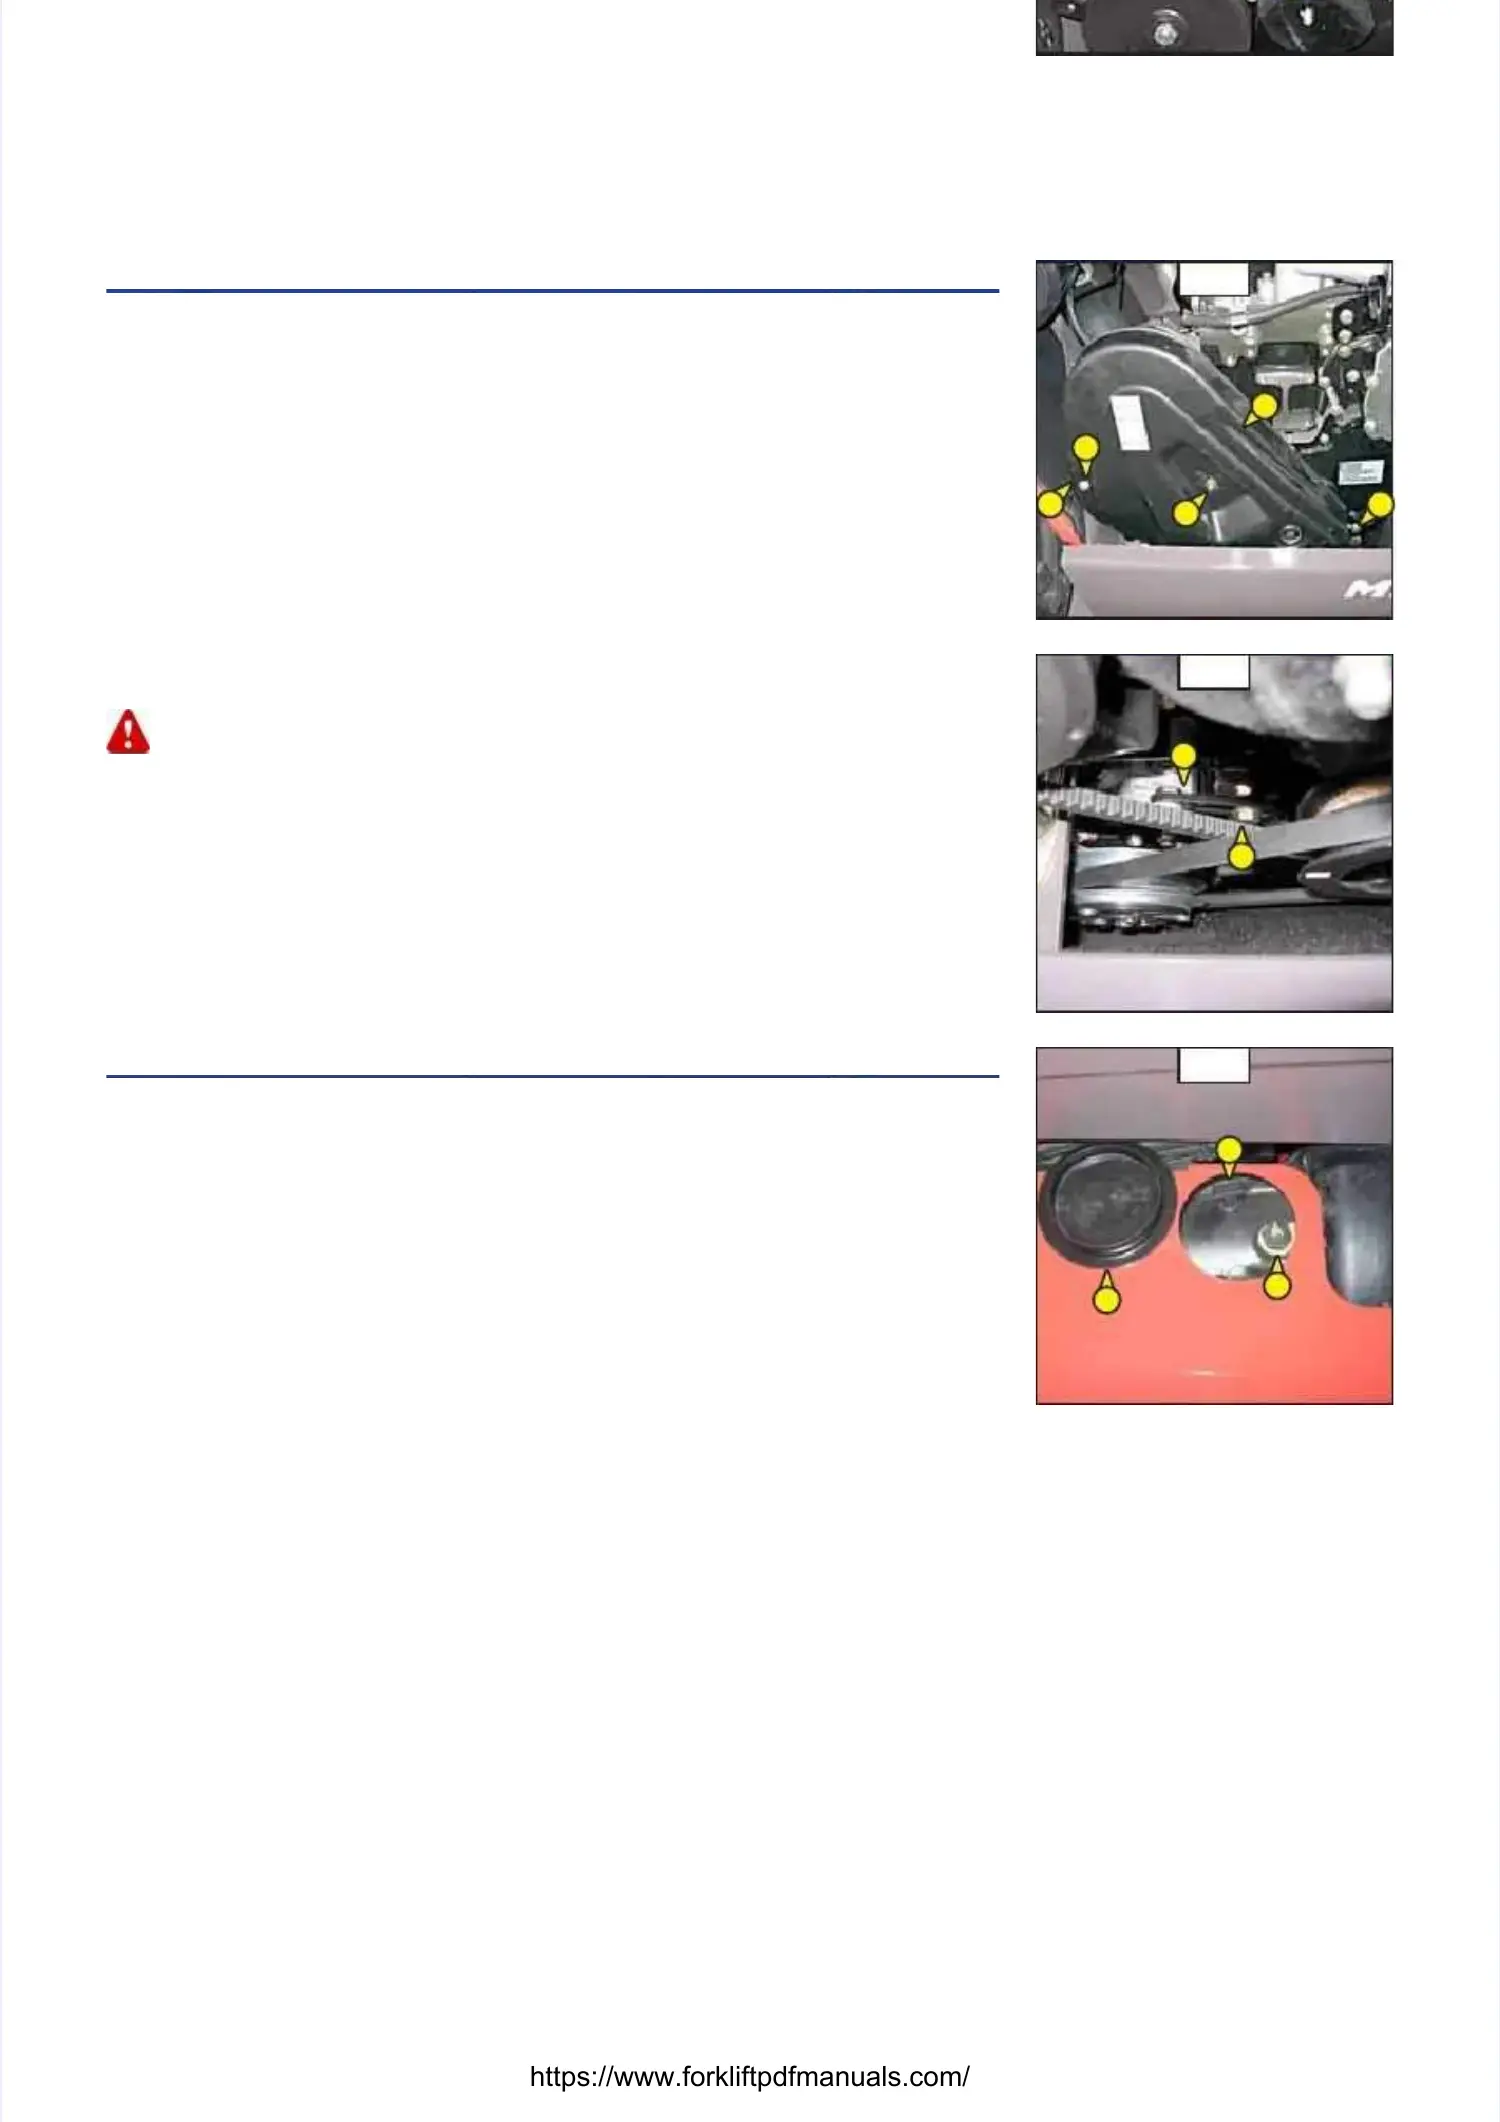
C3 - COMPRESSOR BELT TENSION (OPTION AIR CONDITIONING)C3 - COMPRESSOR BELT TENSION (OPTION AIR CONDITIONING)
CHECK - ADJUSTCHECK - ADJUST
- Open the I.C. engine bonnet.- Open the I.C. engine bonnet.
- Unscrew the fastening screws 1 (fig. - Unscrew the fastening screws 1 (fig. C3/1).C3/1).
- Lay down the protective guard 2 (fig. C3/1).- Lay down the protective guard 2 (fig. C3/1).
-- Check the belt for signs of Check the belt for signs of wear and cracks and change if wear and cracks and change if necessary (see: 3 - MAINTENANCE:necessary (see: 3 - MAINTENANCE:
FILTERS CARTRIDGES AND BELTS).FILTERS CARTRIDGES AND BELTS).
- Check the belt tension between the - Check the belt tension between the pulleys of the crankshaft and of the compressor.pulleys of the crankshaft and of the compressor.
- Under a normal pressure exer- Under a normal pressure exer ted with the thumb (45 N), the belt should move approximatelyted with the thumb (45 N), the belt should move approximately
10 mm.10 mm.
- Carry out adjustments if necessary.- Carry out adjustments if necessary.
- Untighten screws 3 (fig. C3/2) with two to three thread turns.- Untighten screws 3 (fig. C3/2) with two to three thread turns.
- Swivel the compressor assembly so as to - Swivel the compressor assembly so as to obtain the belt tension requirobtain the belt tension required.ed.
- Retighten screws 3 (fig. C3/2).- Retighten screws 3 (fig. C3/2).
- Put the protective guard back 2 (fig. C3/1).- Put the protective guard back 2 (fig. C3/1).
If the compressor belt has to be changed, check the tension again after the first If the compressor belt has to be changed, check the tension again after the first 20 hours of operation.20 hours of operation.
C4 - ANGLE GEAR BOX LEVELC4 - ANGLE GEAR BOX LEVEL
CHECKCHECK
Park the lift truck on level ground with the jib raised and the I.C. engine stopped.Park the lift truck on level ground with the jib raised and the I.C. engine stopped.
- Remove the plastic cap 1 - Remove the plastic cap 1 (fig. C4).(fig. C4).
- Remove level plug 2 - Remove level plug 2 (fig. C4).(fig. C4).
- Wipe the dipstick and check the correct level between the MINI and MAX. marks.- Wipe the dipstick and check the correct level between the MINI and MAX. marks.
--
If necessary, add oil by the filler port If necessary, add oil by the filler port 3 (fig. C4) (see: 3 - MAINTENANCE: LUBRICANT AND3 (fig. C4) (see: 3 - MAINTENANCE: LUBRICANT AND
FUELFUEL
).).

 Loading...