ADJUSTMENT
(
Set the power voltage to the rated voltage for this adjustment.
1. Preparation
(1) Prepare a DC voltmeter.
(2) Place the unit under normal usage conditions, away from highly ventilated areas such as next to an
air conditioning machine or electric fan.
The set requires an ambient temperature of 15℃ to 30℃ and standard humidity.
(3) Settings of This Unit
• POWER (Power source switch) : OFF
• STEREO/BI.AMP SW (Rear PANEL) : STEREO
• MASTER VOLUME : "-∞" (
c
min.) : turn counterclockwise to the lowest position.
• INPUT SELECTOR : CD
• SPEAKER (Speaker terminal) : No load
(Do not connect equipment such as speakers or dummy resistors.)
2. Adjustment Procedure
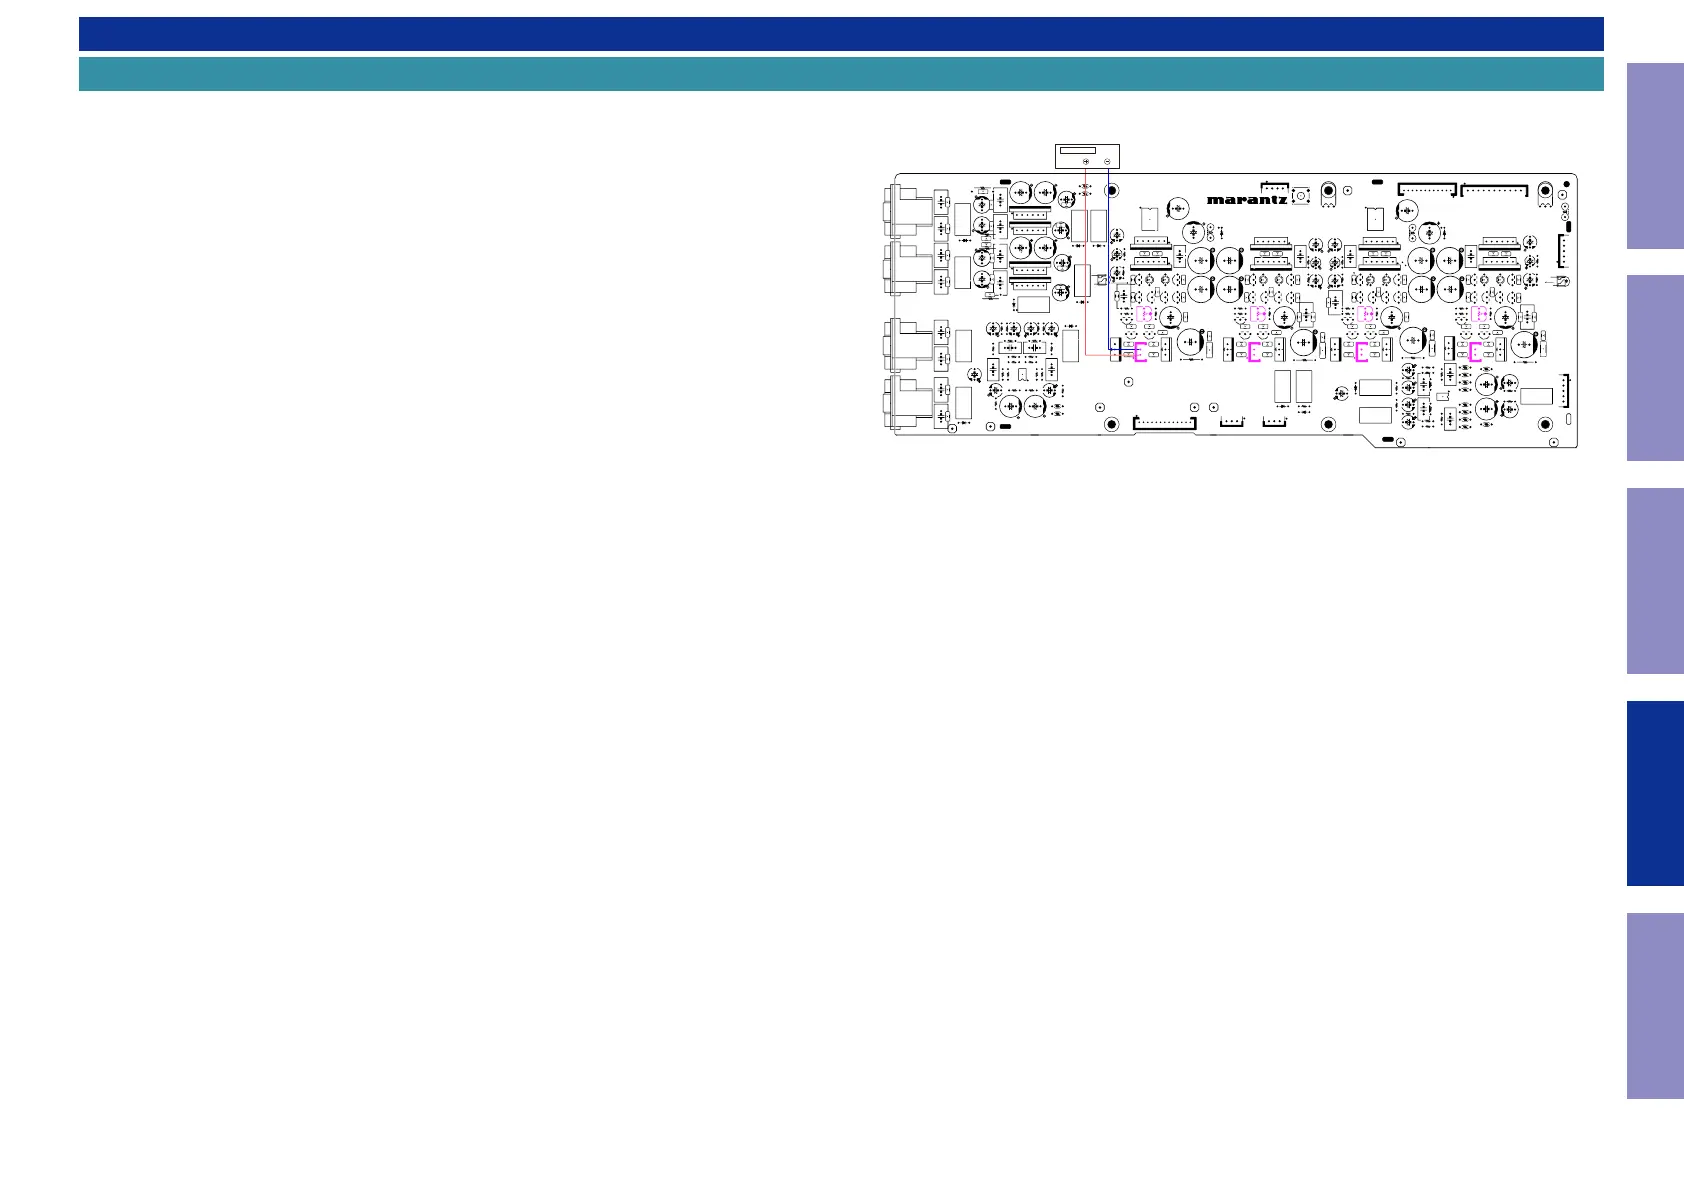
(1) Connect the DC Voltmeter to the test points.
Lch : AUDIO IN PCB : N5014, N5011 V5001, V5002
Rch : AUDIO IN PCB : N5012, N5013 V5003, V5004
(2) Connect the power cord to an outlet. Next, press the power button to turn on the power.
(3) Turn "
V5001, V5002
" and "
V5003, V5004
" clockwise (
x
) one minute after powering and adjust the
voltage at the test point to "
40mV (4 mA) ±5mV(0.5mA)
".
(4) Turn "
V5002, V5001
" and "
V5003, V5004
" one minute after the preliminary adjustment and set the
voltage to "
40mV (4mA) ±5mV (0.5mA)
".
(5) The idling current will uctuate somewhat after adjustment. Check that the voltages of each test
point are within the "
40mV (4mA) ±10mV (1mA)
" range.
Adjusting Idling Current
DC Voltmeter
N5011
N5012
N5013
N5014
V5001
V5002
V5003
V5004
49
Caution in
servicing
Electrical Mechanical Repair Information Updating




 To Next Page