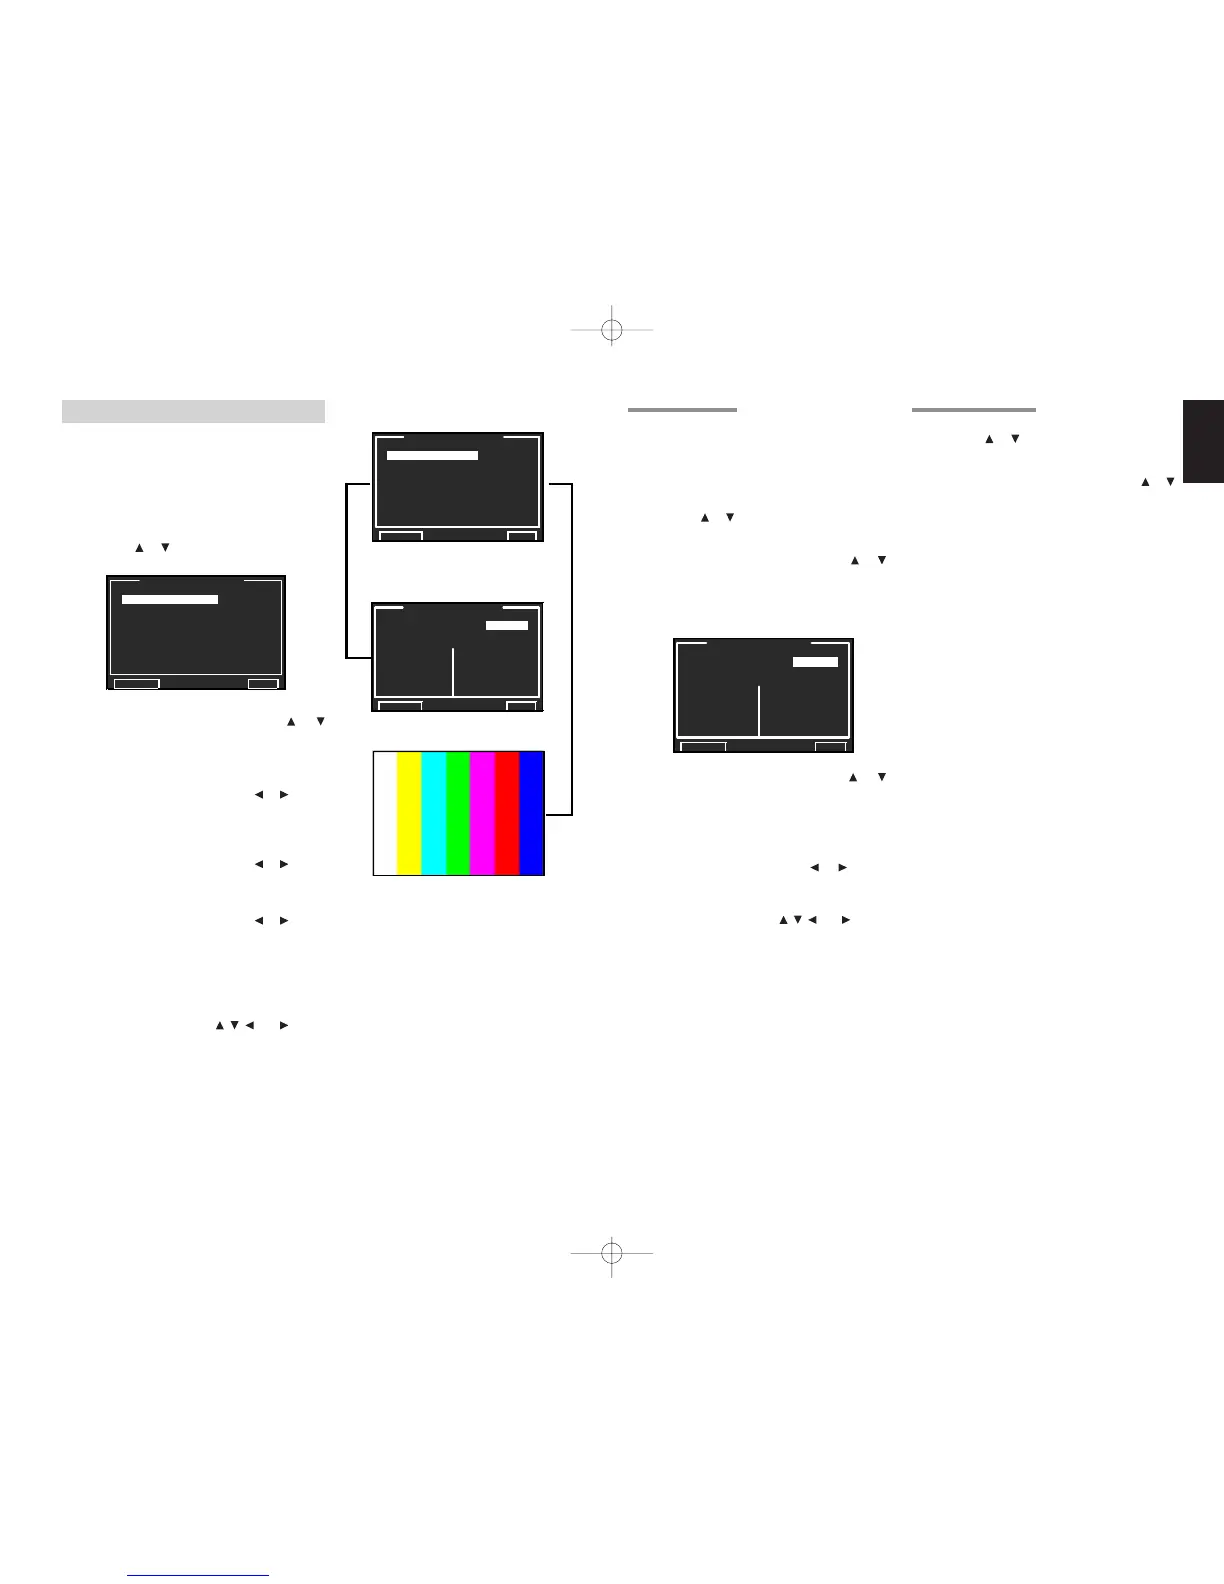
4-1 VIDEO AUTO ON
This menu is for synchronizing the SR9600 with
video components so that they can be powered
up automatically and enter standby at the same
time as the SR9600. Settings can be entered
separately for each input source.
1.
Select “4. VIDEO SETUP” from MAIN MENU
with the or cursor buttons and press the
OK/ENTER button.
2.
Select “VIDEO AUTO ON” with the or
cursor button.
3.
Press the OK/ENTER button to enter the
selection.
4.
Select the desired menu with the or
cursor buttons, and press the OK/ENTER
button.
VIDEO AUTO ON:
Select “ENABLE” or “DISABLE”.
Video function:
Set to “ON” or “OFF” with the or cursor
buttons.
After you complete this portion of the setup, move
cursor to “RETURN” with the , , and cursor
buttons and press the OK/
ENTER
button.
Note:
• VIDEO AUTO ON and RS232C are disabled in
the “ECONOMY STANDBY” setting.
(See page 55)
4 VIDEO SETUP
This menu is for configuring video settings.
•
VIDEO AUTO ON :
“4-1 VIDEO AUTO ON”
(see page 43)
•
VIDEO COLOR BAR :
“4-2 VIDEO COLOR BAR”
(see page 43)
1.
Select “4. VIDEO SETUP” from MAIN MENU
with the
or cursor buttons and press the
OK/ENTER button.
2.
Select the desired menu with the
or
cursor buttons and press the OK/ENTER
button.
VIDEO CONVERT:
Select the VIDEO CONVERT function to
“ENABLE” or “DISABLE” with the or cursor
buttons.
(Video cable connection: See page 48)
AUTO VIDEO SEL:
Select the AUTO VIDEO SEL function to
“ENABLE” or “DISABLE” with the or cursor
buttons. (See page 55)
OSD INFO:
Select the OSD information function to
“ENABLE” or “DISABLE” with the or cursor
buttons.
If you select “ENABLE”, the SR9600 will display
the status of the feature (Volume up/down, input
select, etc..) on the monitor. If you do not desire
this information, select “DISABLE”.
After you complete this portion of the setup, move
cursor to “RETURN” with the , , and cursor
buttons and press the OK/
ENTER
button.
☞
p.43
☞
p.43
4-2 VIDEO COLOR BAR
1.
Select “4. VIDEO SETUP” from MAIN MENU
with the or cursor buttons and press the
OK/ENTER button.
2.
Select “VIDEO COLOR BAR” with the or
cursor buttons.
3.
Press the OK/ENTER button to enter the
selection. Color bars appear on the video
display connected to the SR9600.
4.
Press the OK/ENTER button again to return to
the 4. VIDEO SETUP menu.
Note:
• Color bars are not output to the video and S-video
jacks.
SR9600UDFU01ENG34 05.4.27, 5:42 PMPage 43 AdobePageMaker6.5J/PPC
 Loading...