Triplematic
Triplematic 201708 EN 15
Installation
4 Installation
4.1 Safety during installation
WARNING Before you install, operate or do maintenance on the machine, you must read the safety information
in this manual. Obey the instructions in this manual to prevent injuries or damage to the equipment.
WARNING Always wear safety gloves, protective glasses, and any other personal protective equipment
suitable for the current work task.
4.2 Site requirements
WARNING Put the machine indoors, in a dry area with good light. Do not let the machine become wet or moist.
Do not put the machine near gas, liquids or other materials that can catch fire or explode.
CAUTION Make sure that the floor where the machine is placed, is flat and level. If it is not, attach the stand to
the floor with screws.
Note: Machines can be set up on a bench or you can use the included stand. Please note that mounting hardware
for the bench is not supplied with the machine.
4.3 Unpack the machine
Note: For a video demonstration of how to unpack, assemble, install, and operate the machine, visit Markusson.se
1. Unpack the crates.
Note: Keep the delivery crates and packing materials. Pack the machine in them if it is moved or sent for service.
The crates and packing materials will minimize the risk of damage during transportation.
2. Make sure that all parts in the list below are included in the delivery:
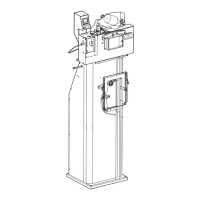
• Triplematic Auto Chain Grinder machine
• stand (with set of screws, nuts and bolts for assembly)
• pneumatic tensioner
• converter (with 2 screws for assembly)
• Triplematic Auto Chain Grinder User manual (this document)
• rectangular profile stone (55 x 15 x 15 mm) and profile template (used as protection during transport and fitted
in the chain vise)
• hex key, which is used to change the top-plate angle
• Allen wrench, which is used for tightening
• grinding wheel guard (with 2 screws for assembly)
• 2 types of ceramic grinding wheels,
• screws, nuts and bolts for assembly
Note: For your convenience, you may also use your own tools to assist the machine’s assembly.
3. Remove all packing materials. Remove the profile template from the chain vise, which is used to protect the
grinding head during transport. Remove the air hose connector’s packing material.