Operation
Triplematic
30 Triplematic 201708 EN
– clockwise to increase the height of the
depth gauge (and therefore grind less of it),
or
– counter clockwise to decrease the height of
the depth gauge (and therefore grind more
of it).
• Repeat the sharpening test until the height of
the depth gauges is correct. Use the template
provided with the machine and refer to the
top-plate angle chart to determine the correct
height.
17. Set the chain pusher switch to ON. The chain
pusher arm will push the chain forward.
18. Monitor the grinding wheel movements, and
check if the chain is sharpened.
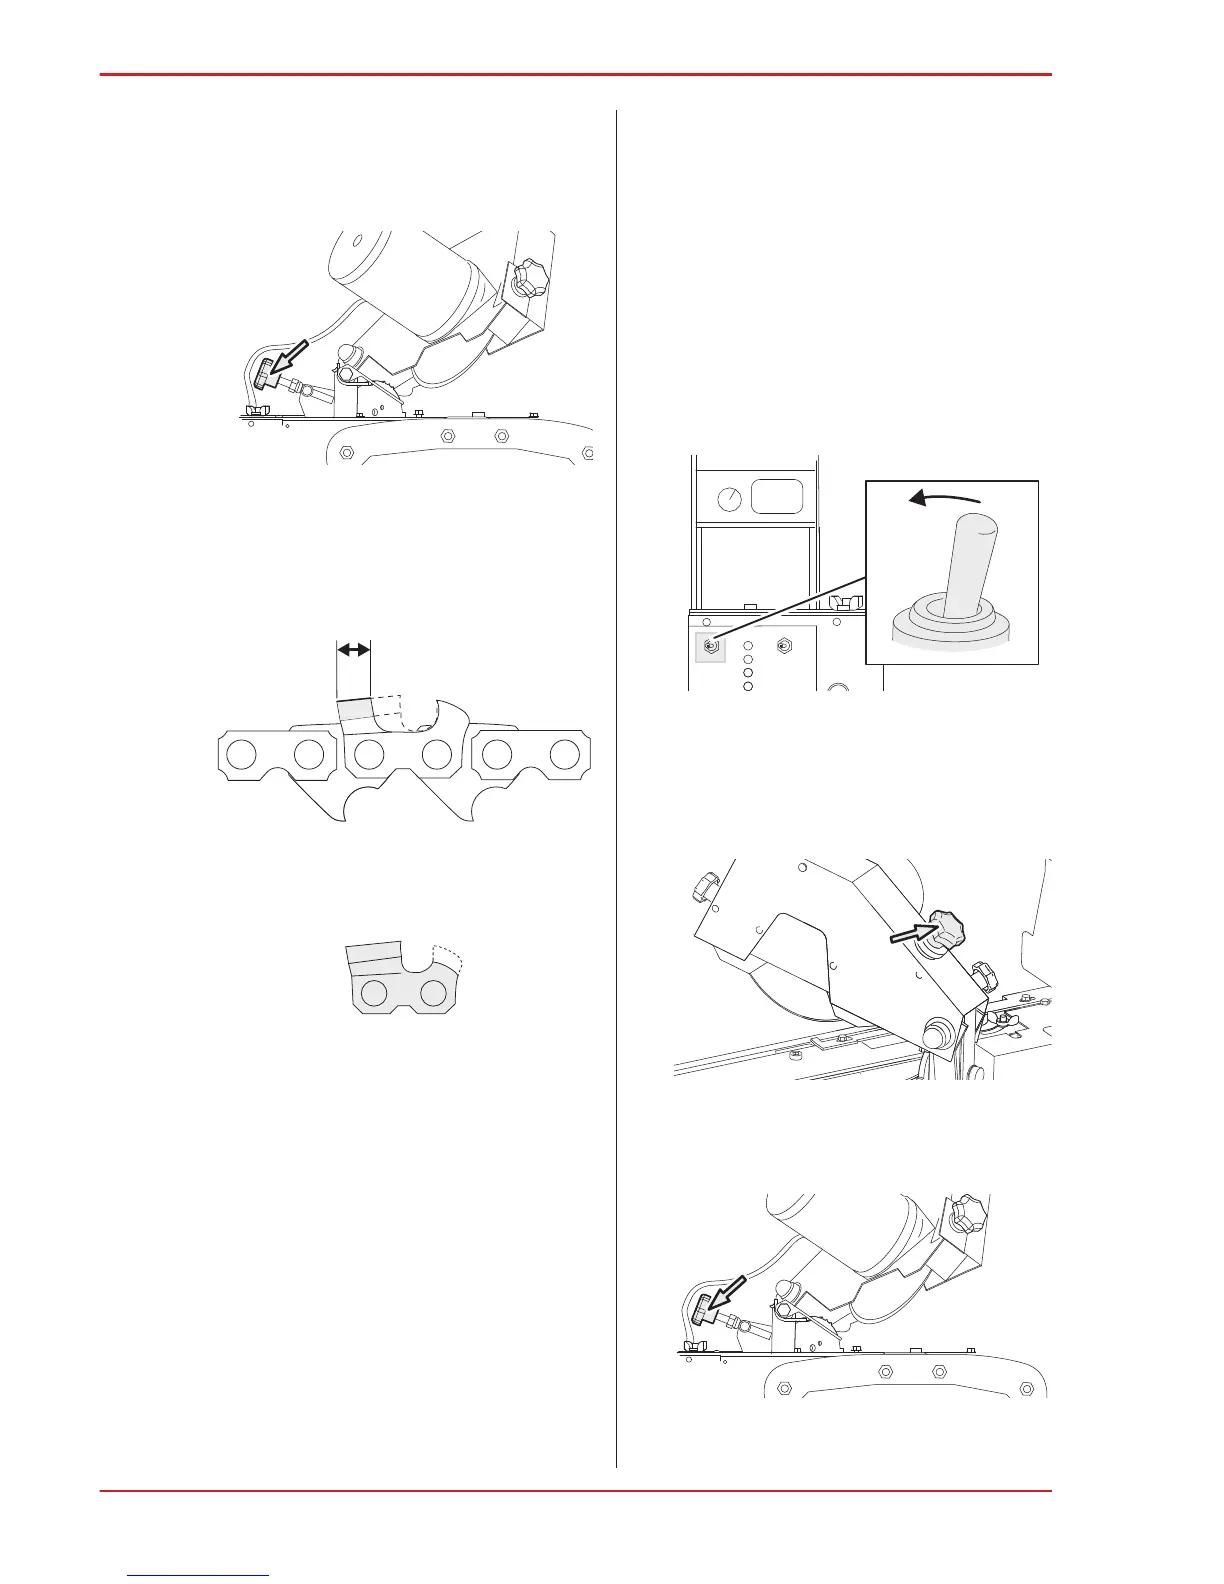
19. If required: Turn the grinding depth knob,
located on the back of the grinding head, to
make minor adjustments for the grinding depth.
20. If required: Turn the chain pusher adjustment to
make minor adjustments for the grinding length.
• Repeat steps 1-2 until the grinding depth is
equal.
15. To set the approximate grinding length, turn the
chain pusher adjustment knob:
• clockwise, to grind more, resulting in a shorter
cutter top plate, or
• counter-clockwise, to grind less, resulting in a
longer cutter top plate.
16. If required: Change the grinding setting for the
height of the depth gauges.
Set the depth gauge height:
• Do a sharpening test on a test chain,
according to the instructions in section 8.2,
“Sharpening test”.
• Use an Markusson flat file to set the height
of the depth gauge. Once you have set the
depth gauge, refer back to the template to
make sure it meets the correct specifications.
• Use the set depth gauge to adjust the position
of the machine to set up the remaining depth
gauges. Turn the depth gauge height knob:
– clockwise to set the first depth gauge by
hand using the flat file and depth gauge
tool.