6
MAC
250 and
MAC
250
+
Rigging
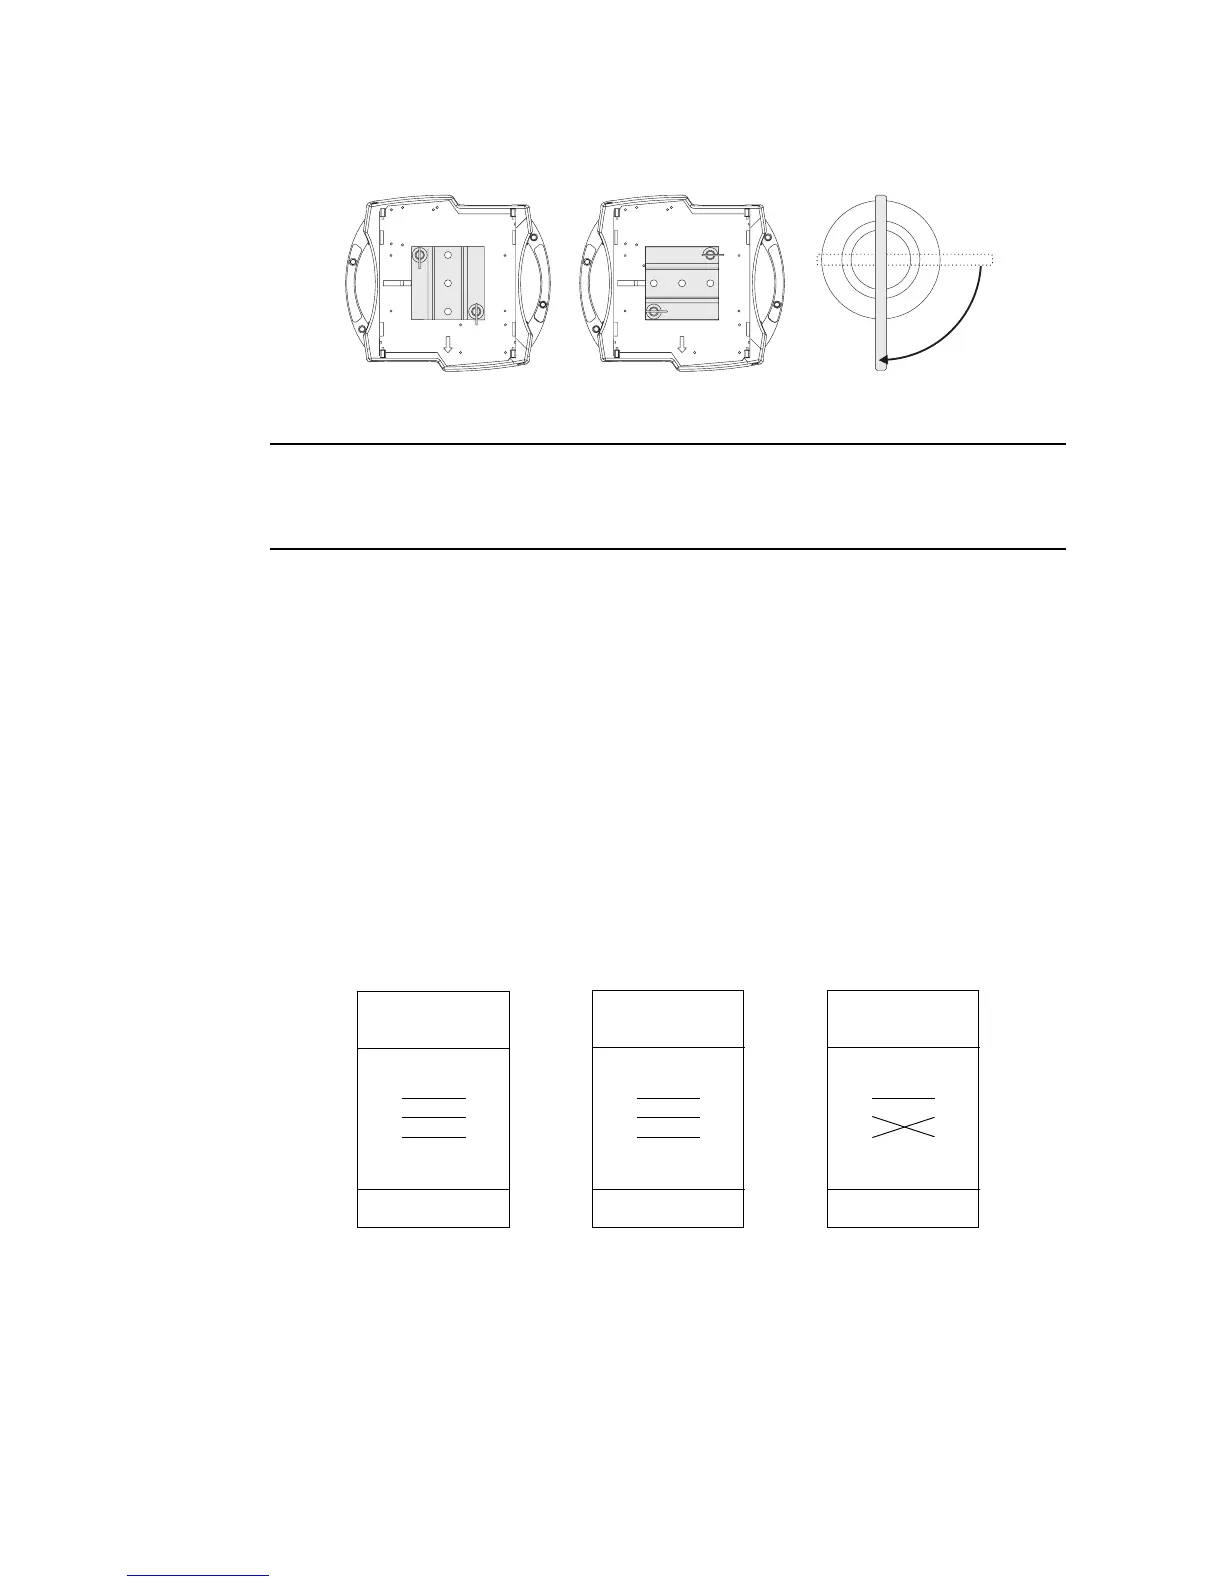
The MAC 250 and MAC 250
+
include a clamp mounting bracket to which 1 or 2 rigging clamps (not included) can be
bolted. The clamp mounting bracket fastens to the base as shown with 1/4-turn fasteners.
WARNING!
Always use an approved safety cable.
The 1/4-turn fasteners are locked only when turned fully clockwise.
1.
Verify that the clamps are in good condition and can bear at least 10 times the weight of the fixture. Bolt
clamps to the bracket with a grade 8.8 (minimum) M12 bolt and lock nut, or as recommended by the clamp
manufacturer, through the 13 mm holes in the clamp mounting bracket.
2.
Align the clamp mounting bracket with any 2 key slots on the base. Insert both locking pins into the
slots and turn both levers a full 1/4 turn clockwise to lock.
3.
Verify that the structure can bear at least 10 times the weight of all installed fixtures, clamps, cables,
auxiliary equipment, etc.
4.
Working from a stable platform, clamp the fixture to the structure.
5.
Install a safety cable that can bear at least 10 times the weight of the fixture securely to the structure
and anchor the cable to the dedicated attachment point on the base. The attachment point is
designed to fit a carabiner clamp.
Connecting the serial data link
The MAC 250 and MAC 250
+
have locking 3-pin data input and output sockets that are wired for use with DMX
devices, that is, pin 1 to shield, pin 2 to cold (-) and pin 3 to hot (+). As some devices have 5-pin connectors, or 3-pin
connectors with reversed polarity on pins 2 and 3, the following adaptor cables may be required.
1.
Connect the controller’s output to the fixture’s data input. For a
DMX controller with 5-pin output
, use a
cable with a 5-pin male and a 3-pin female connector, such as P/N 11820005.
For a DMX controller with 3-
pin output
, use a 3-pin cable such as the one included. For a Martin RS-485 protocol controller, use a
phase reversing cable or reconfigure the pin-out as described on page 19.
2.
Connect the output of the fixture closest to the controller to the input of the next fixture. When con-
necting a fixture with pin 3 hot to a fixture with pin 3 cold, use a phase-reversing adaptor.
3.
To terminate the link, insert a male 120
Ω
XLR termination plug in the output of the last fixture.
Figure 2: Clamp mounting bracket
Phase-Reversing
Adaptor
Male Female
1
2
3
1
2
3
3-pin to 3-pin
P/N 11820006
Adaptor
Male Female
1
2
3
4
5
1
2
3
5-pin to 3-pin
P/N 11820005
Adaptor
Male Female
1
2
3
1
2
3
4
5
3-pin to 5-pin
P/N 11820004
Figure 3: Cable adaptors