17
is needed.
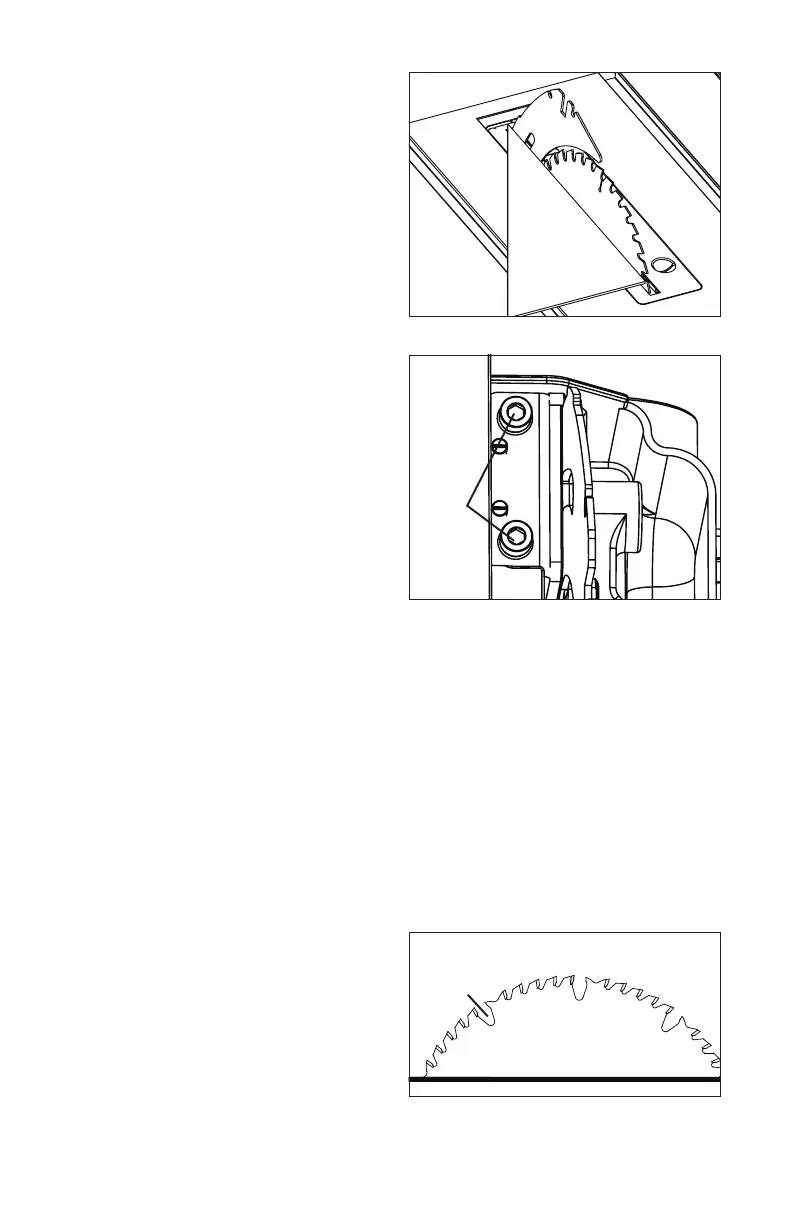
NOTE: The spreader’s alignment can be
adjusted for different blade widths.
To check the alignment of the
spreader/riving knife:
1. Unplug the saw
2. Raise the saw blade as high as it
will go by turning the Height/bevel-
adjusting hand wheel clockwise.
3. Remove the anti-kickback pawls, and place a framing square or straight
edge against both the saw blade and
the spreader.
NOTE: Place the framing square
between the carbide teeth, and measure
from the blade. This step will ensure that
the framing square is square against the
blade from the front to the back of the
blade.
4. The saw blade and spreader/riving
knife are aligned when the framing
square contacts the blade and the spreader/riving knife evenly, with no
gaps.
To adjust:
1. Unplug the saw
2. Loosen the screws that hold the mounting bracket using the 5/32” (4 mm)
hex key (included).
3. Reposition the blade guard assembly left or right, as required in order to
align the spreader/riving knife with the saw blade.
4. Once properly aligned, securely retighten the screw.
CHANGING THE BLADE DEPTH (See Fig. 12)
The saw blade depth should be set
so that the outer points of the saw
blade are higher than the workpiece by
approximately 1/8” (3.2 mm) to 1/4”
(6.4 mm), but the lowest points (gullets)
are below the top surface.
1. Unplug the saw
2. Push the bevel-locking lever in order to tighten it securely.
Fig. 10
Fig. 11
Screw
Fig. 12
GULLETS
 Loading...