18
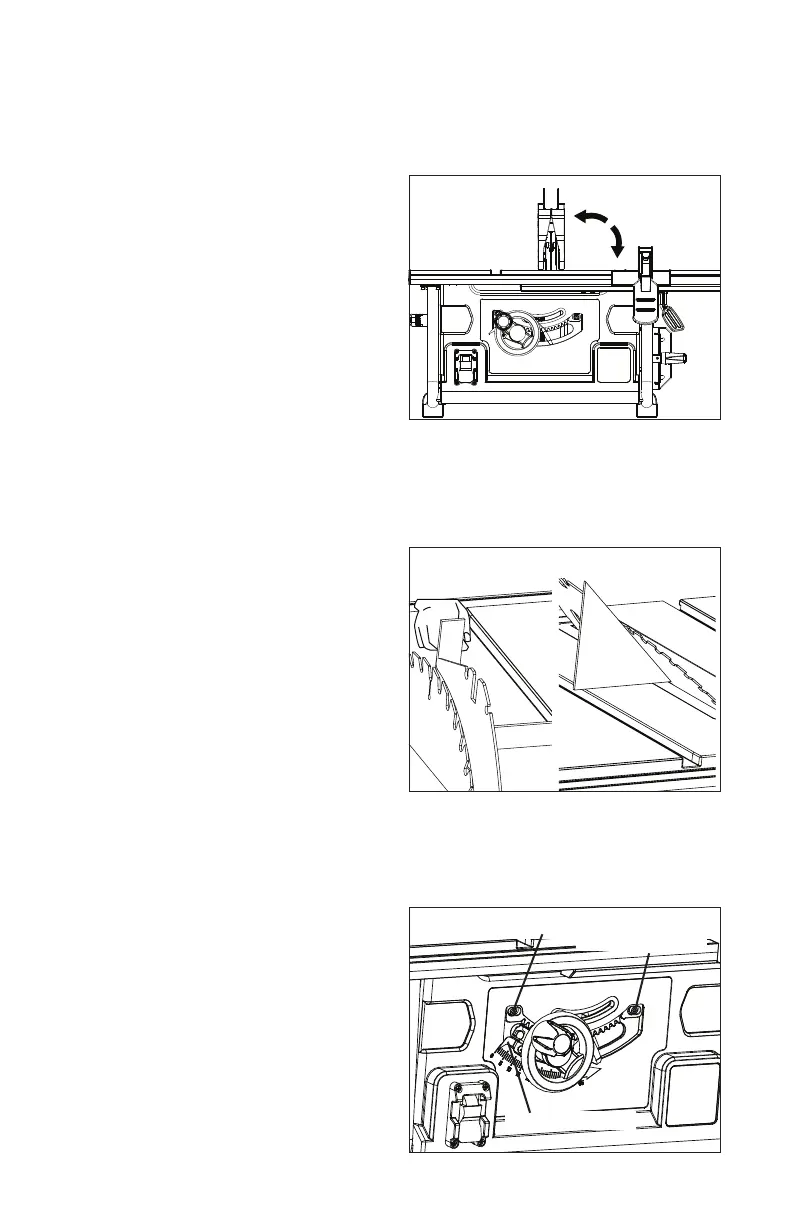
3. Raise the blade by turning the height/bevel-adjusting hand
wheel clockwise, or lower it by turning the handle counter-clockwise.
CHANGING THE BLADE ANGLE (See Fig. 13)
1. Unplug the saw
2. Loosen the bevel control by pulling
the bevel-locking lever.
3. To adjust the bevel angle, push the
wheel in toward the saw, and then
turn it. Turning the wheel counter-
clockwise increases the angle of
the blade, bringing it closer to 45º;
turning it clockwise decreases the
angle, bringing the blade closer to
90º.
4. To lock, tighten the bevel control by pushing the bevel-locking lever.
ADJUSTING THE BEVEL STOPS (See Fig. 14, 15)
1. Unplug the saw.
2. Using a square, set the blade
to exactly 0°. If the blade stops
bevelling before it gets to 0, loosen
the stop set screw (located under
the left mitre guide slot) using the
5/32” (4 mm) hex wrench, and then
proceed to 0°. With the blade set at
0, slowly turn the zero-stop screw
until you feel resistance. Bevel the
blade away from 0 a little and then
back to the stop.
3. Re-measure the angle, and repeat the stop adjustment as necessary until
the blade stops at 0 degrees.
4. Set the 45° stop the same way. The
set screw for the 45° stop is located
under the right hand mitre guide
slot.
ADJUSTING THE BEVEL INDICATOR
(See Fig. 15)
If the bevel indicator is not at 0 when the
saw blade is at 90º, adjust the indicator
by loosening the screw and setting it to
Fig. 14
Fig. 13
Fig. 15
90° stop screw
45° stop screw
Bevel indicator
 Loading...