54
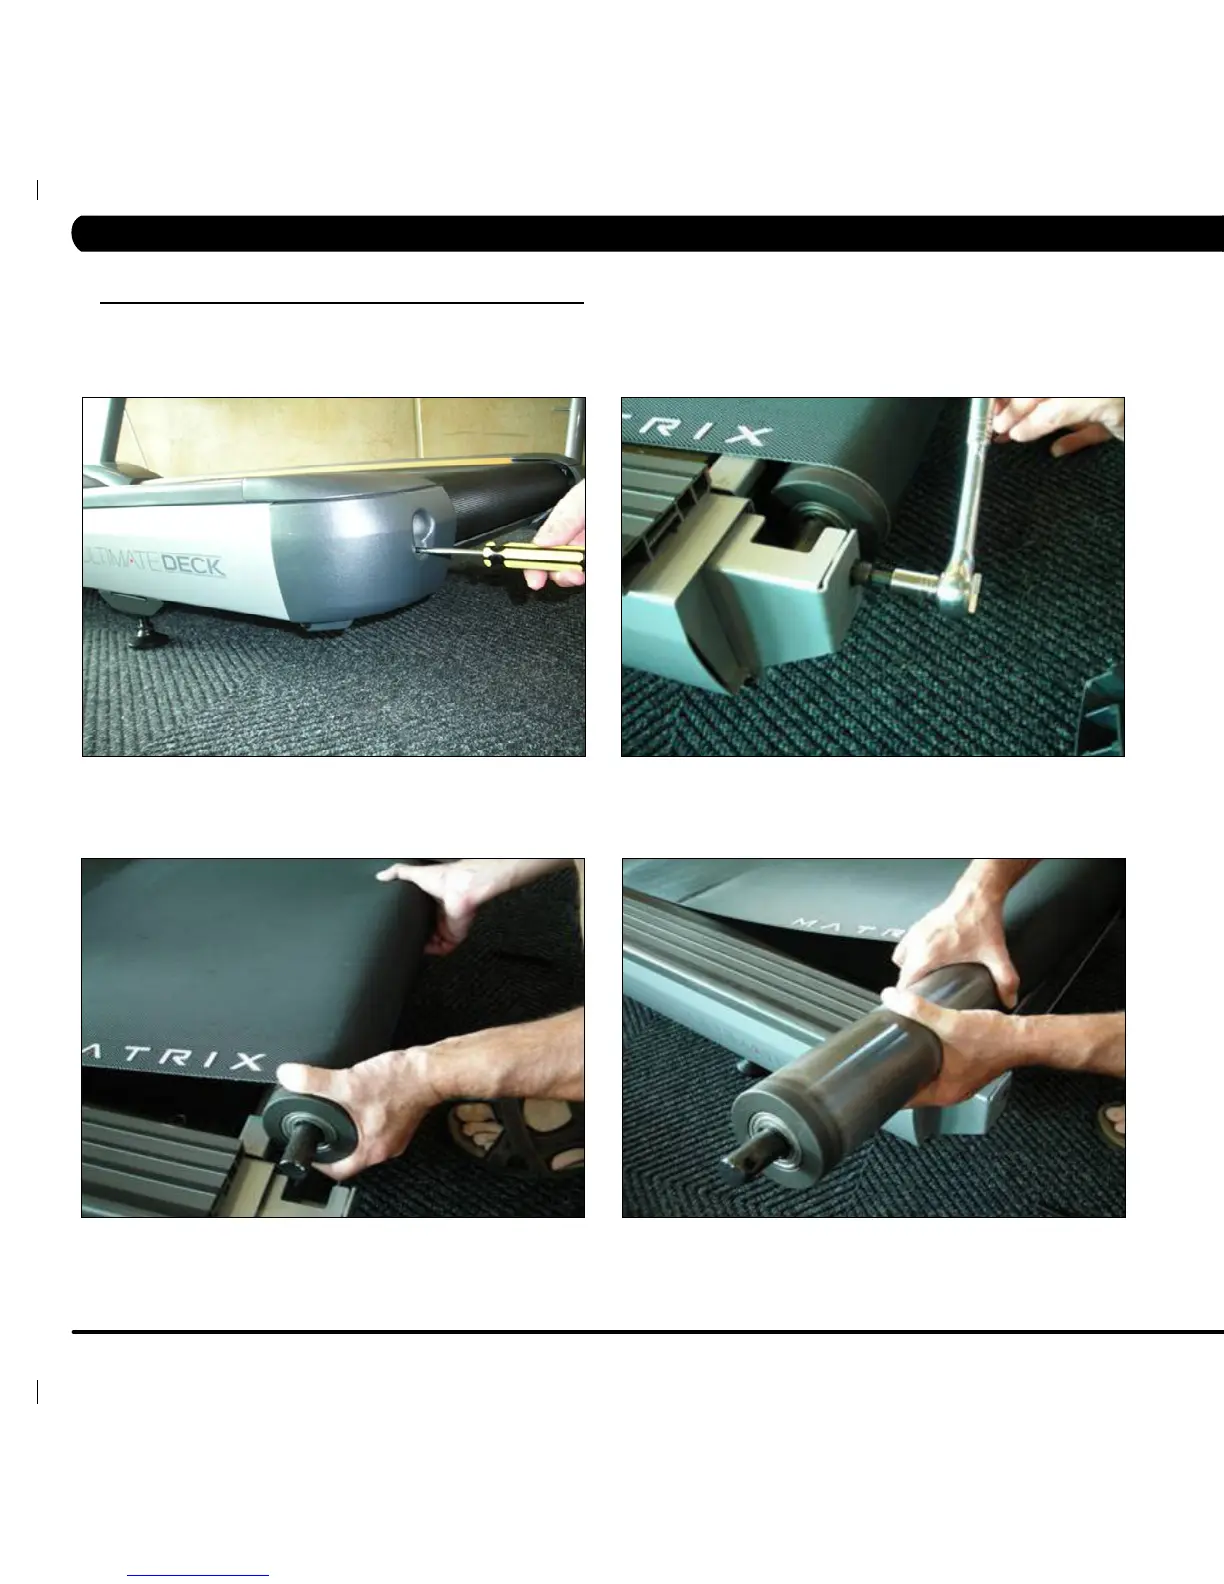
9.2 REAR ROLLER REPLACEMENT
1) Turn off the power and disconnect the cord from the machine.
2) Remove the 4 screws holding on both of the end caps using a Phillips screwdriver and remove the end caps (Figure A).
3) Remove both rear roller adjustment screws using an 8 mm Allen wrench (Figure B).
4) Remove the rear roller from the running belt (Figures C & D).
5) Reverse Steps 1-4 to install a new rear roller.
6) Tension the running belt as outlined in Section 3.6.
FIGURE A FIGURE B
FIGURE C
CHAPTER 9: PART REPLACEMENT GUIDE
FIGURE D