P/N 03521015 Rev K Page 21
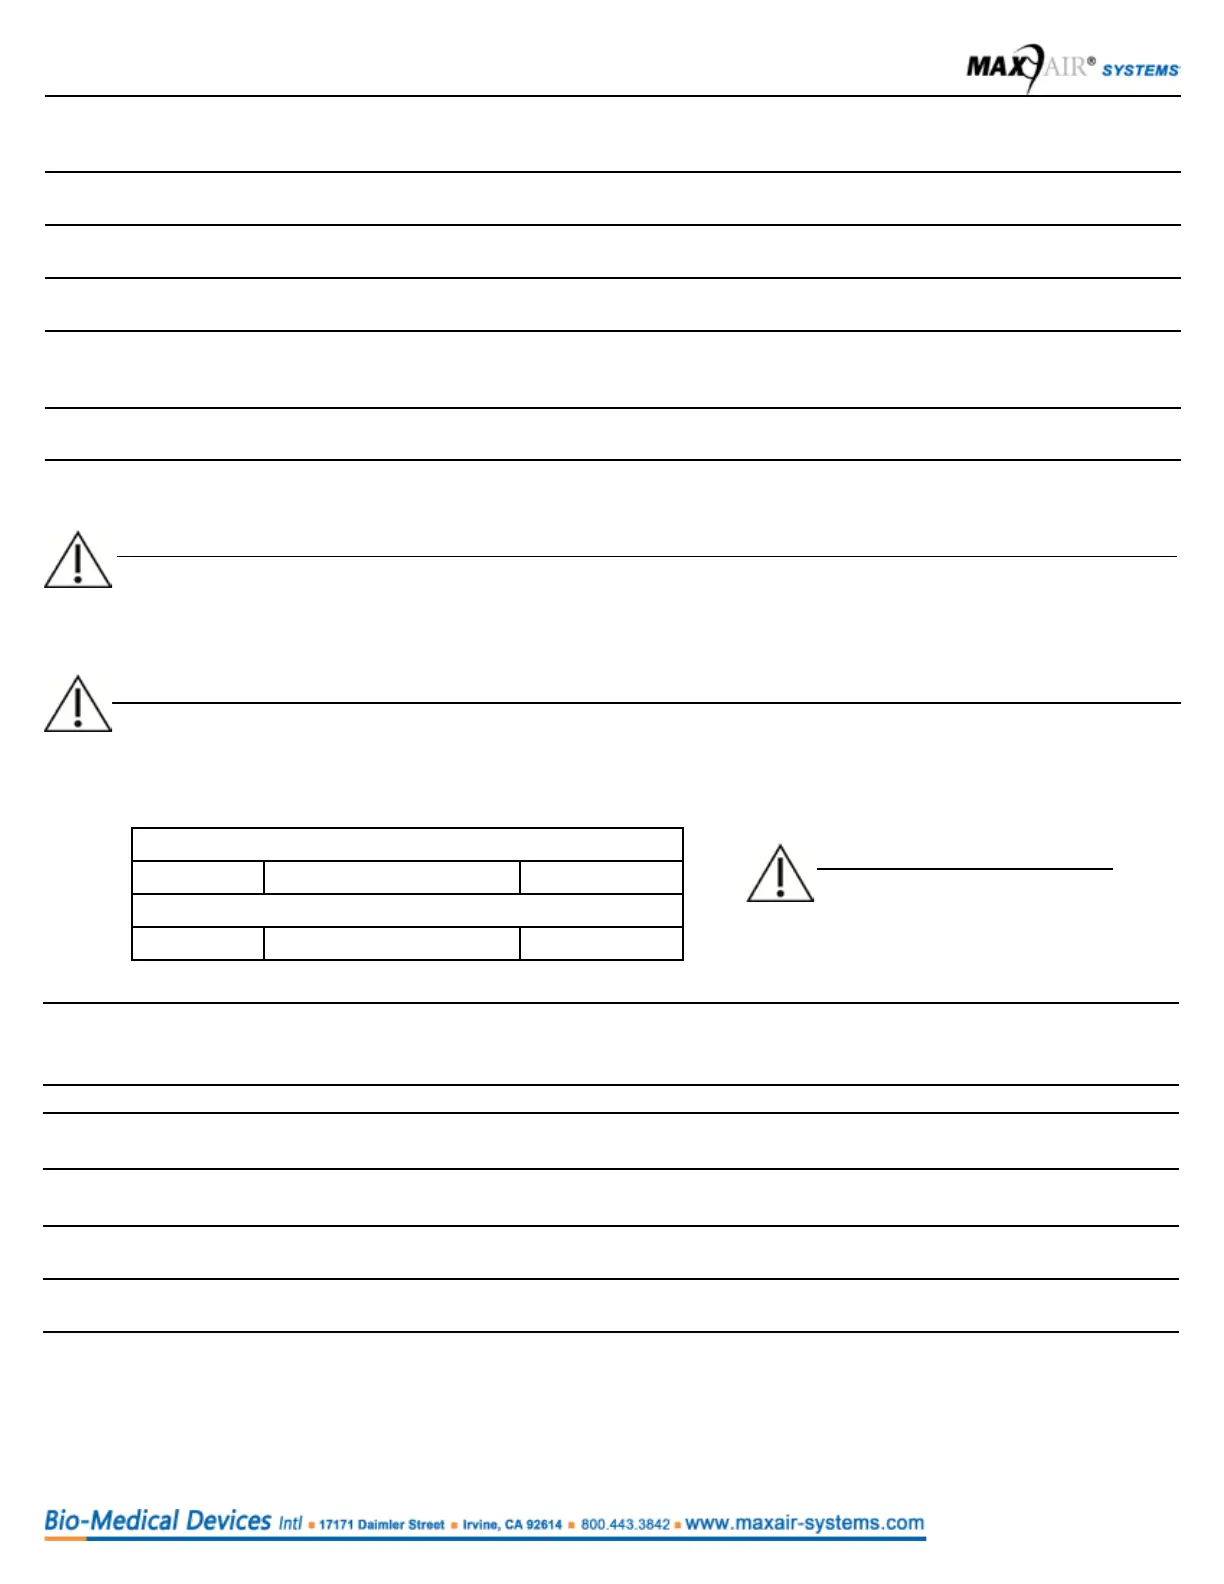
Air Flow Switch Position
Low Med High
Air Flow in Liters Per Minute
190 215 240
5 Side Strap with Snaps
Height adjustment. Four holes represent four possible height adjustments to accommodate different head sizes and ensure
convenient viewing of the LED Safety Status Indicators. Secure into desired position by snapping against post/stud.
6 Rear Liner Pads
Provide cushion for comfort. Attached via adhesive. For replacement refer to Section 14.
7 Helmet Label
PN, O.N. and SN identication. Refer to symbol denition chart for further details.
8 Power Cord
Battery to Helmet Connection. For replacement, refer to Section 14.
9 Helmet Power Cord Connector
Connection for the Power Cord to the Helmet, which then connects to the Battery. The Power Cord should not be disconnected
from this connector under normal operation conditions.
10 Liner Power Cord Slot
Allows removal of Helmet Liner without the removal of the power cord.
11 Airow Controller
CAUTION
The Air Flow Switch is user adjustable to match the amount of air ow with the user’s activity level and breathing
requirements.
NOTE
The ow levels, in liters per
minute, are only approximate.
NOTE
When the Helmet is initially connected to the Battery, all ve LED Safety Status Indicators are lighted briey indicating
all are functional. The red and yellow LEDs will turn off and the airow increases to the appropriate operating level based on the
Air Flow Switch position. The green LEDs will be on as appropriate to the battery charge level as indicated in the LED Safety
Status Indicators table (previous page).
CAPR Helmets are equipped with a switch which adjusts the operating airow. When the Helmet is rst turned on it will start at a
low level, then the airow will increase to a preset point according to the switch position.
12 Back Headband Comfort Pad
Provides cushion for comfort and sizing for very small head sizes. Attached via Hook and Loop, and removable. For
replacement, refer to Section 14.
13 FCC Rear Adapter Post (optional, not on all models)
14 FCC (Rear) T-Tab
Locking/Release mechanism to provide secure mounting and dismounting of the FCC.
15 Rear Headband Ratchet
Head circumference adjustment knob.
16 FCC Side Adapter Posts
Attachment posts for the DLC Face Seal on both sides.
17 FCC Front Adapter Post
Front alignment post that mates with the front FCC hole.
18 FCC Gasket
Provides seal against DLC
 Loading...