Page 46 P/N 03521015 Rev K
11. Instructions For Use: Helmet Liner
Helmet Headband Liner: O.N. 2071-01; PN 03531021
CAUTION
Prior to assembly, inspect and verify the Liner mounting holes (4) are in good condition. If the mounting holes are
worn and connections to the helmet are weak or loose, replace the Liner.
Always assemble the Helmet Liner to a Helmet that already has a Helmet Protector or Filter Cartridge attached.
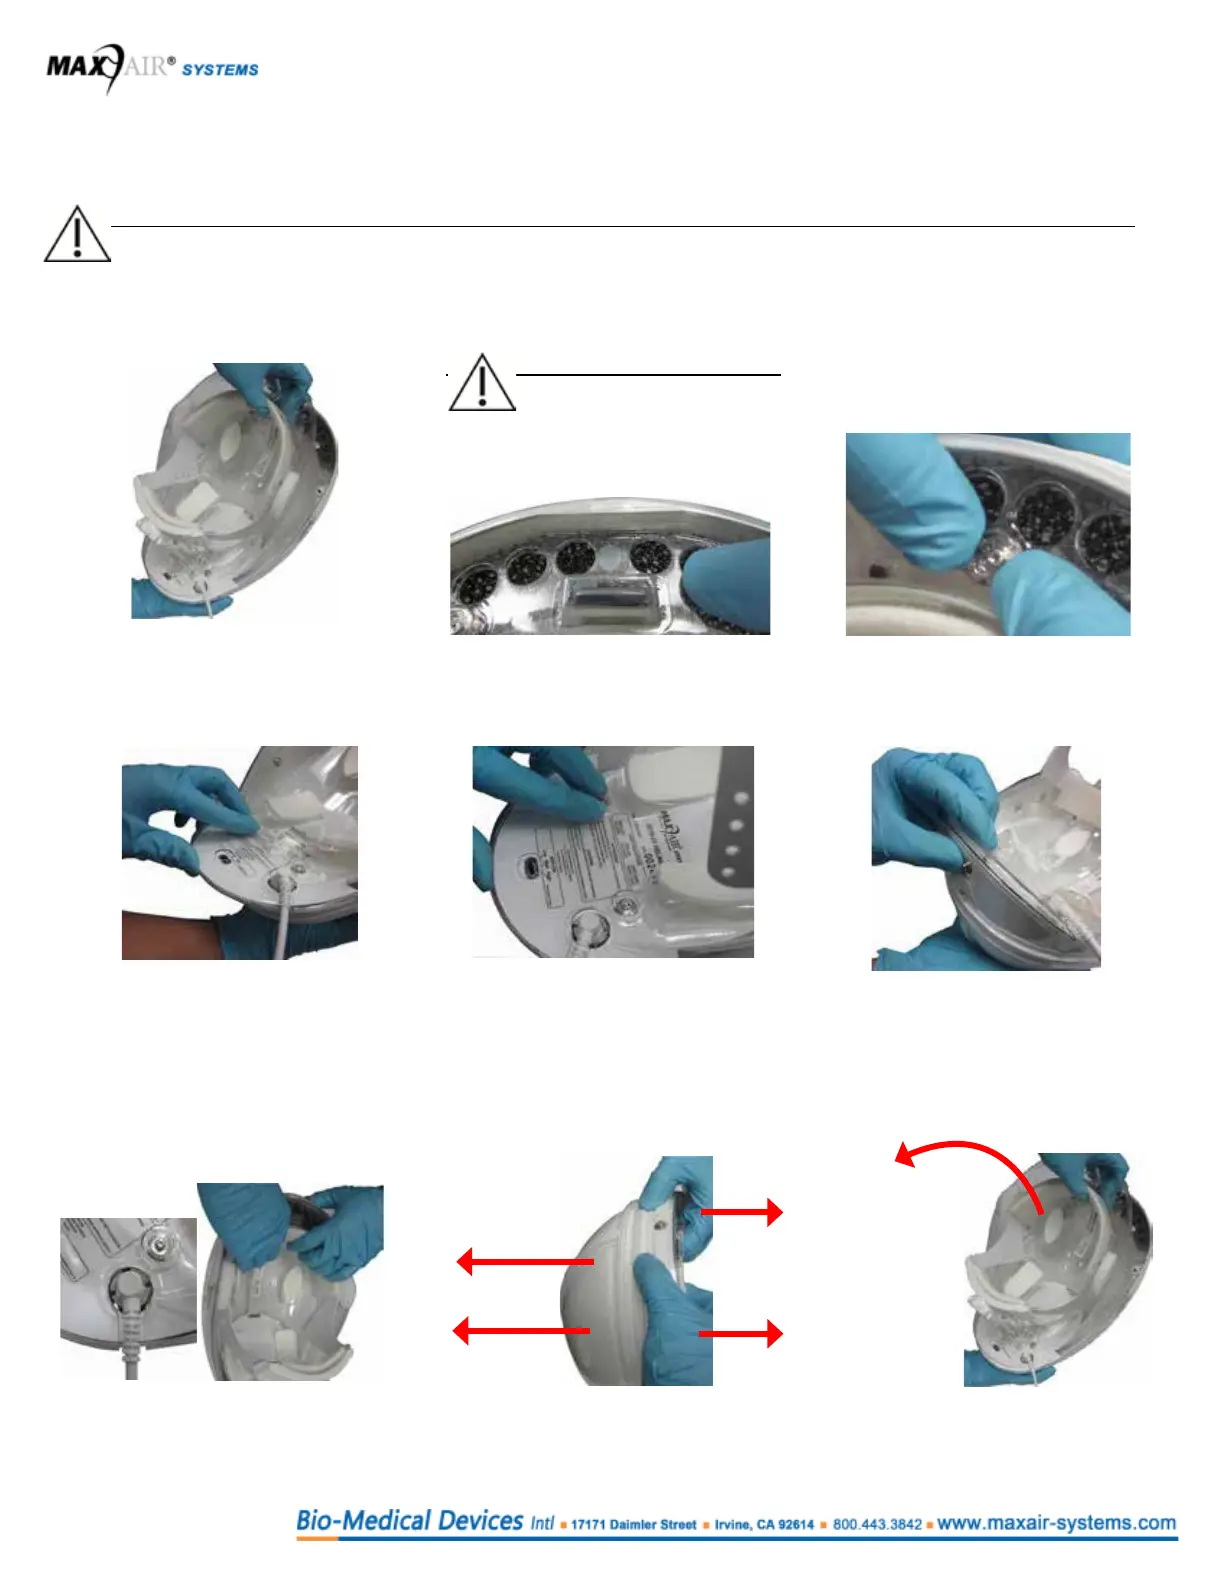
Assembly
NOTE
The Helmet Liner front
should be “caught” in the
recessed area, front lip at
the Helmet front.
1. Support the Helmet with one hand and
position the Liner inside the Helmet.
Adjust the power cord over the power
cord slot.
2. Align and place the Liner front
bottom edge under and against the
front lip of the Helmet.
3. Front Left and Right: Align and snap
down the Liner front holes to the
Helmet front Snaps with your thumbs.
4. Push the rear edge of the Liner inward
with your thumb inward. Align the
rear Liner holes over the Helmet rear
snaps.
5. Rear Left and Right: Snap the
Liner rear holes on to the Helmet
rear snaps.
6. Snap the Liner rear lip against the
Helmet rear by pressing/squeezing
them together.
Dis-assembly
1. Align the Helmet Power Cord to
the Liner cord slot. Grasp the Liner
headband with both hands.
2. Apply force with thumbs and ngers in
opposite directions to disengage the
front mounting snaps.
3. Disengage rear mounting snaps
by pulling the Liner away from
the Helmet.