Page 70 P/N 03521015 Rev K
Donning
`
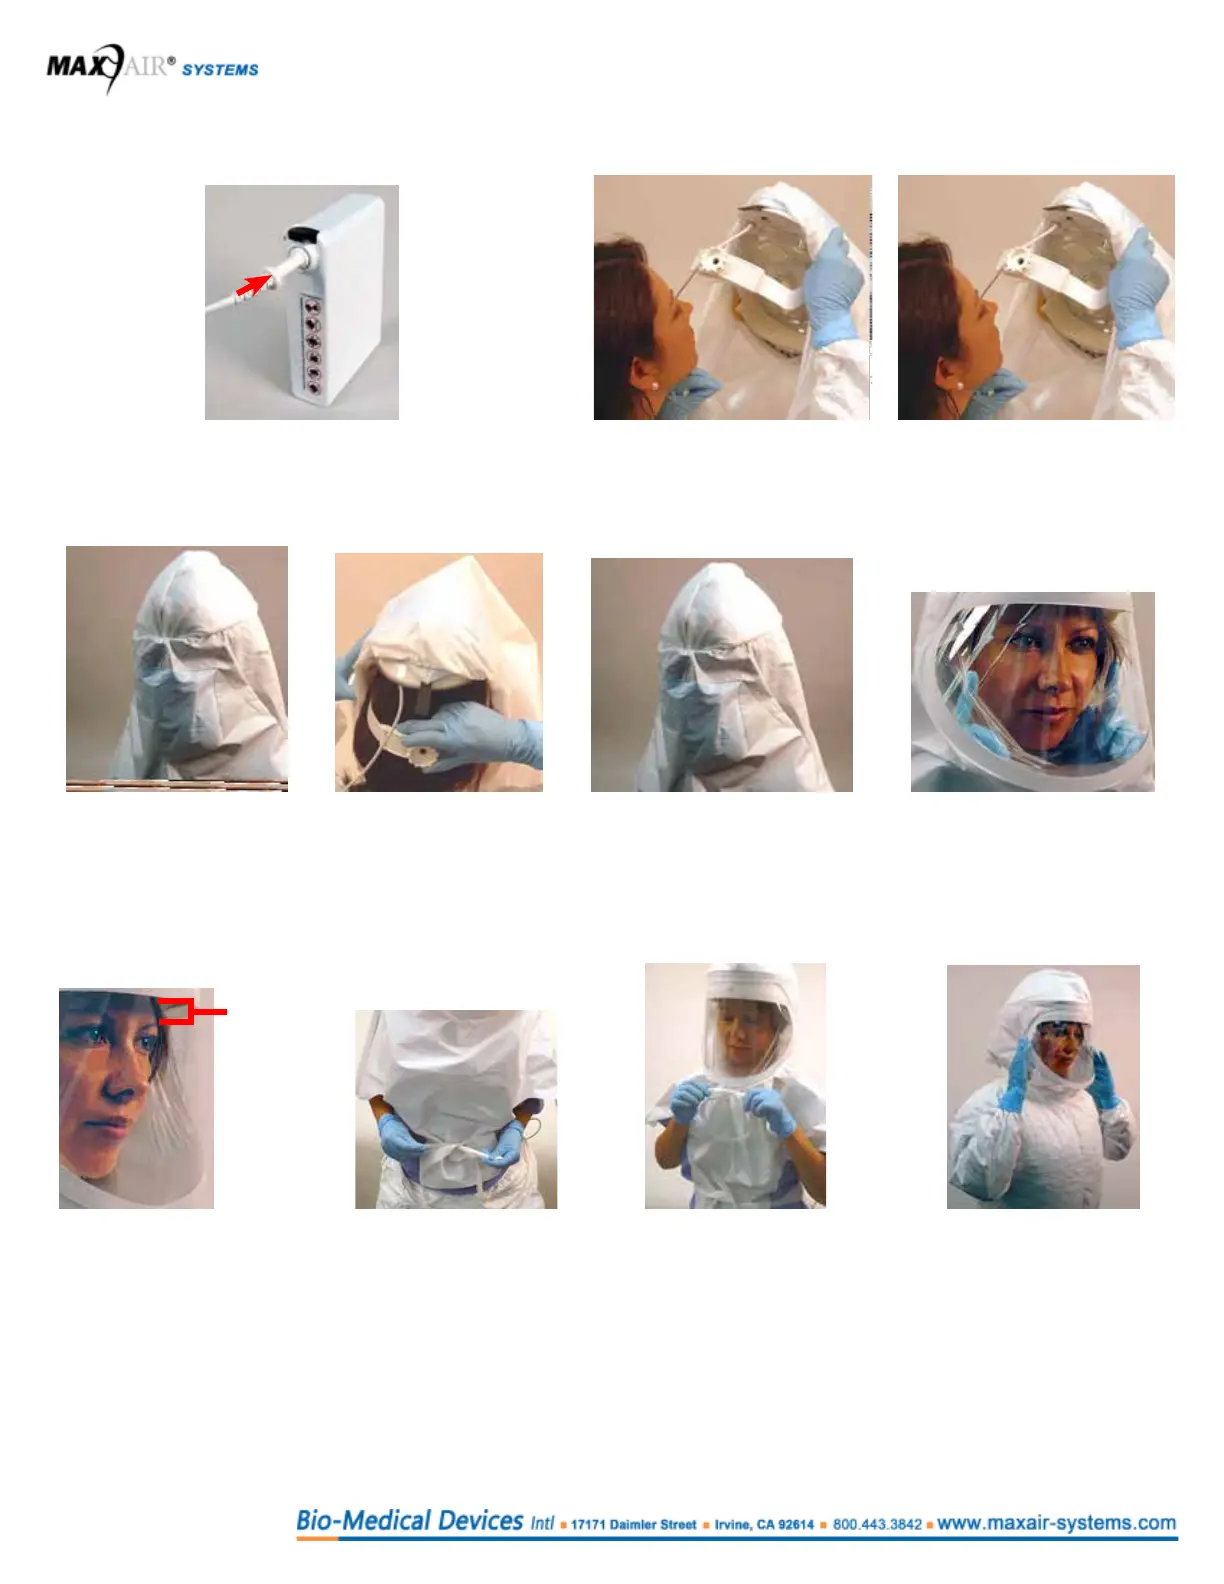
9. Connect the Helmet Power Cord to the Battery. Push
the Power Cord Connector into the Battery Receptacle
until the Secure Connection audibly clicks.
10. Loosen rear Ratchet Knob
(counterclockwise).
11. Hold Helmet in one
hand; pull Cuff down
with other hand, and
place chin into Cuff.
12. Pull Helmet over and
down onto head.
13. Secure Helmet by
tightening Ratchet
Knob as tight as
comfortably possible,
while ensuring stability.
14. Pull back of Hood over, and
down behind Helmet.
15. Slide ngers between
face and Cuff on both
sides from chin to
temples to ensure
slight Cuff-to-face
tension*.
16. Ensure that the front
Headband is within
1/2 inch of eyebrows
for good visualization
of the Safety LEDs
17. Pull lower ties around
from back and place
through tie slits in hood
bottom. Tie securely.
18. Pull upper ties around and to
front and tie securely under
Lens. Ties should be within
about 1/2 inch from neck.
19. Suitable body
cover gown is
recommended. Tuck
Hood Shroud under
body cover gown for
optimum protection.
Dofng
Reverse steps 9 thru 19 to doff Helmet and remove Hood.
After disconnecting the Battery from the Helmet, connect it to the Charger (refer to page 38, 12.1 Routine Infection Control
use in med/surg and ED areas, and page 51, 17. Instructions For Use: Charger, for details.
≤ 1/2 inch
(~1.25 cm)