17
TROUBLESHOOTING
TROUBLESHOOTING
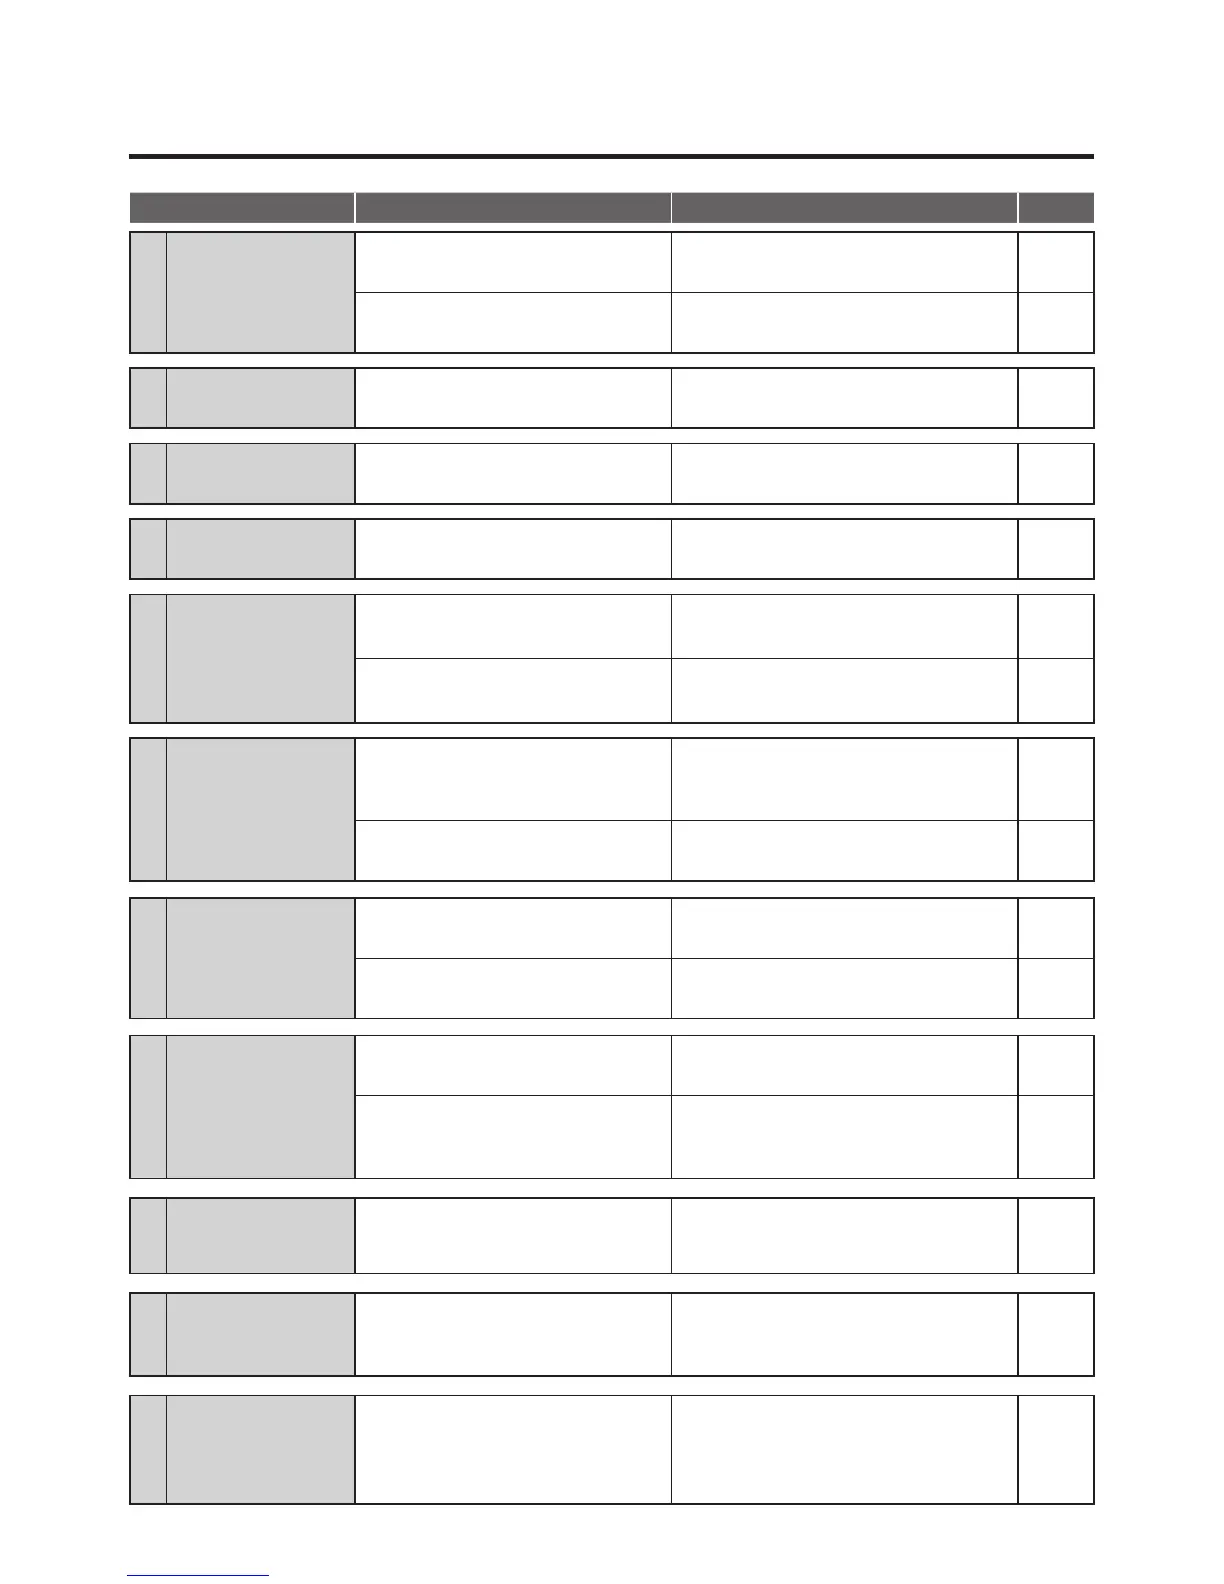
Phenomenon Check Point Remedy
See Page
1
The machine is not
energized by turning
on the power switch.
Check if the power cord is rmly
connected.
Connect the power cord. -
Check if the rear cover is rmly
closed on the back of the main body.
Close the rear cover on the back of the
main body.
P14
2
The red LED indication
lamp is illuminated.
The staples may have run out.
Follow the appropriate reference
procedure.
P12
3
The orange LED indication
lamp is illuminated.
Check if the cartridge is rmly set.
Open the rear cover on the back of the
main body to re-set the cartridge.
P13
4
The green LED indication
lamp is blinking.
The staples may have not been fed.
Hold down the START button for approx.
3 seconds to feed the staples.
P14
5
The green LED
indication lamp is still
blinking after feeding
the staples.
The staples may be jamming at the
end of the cartridge
.
Follow the appropriate reference
procedure.
P15
They may be non-original
consumable goods (No. 110FE)
.
Check if MAX staple rells No. 110FE
are used.
P18
6
The red LED
indication lamp is
blinking.
The driving part may have not
returned to a normal position.
Remove the residual paper if any. Then,
turn off the power switch and on again.
-
The staples may be jamming at the
end of the cartridge.
Follow the appropriate reference
procedure.
P15
7
The paper is not
stapled by pressing
the START button.
Check if the selector switch is set to
MANUAL.
Set the selector switch to MANUAL. P9
The paper may not be in contact
with the stapling position sensor.
Bring the paper into contact with both or
either right or left stapling position sensor.
P9
8
The paper is not
stapled when
inserted.
Check if the selector switch is set to
AUTO.
Set the selector switch to AUTO. P8
The paper may not be in contact
with both the right and left stapling
position sensors.
Bring the paper into contact with both the
right and left sensors. The paper is not
stapled by contacting only one sensor.
P8
9
The cartridge cannot
be removed.
The driving part may have not
returned to a normal position.
Remove the residual paper if any. Then,
turn off the power switch and on again.
-
10
Stapling operation is
performed, but the
paper is not stapled.
The staples may be jamming at the
end of the cartridge.
Follow the appropriate reference
procedure.
P15
11
After clearing the jammed
staples, stapling operation
is performed, but the
paper is not stapled.
The staples may be jamming at the
staple leg cutting section.
Disconnect the power plug immediately
from the plug socket and contact your
dealer or distributor for repair.
-