31
8. INSTALLATION
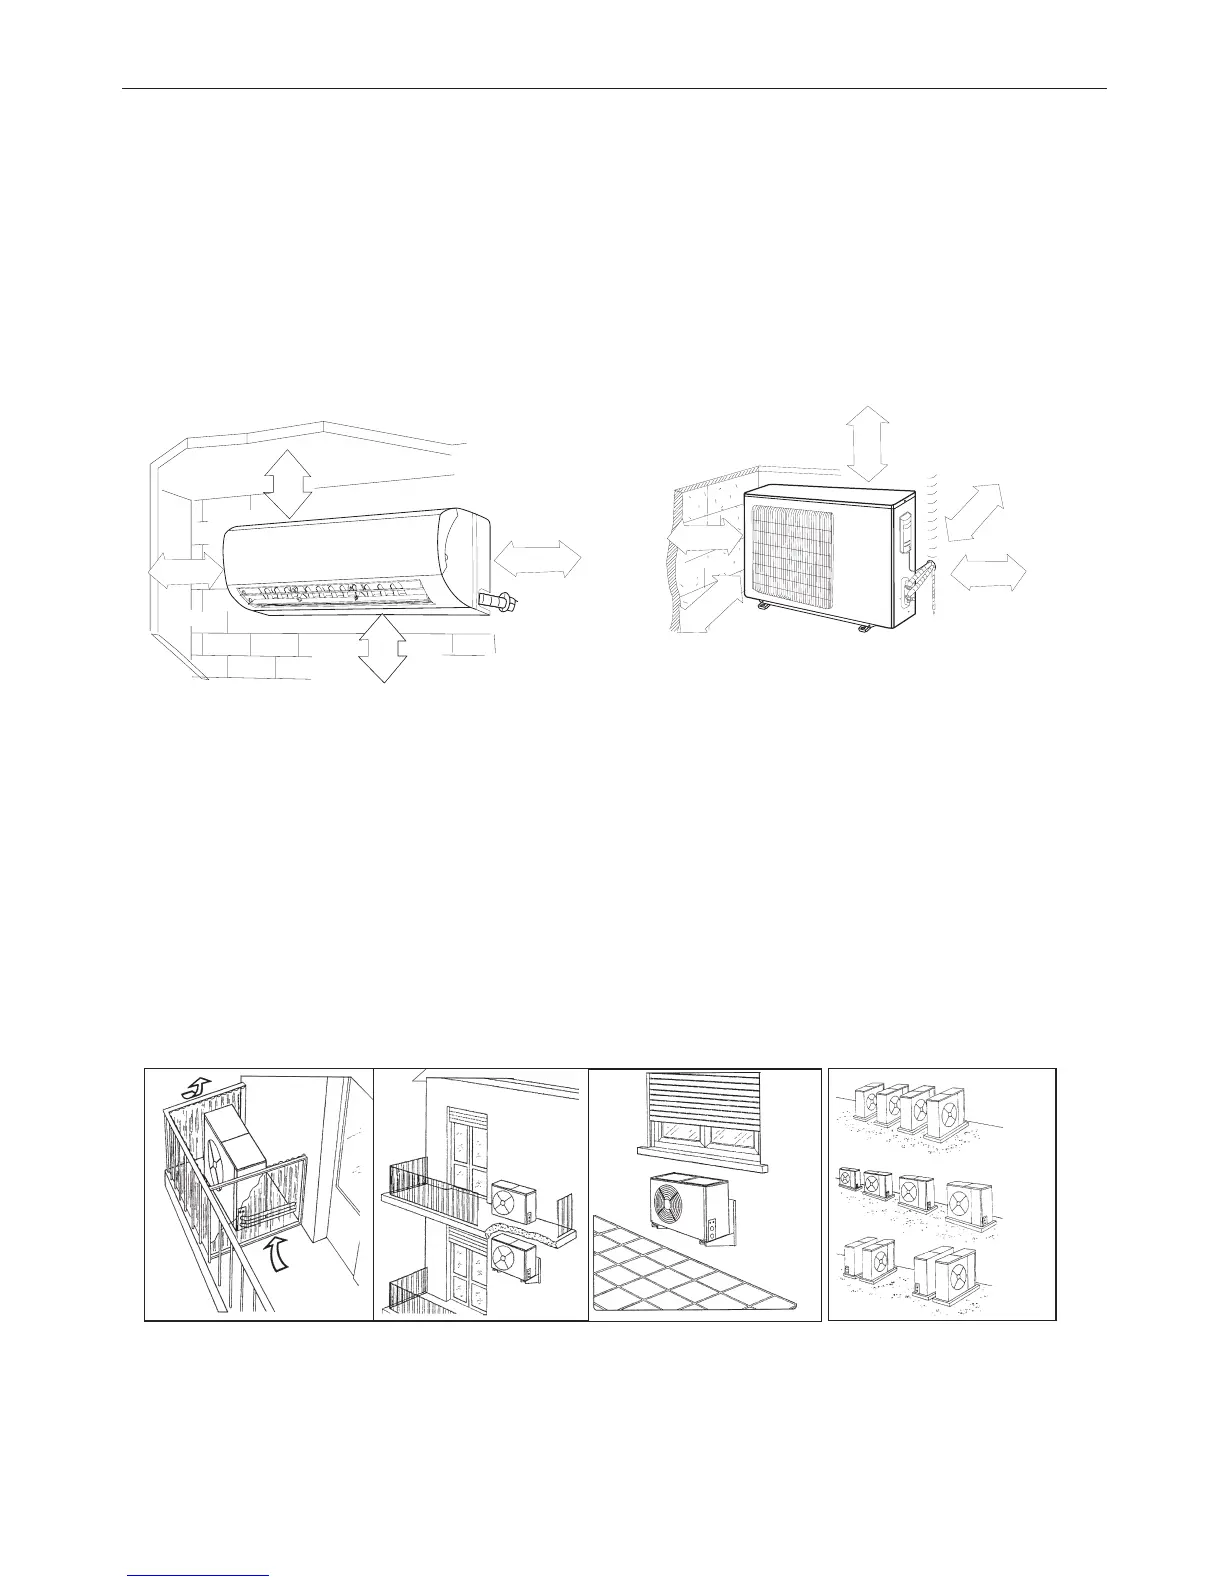
Indoor unit
•Do not expose the indoor unit to heat or steam.
•Select a place where there are no obstacles in front or around the unit.
•Make sure that condensation drainage can be conveniently routed away.
•Do not install near a doorway.
•Ensure that the space on the left and right of the unit is more than 12cm.
•Use a stud nder to locate studs to prevent unnecessary damage to the wall.
•A minimum pipe run of 3 metres is required to minimise vibration & excessive noise.
•The indoor unit should be installed on the wall at a height of 2.3 metres or more from the oor.
•The indoor unit should be installed allowing a minimum clearance of 15cm
from the ceiling.
•Any variations in pipe length will/may require adjustment to refrigerant charge.
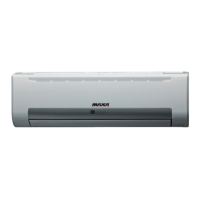
Outdoor unit
If an awning is built over the outdoor unit to prevent direct sunlight or rain exposure, make sure that heat radiation from the conden-
ser is not restricted.
•Ensure that the clearance around the back of the unit is more than 30cm and left side is more than 30cm. The front of the unit should
have more than 200cm of clearance and the connection side (right side) should have more than 60cm of clearance.
Do not place animals and plants in the path of the air inlet or outlet.
•Take the air conditioner weight into account and select a place where noise and vibratiol will not be an issue.
•Select a place so that the warm air and noise from the air conditioner do not disturb neighbours.
•Install the outdoor unit on a rigid base to prevent increasing noise level and vibration.
•Determine the air outlet direction where the discharged air is not blocked.
•In the case that the installation place is exposed to strong wind such as a seaside, make sure the fan operating properly by putting
the unit lengthwise along the wall or using a dust or shield plates.
•Specially in windy area, install the unit to prevent the admission of wind.
•If need suspending installation, the installation bracket should accord with technique requirement in the installation bracket diagram.
The installation wall should be solid brick, concrete or the same intensity construction, or actions to reinforce, damping supporting
should be taken. The connection between bracket and wall, bracket and the air conditioner should be rm, stable and reliable.
•Be sure there is no obstacles which block radiating air.
Rooftop installation:
•If the outdoor unit is installed on a roof structure, be sure to level the unit. Ensure the rocstructure and anchoring method are ade-
quate for the unit location.
•Consult local codes regarding rooftop mounting.
•If the outdoor unit is installed on roof structures or external walls, this may result in excessive noise and vibration, and may also be
classed as a non serviceable installation.
YES
YES
NO