10
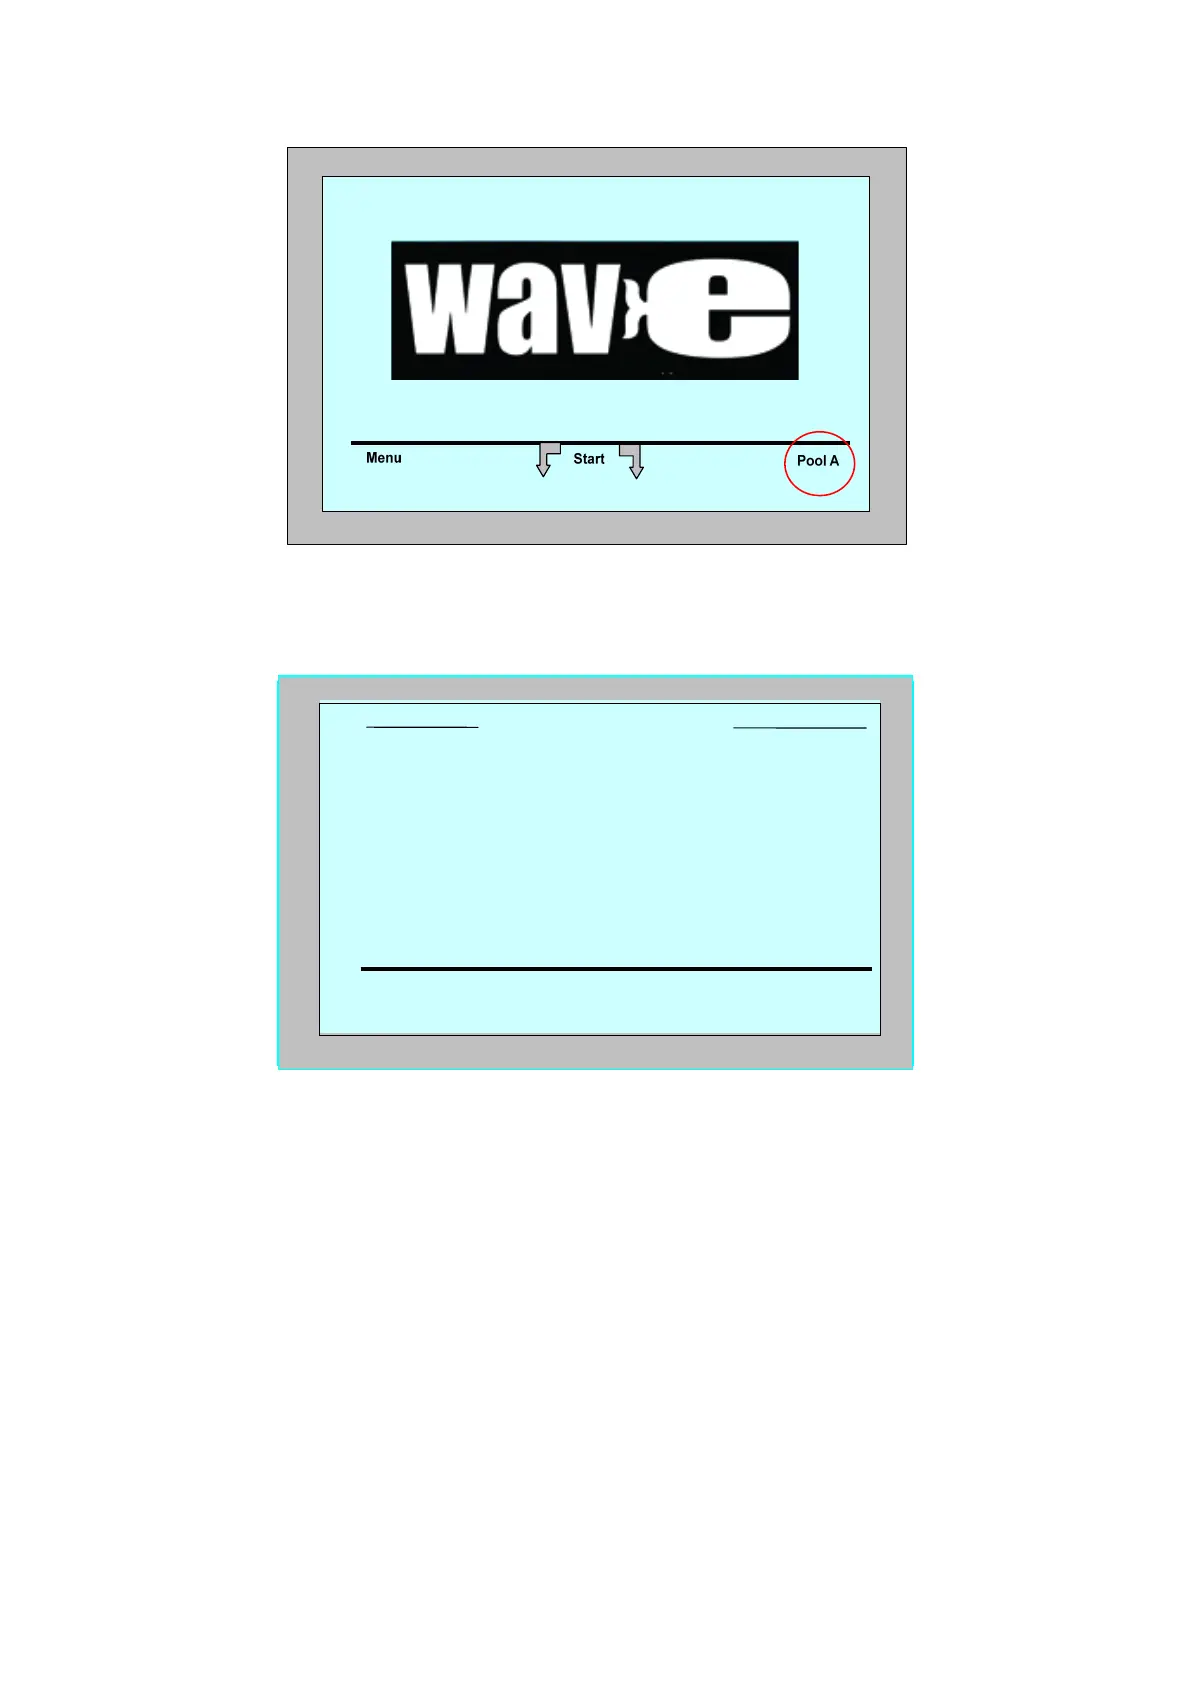
Figure 9: Wave screen showing Pool A as default setting
2. From the Wave screen, press Pool A. The Pool Profile screen opens
(Figure 10).
Figure 10: Pool Profile screen
3. To select a second pool profile, scroll down to Pool B and press Select.
The Wave screen automatically displays showing that Pool B is the
currently defined pool.
4. To configure Pools B, C and D, go to Step 1 of Starting the First
Cleaning Session, page 3.
To go to a previously defined pool setting:
1. From the Wave screen, press the currently displayed pool setting at the
right side of the screen (see Figure 9) to open the Pool Profile screen.
2. Scroll to the required pool and press Select. The Wave screen is
displayed with the chosen pool setting.
Select Pool Profile
select
c
exit
Pool A
Pool D
Pool C
Pool B
d
c
10
Figure 9: Wave screen showing Pool A as default setting
2. From the Wave screen, press Pool A. The Pool Profile screen opens
(Figure 10).
Figure 10: Pool Profile screen
3. To select a second pool profile, scroll down to Pool B and press Select.
The Wave screen automatically displays showing that Pool B is the
currently defined pool.
4. To configure Pools B, C and D, go to Step 1 of Starting the First
Cleaning Session, page 3.
To go to a previously defined pool setting:
1. From the Wave screen, press the currently displayed pool setting at the
right side of the screen (see Figure 9) to open the Pool Profile screen.
2. Scroll to the required pool and press Select. The Wave screen is
displayed with the chosen pool setting.
Select Pool Profile
select
c
exit
Pool A
Pool D
Pool C
Pool B
d
c