15
AMPLIFIER PREPARATION AND MOUNTING (2018.5 Turbo S & 2019 Models)
Before installing the dual amplier plate with the amplier(s) in position, you must prepare the mounting area
in the vehicle to accept the plate. The area where the ECU bracket was removed and set aside is where the
dual amplier plate installs. If a factory-optioned amplier was present, this would also have been removed.
NOTE - These instructions assume both ampliers and all speakers are present in a full Stage 5 System. If
not all components are present in your system, this makes upgrading much easier.
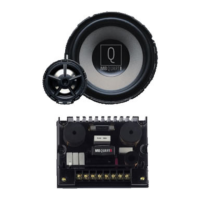
STEP 1 – SET THE ECU AND BRACKET BACK IN
PLACE*
Set the Dynamics ECU (if present) and ECU mounting
bracket back in its original placement ensuring the wiring
intended for the amplier harness is routed through the
gap area at the forward section of the bracket. Loosely
reattach only the two (2) 10mm rear bolts (nearest the
dashboard) at this point as shown in Figure 10-4. *It is
only important the ECU bracket is back in place for trial
tting of the dual amplier plate. It will not have its nal
reassembly at this step.
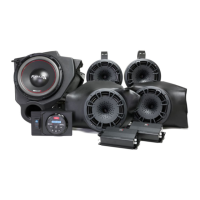
STEP 2 – AMPLIFIER MOUNTING
Mount your amplier(s) on the dual amplier plate in
the conguration shown. This conguration is critical to
make sure you can access your ne tune adjustments
for crossover and bass boost.
STEP 3 – TRIAL FITTING THE DUAL AMP PLATE
With the ampliers mounted to the plate, place it into
position atop the ECU bracket as shown in Figure 10-6.
Be sure there is free movement of the wiring harness
with enough length to connect to the amplier’s on-
board connectors. Loosely t the remaining two (2)
10mm bolts from the ECU bracket to check the t of the
dual amp plate. Connect the power and speaker wiring
to the harness as labeled. Do not zip tie anything at this
point as the amp plate will not have its nal reassembly
until after the system has completed testing.
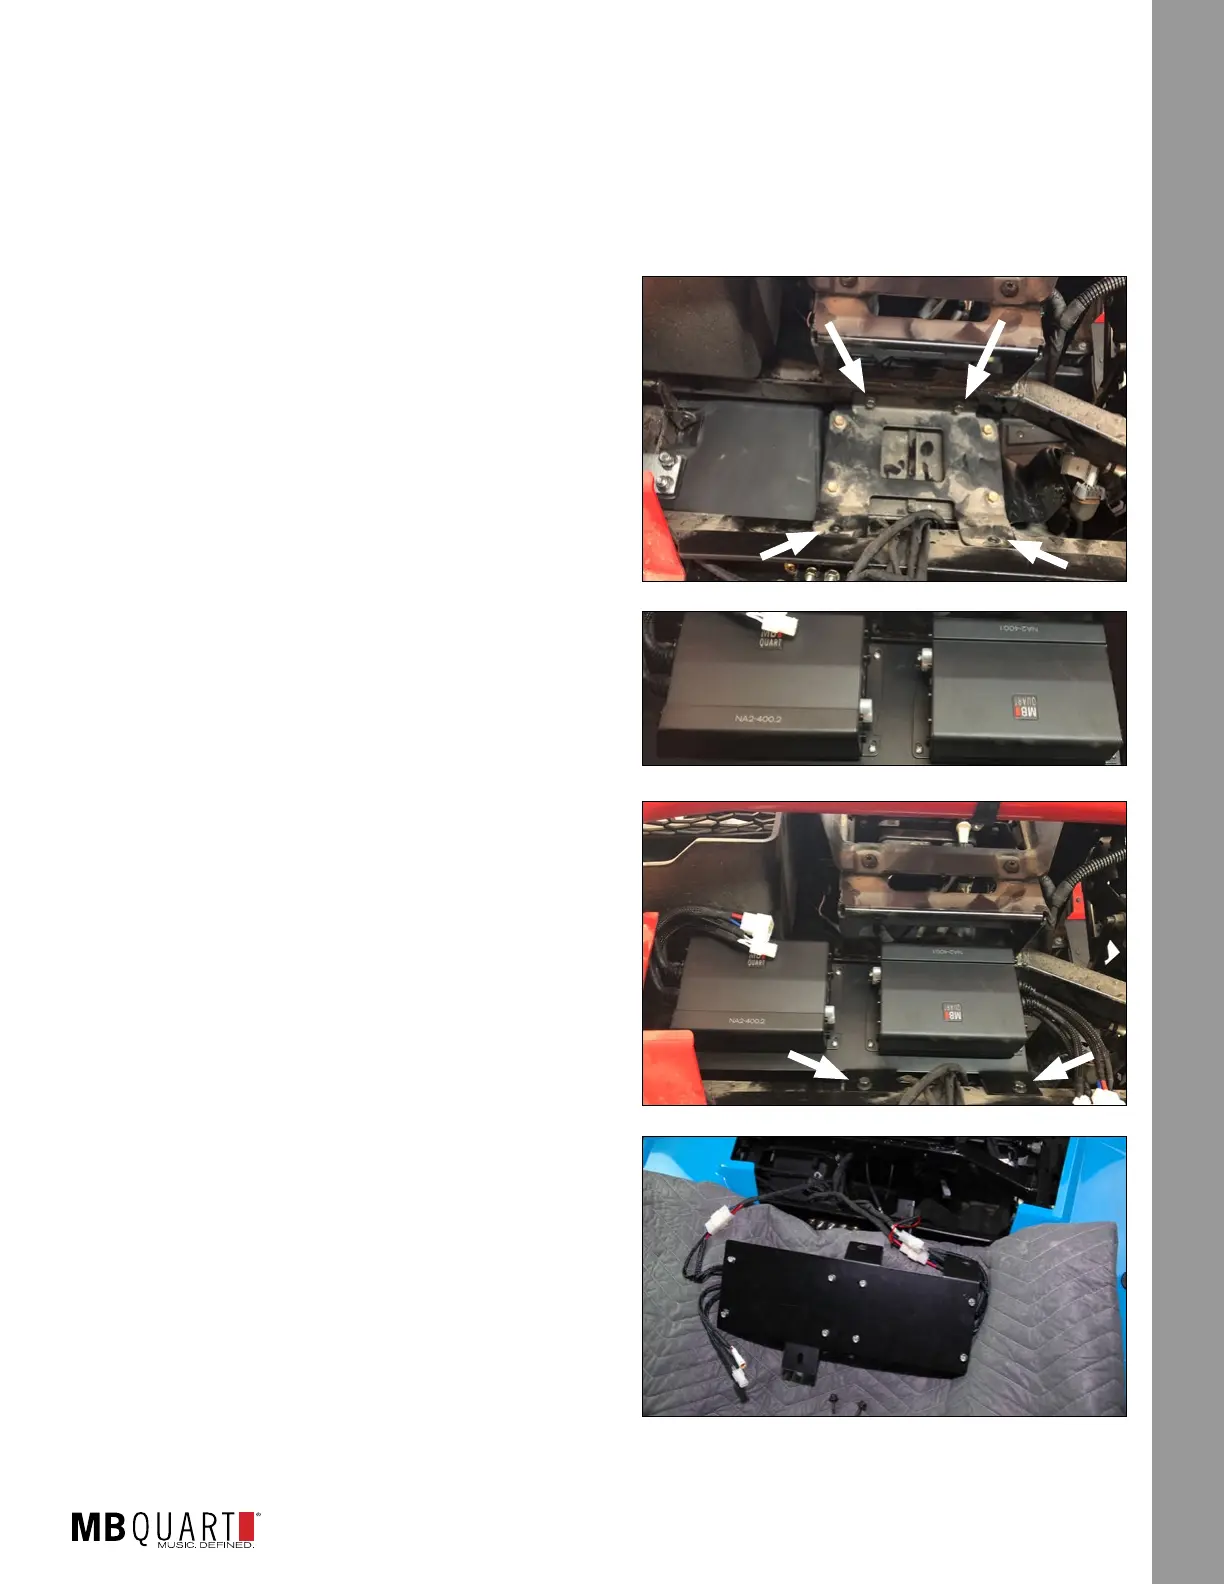
STEP 4 – REMOVE DUAL AMP PLATE AND FLIP
OVER, REMOVE ECU BRACKET
With the ampliers connected to the wiring harness,
place a towel or blanket over the open hood area.
Remove the rst two (2) 10mm bolts for the amp plate,
remove the plate and ip it over on the towel to avoid
scratching the amplier heatsinks. Next remove the
remaining two (2) 10mm bolts from the ECU mount (if
present) and place the ECU to the side as when initially
disassembled on page 10. This will allow you to continue
working on the other steps of the installation until you’re
ready to power up the system, complete nal testing and nalize the reassembly of the ECU bracket and
dual amp plate.
Figure 10-4
Loosely Reattach (2) 10mm
Leave Open
Leave Open
Figure 10-5
Figure 10-6
10mm
10mm
AMPLIFIER MOUNTING
Figure 10-7