8
©2019 Maxxsonics USA, Inc.
DASH AREA DISASSEMBLY 2013-2018 (Non-Turbo S) RZR - Continued
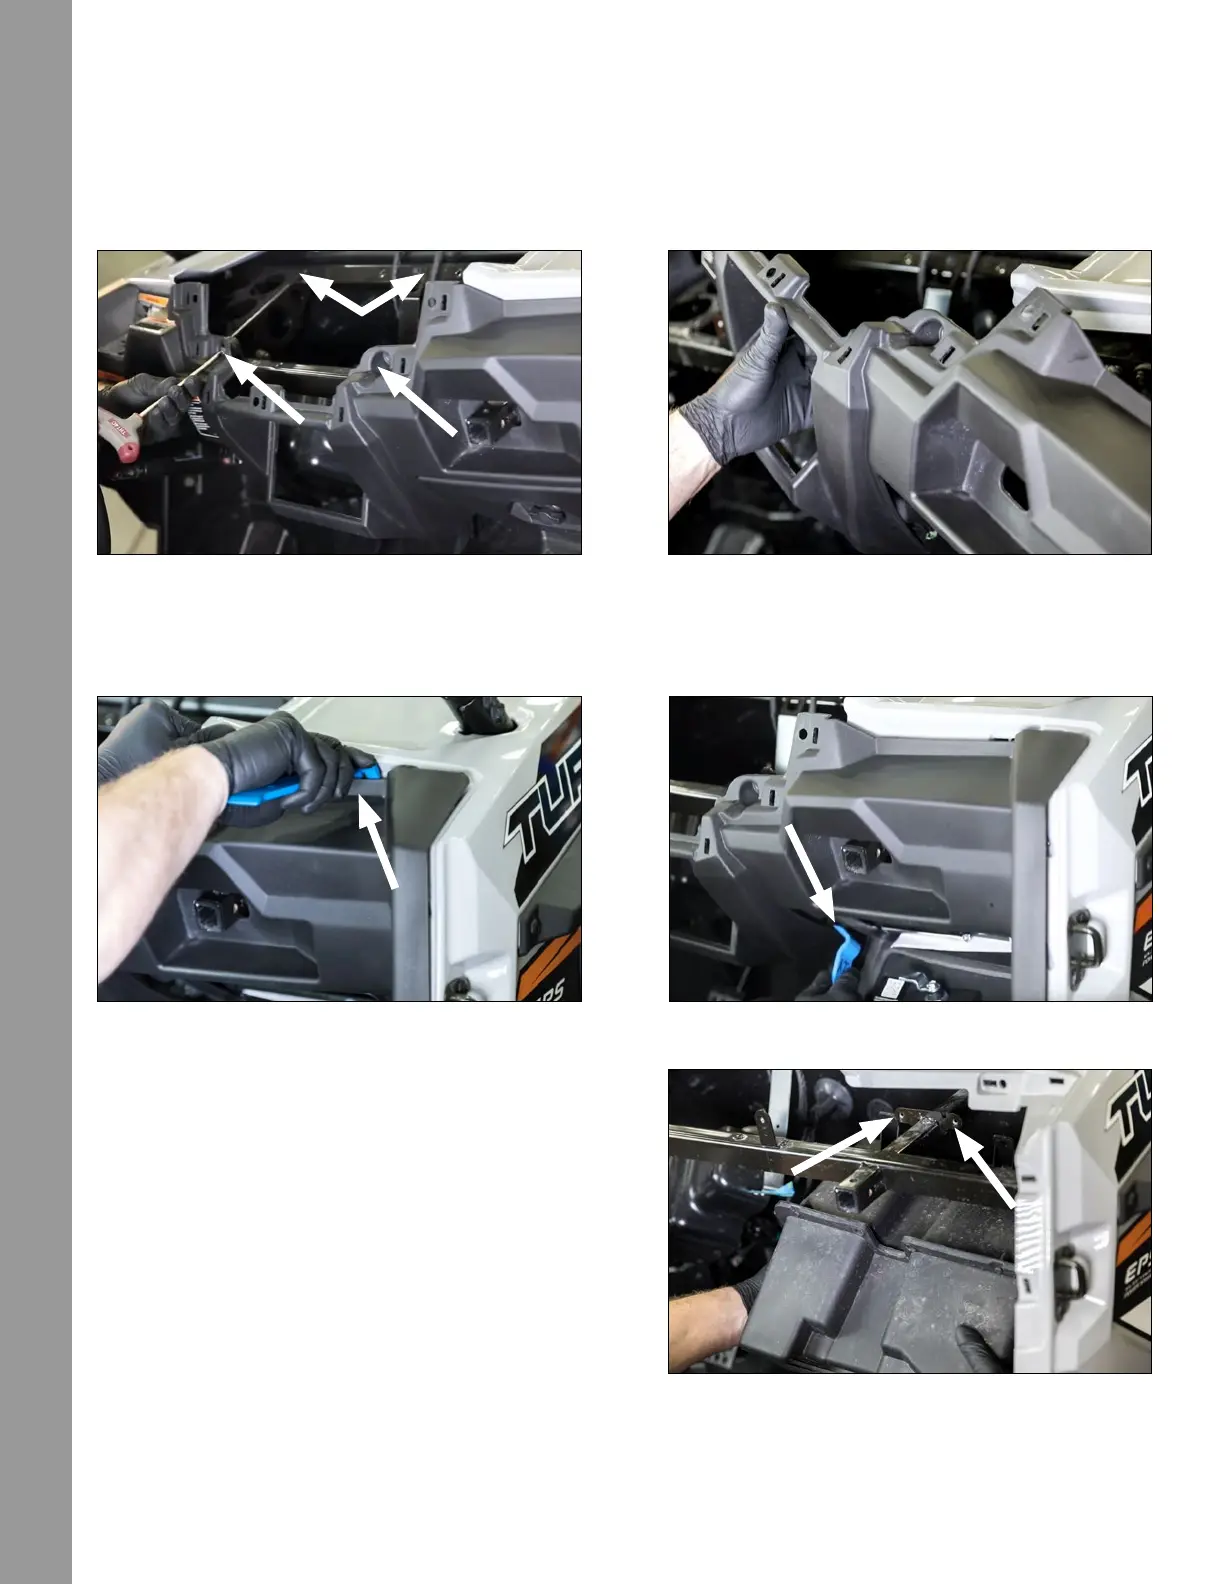
STEP 5 – REMOVE DASH FASCIA CENTER HARDWARE
Remove (4) Torx screws from the front of the dash through the openings shown in Figure 6-5a. The rst set
of Torx screws will come out allowing access to the second (upper) set further back in the dash. Next, pull
the only the center of the dash loose as shown in Figure 6-5b.
STEP 6 – REMOVE DASH FASCIA HARDWARE
Using a large panel removal tool, release the side clips from the passenger’s side front dash assembly as
shown in Figure 6-6a and 6-6b. Slowly ensure you account for all clips removed.
STEP 7 – REMOVE THE GLOVE BOX
Remove (2) 10mm bolts on the top of the glove box
where it is fastened to the grab bar framework. See
holes in Figure 6-7. The glove box will easily slide
out. A different mounting method is used for the new
subwoofer.
Go to page 12 for next steps on these model year
vehicles.
Figure 6-5bFigure 6-5a
Figure 6-6bFigure 6-6a
Figure 6-7
DISASSEMBLY