12
CD Operation
General Operations:
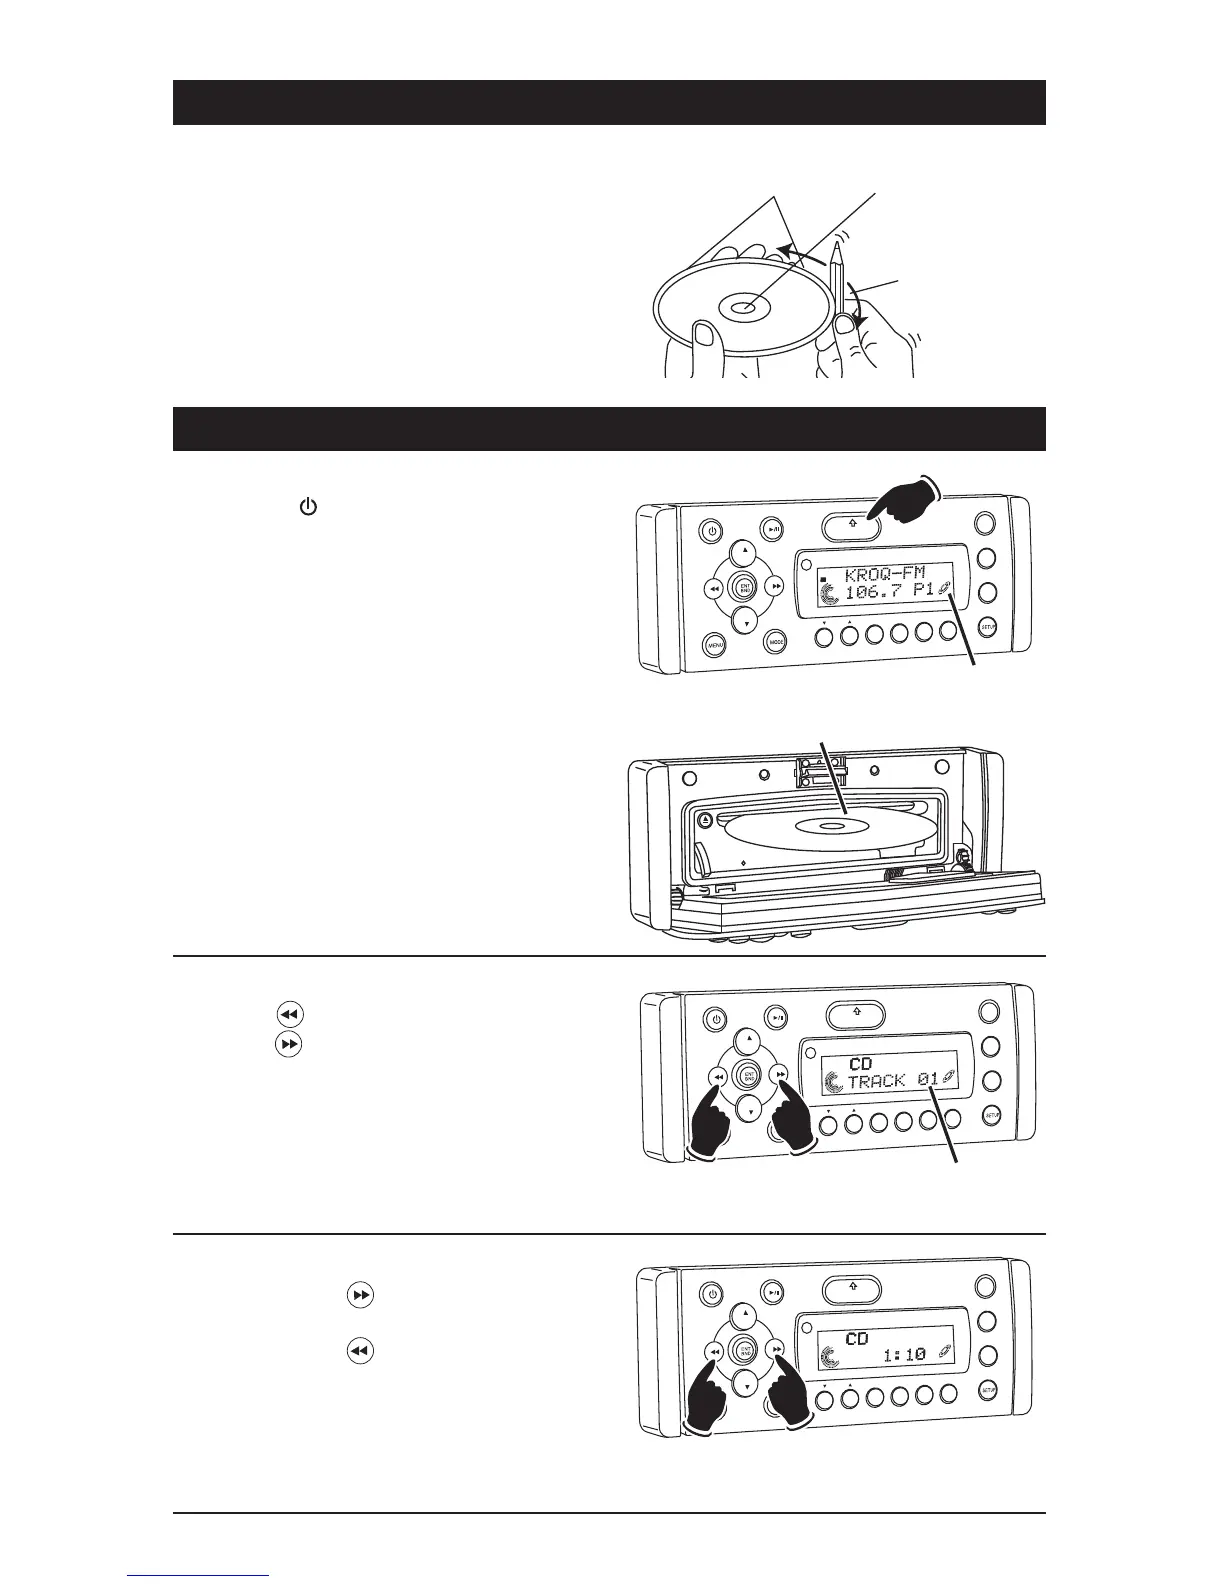
1. Press the button to turn the unit On.
2. Press the OPEN button to fold down the front
panel to access the CD player slot.
3. Gently insert the disc into the slot with the
label side up. The unit will automatically load
the disc.
Note: If a CD does not auto-load, DO NOT
FORCE it into the slot, as you may already have
a CD loaded as indicated by the inserted disc
icon.
VO
L
LOU
D
VOL
MU
TE
D
IM
SMOD
i
Pod MEN
U
OPEN
1
2
3
4
5
6
ASM
DISP
EQ
SUB
W
SH
F
RPT
SC
N
DIR CAT
ST
Inserted Disc Icon
Label Side Up
CD Track Selection:
Press the button to select a lower track.
Press the button to select a higher track.
The track number will appear in the display.
VOL
LOU
D
VOL
MU
TE
D
IM
OPEN
1
2
3
4
5
6
ASM
DSP
EQ
SUB
W
SHF
R
PT
SC
N
D R/CAT
Track
Number
Lower
Track
Higher
Track
Disc Warnings (Continued)
Preparing New Discs with Rough Spots:
A new disc may have rough edges on its inside and
outside edges. If a disc with rough edges is used,
the proper setting will not be performed and the
player will not play the disc. Therefore, remove the
rough edges in advance by using a ball point pen
or pencil as shown. To do this, press the side of
the pen or pencil against the inside and outside
edges of the disc.
Rough spots on
outside edge
Rough spots on
inside edge
Ball point pen
or pencil
Fast Forward/Fast Reverse:
Push and hold the button to fast forward the
disc.
Push and hold the button to fast reverse the
disc.
VOL
LOU
D
VOL
MU
TE
DM
OPEN
1
2
3
4
5
6
ASM
DISP
EQ
UB W
SH
F
R
PT
SC
N
DIR CAT
Fast
Reverse
Fast
Forward