20
piezo smart - manual of use and maintenance
21
piezo smart - manual of use and maintenance
06.3 Sterilisation procedure
WARNING: Sterilisation must be carried out using a steam autoclave only.
Do not use any other sterilisation procedure (dry heat, radiation, ethylene oxide, gas, low-tempera-
ture plasma, etc..).
DANGER: Infection control - Sterilisable parts.
To avoid bacterial and virus infections, always clean, disinfect and sterilise the following compo-
nents after each treatment:
1 Handpieces;
2 Inserts;
3 Torque wrench for tightening the inserts.
These components are made of materials able to withstand a maximum temperature of 135°C for a
maximum of 20 minutes.
The autoclave sterilisation process must be carried out using either of the following parameters:
- Cycle at 121°C for 16 minutes;
- Cycle at 134°C for 4 minutes.
All the stages of sterilisation must be carried out by the operator in accordance with EN 554 and
EN 556 standards.
06.4 Autoclave sterilisation of the handpiece
WARNING: Do not dip the handpiece into disinfectants or other types of liquid as this
could cause damage to it.
WARNING: Do not sterilise the handpiece with an insert fitted in place.
WARNING: The electric contacts of the handpiece connector and of the cord connector
must be dry.
Upon completion of the sterilisation cycle and before connecting the handpiece to the cord, make
sure that the electric contacts of both connectors are perfectly dry. If necessary, dry the contacts by
blowing air on them with the syringe.
WARNING: Allow the handpiece to cool completely after a sterilisation cycle before using
it again.
1 Clean the handpiece carefully, paying special attention to the threaded pin onto which the
inserts are screwed and tiio the adjacent ring-shaped cavity.
2 Disinfect the handpiece using a cloth moistened with a mild disinfectant solution with a neutral
pH.
3 Dry the electric contacts by blowing air onto them with the syringe.
4 Place the single handpiece (without any inserts) inside a disposable bag and seal it.
5 Sterilise the handpiece in the autoclave.
06.5 Autoclave sterilisation of the inserts
1 Clean each insert (preferably in an ultrasound tank) and rinse with distilled water.
2 Dry the insert.
3 Disinfect the insert using a mild disinfectant solution with a neutral pH and dry it thoroughly .
WARNING: Before starting the sterilisation cycle, make sure that the insert is completely
dry also internally. To do this, blow air through the hollow part with the syringe.
This will prevent stains or patches from appearing on the surface of the insert.
4 Place the inserts in separate disposable bags and seal them.
5 Sterilise the inserts in the autoclave.
06.6 Autoclave sterilisation of the torque wrench for tightening the
inserts
1 Clean the wrench.
2 Disinfect the wrench using a mild disinfectant solution with a neutral pH and dry it thoroughly.
3 Place the wrench in a disposable bag on its own and seal the bag.
4 Sterilise the wrench in the autoclave.
07.0 Scheduled maintenance
07.1 Cleaning of the water circuit
1 The device has a Clean function for cleaning the water circuit (see point 06.1).
Press the pedal and hold it down for the time considered most suitable for completing the cleaning
cycle.
2 The cleaning cycle can be carried out with or without the handpiece and the insert fitted.
3 Empty the residual water from the circuits by removing the bottle and operating the device for a
few seconds.
4 If the cleaning cycle has been carried out without the handpiece, it is important to dry the elec-
tric contacts of the cord by blowing air onto them with the syringe before starting any applica-
tion.
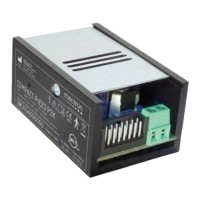
07.2 External power supply unit
DANGER: Check the housing and the cables of the external transformer periodically to make
sure that they are intact. If it is damaged, replace it with a Mectron original spare.
07.3 Replacement of the peristaltic pump
WARNING: Before carrying out any activities on the peristaltic pump, it is necessary to:
- Remove the bottle (see point 04.6);
- Empty the water circuit by operating the device. Any residues of liquid could accidentally pen-
etrate inside the device.
1 Disconnect the tubes of the peristaltic pumps from their couplings.
2 Press the two side tabs (Fig.4 - Ref. C) and pull out the body of the pump.
3 Insert the new pump following the instructions under point 04.2.