POWER TRIM
90-883728 JULY 2001 Page 5B-27
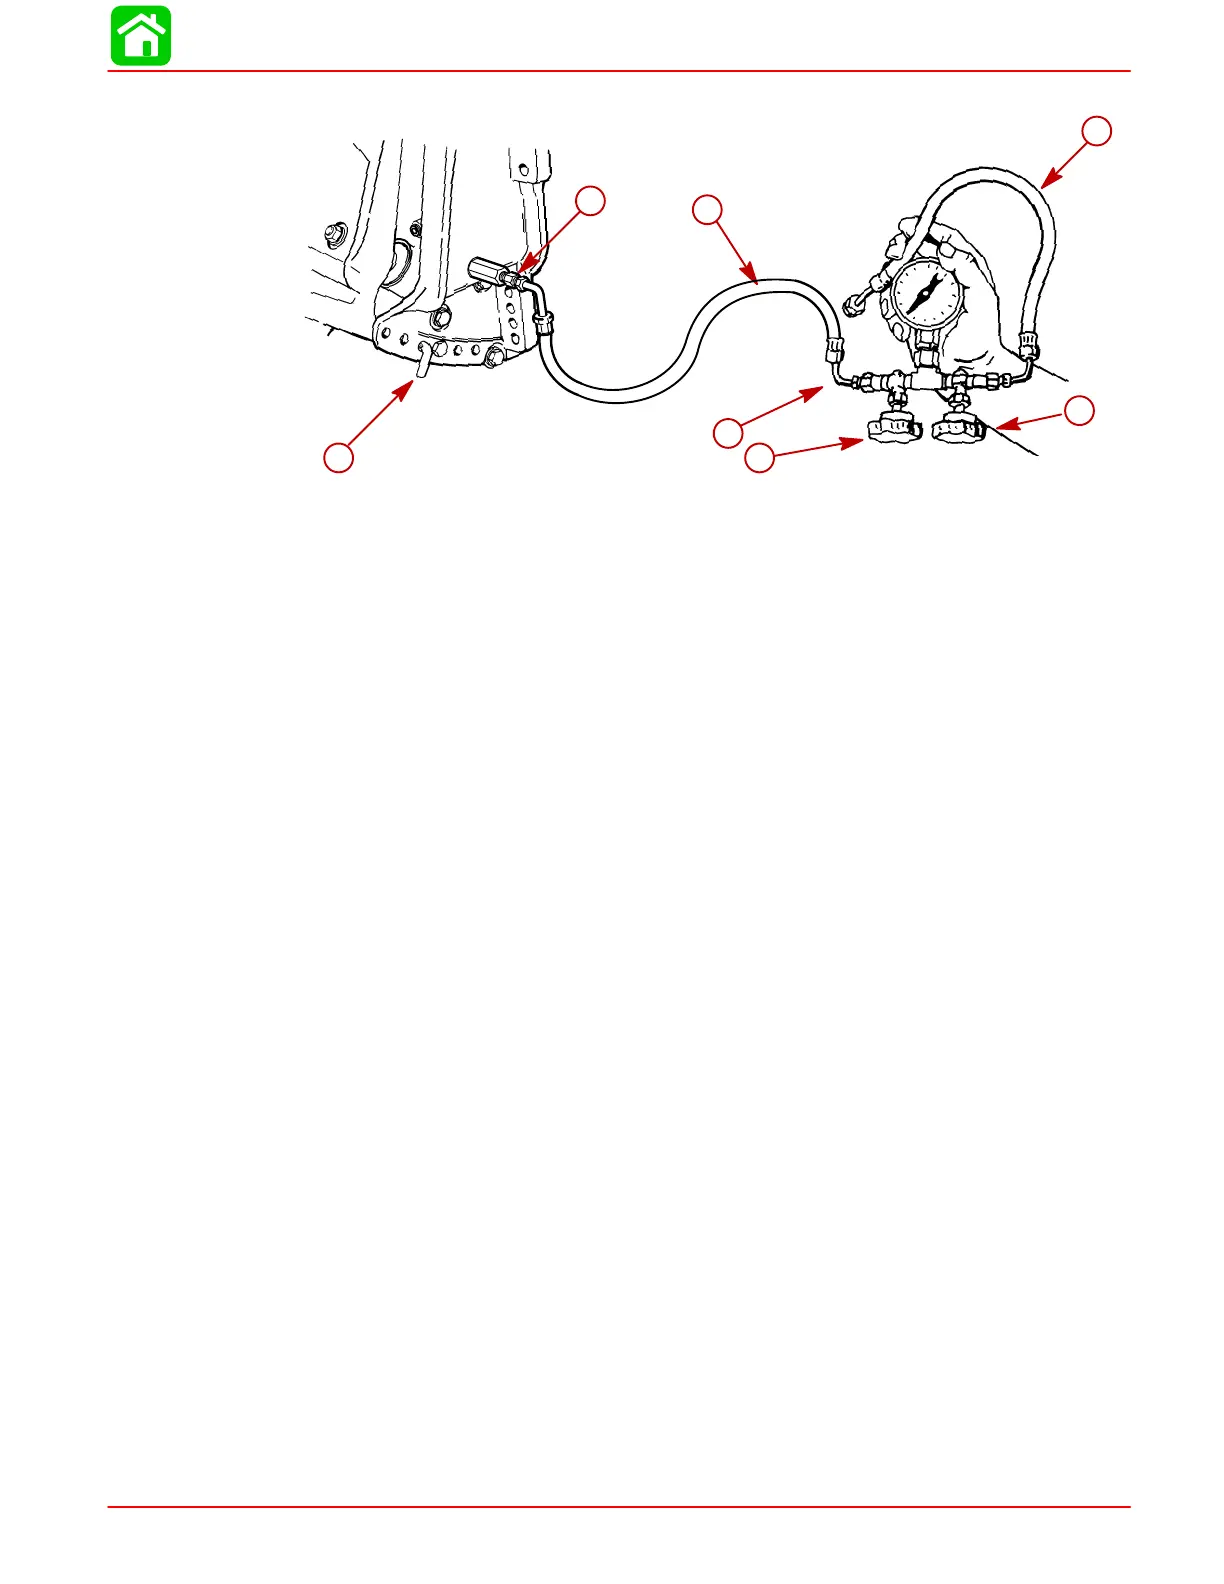
5. Thread hose from Test Gauge Kit (91-52915A6) into brass fitting on adaptor.
54459
e
b
d
c
a
f
g
a
b
c
d
e
f
g
a-Brass Fitting
b-Test Gauge Assembly
c-Tilt Pin (Position in Hole Shown)
d-Hose
e-Hose (Not Used)
f-OPEN Valve
g-CLOSE Valve
6. Reinstall fill plug.
7. Disengage tilt lock lever.
8. Open valve (f) and close valve (g).
9. Run trim “DOWN”. Minimum pressure should be 500 P.S.I. (35 kg/cm
2
).
10. Tilt outboard full “UP” and engage tilt lock lever.
11. Slowly remove “Fill” plug to bleed pressure.
12. Remove test gauge hose and adaptor.
13. Reinstall manual release valve and secure valve with circlip.
14. Retighten “Fill” plug.
NOTE: If pressure is less than 500 PSI (35 kg/cm
2
), troubleshoot system per instructions
on Page 5B-15.
 Loading...