POWER TRIM
Page 5B-30 90-883728 JULY 2001
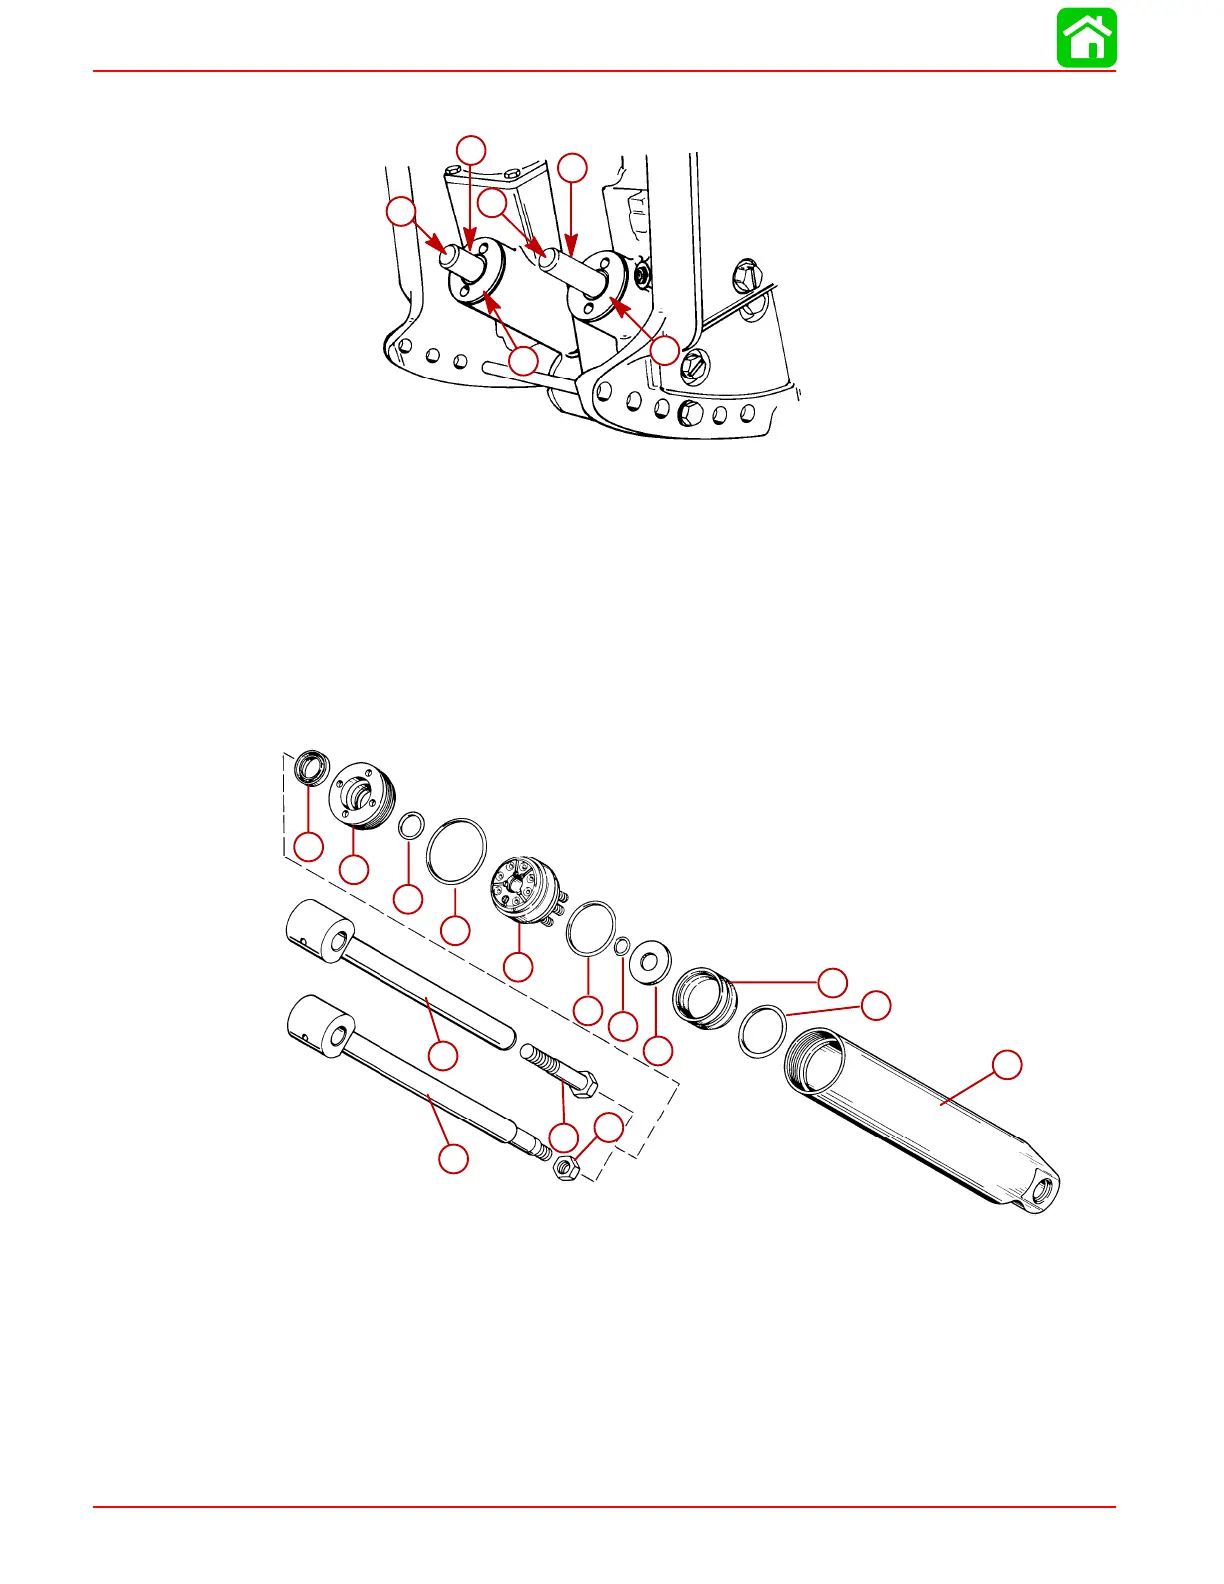
2. Install trim rods and caps. Use installation tool (91-44487A1) or spanner wrench
(91-74951) to tighten caps securely.
51353
a
c
a
c
b
b
a
a
b
b
c
c
a-Trim Rods
b-Cylinder End Caps
c-Rod End Rollers (lubricate with Quicksilver Anti-Corrosion Grease or
Special Lubricant 101)
Tilt Ram
REMOVAL - TILT ROD ASSEMBLY ONLY
NOTE: Tilt Rod Assembly can be removed from cylinder without removing entire power
trim system from outboard.
TILT RAM COMPONENTS
1
3
4
2
2
5
2
2
6
7
8
9
2
51372
1
2
3
4
2
2
5
2
2
6
7
8
9
10
11
1-Housing - Tilt Ram
2-O-ring* (5)
3-Memory Piston**
4-Washer
5-Piston Assembly
6-End Cap
7-Oil Seal
8-Bolt (Design 1)
9-Nut (Design 2)
10 - Tilt Rod (Design 1)
11 - Tilt Rod (Design 2)
*O-ring Repair Kit Available, P.N. 811607A1 (Includes item 7, Oil Seal)
**Memory piston (3) for tilt rods (10 and 11) are different and must be used with correct
tilt rod/cylinder assembly. Memory piston for Design 1 tilt rod is flat, Design 2 is dished
to clear nut and thread.
 Loading...