LEFT HAND NON-RATCHETING
Page 6B-36 90-883728 JULY 2001
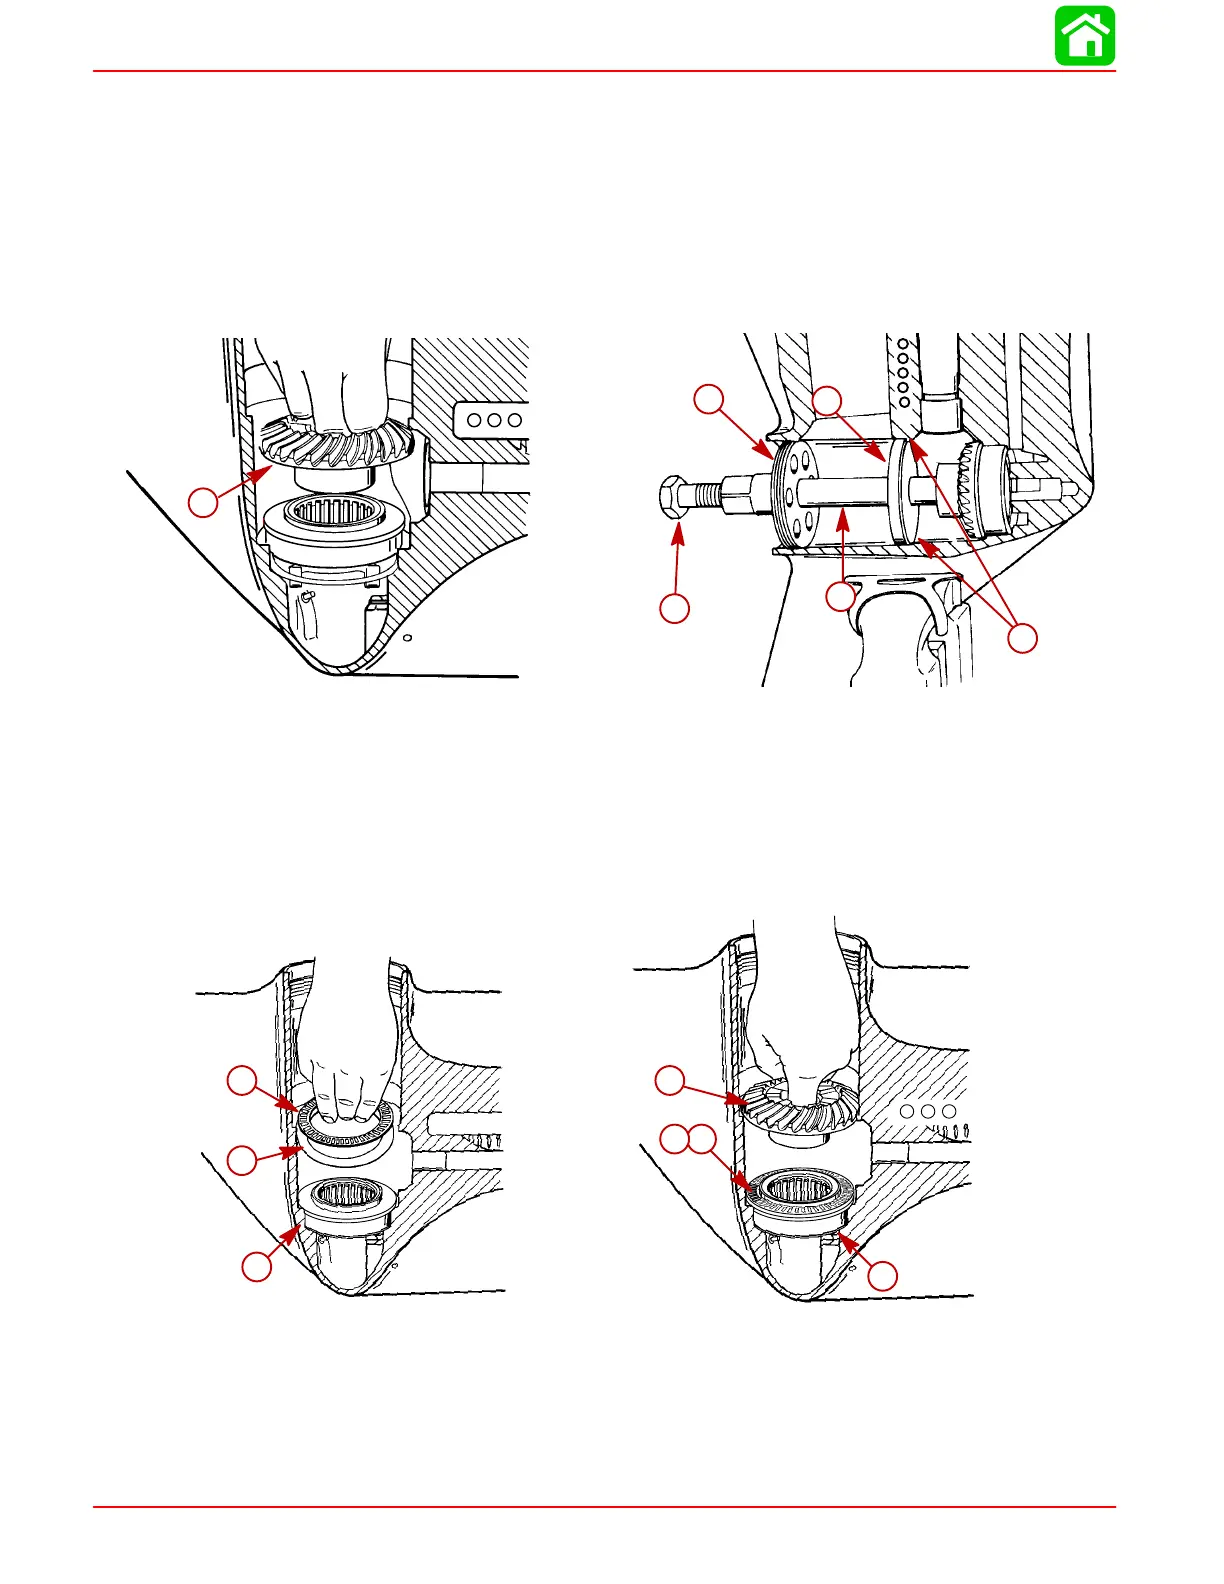
4. Position the reverse gear (without the thrust race or thrust bearing) into the gear hous-
ing and into the adaptor.
5. Install PILOT RING (91-18603) over DRIVER TOOL (91-18605) and seat pilot ring in
gearcase against inner ledge. Thread RETAINER (91-18604) into bearing carrier
threads. Install SCREW (10-18602) into retainer and gently tighten screw against
driver tool while holding retainer securely. Continue to apply pressure against driver
rod until reverse gear/bearing cup adaptor JUST SEATS in gearcase. DO NOT
OVER-SEAT the adaptor as the reverse gear bearing will be damaged. As bearing
adaptor begins to seat, the effort required to turn screw will increase considerably.
d
a
c
b
e
a
55100
a
b
c
d
e
f
a-Reverse Gear
b-Pilot Ring (91-18603)
c-Driver Tool (91-18605)
d-Inner Ledge
e-Retainer (91-18604)
f-Screw (10-18602)
6. After reverse bearing adaptor is seated, remove screw, retainer, driver tool, pilot ring
and reverse gear. Apply Quicksilver Super Duty Gear Lubricant to thrust bearing and
install thrust race and bearing onto bearing adaptor.
7. Reinstall reverse gear into bearing adaptor.
a
55102
d
e
f
g
55101
a
b
c
a-Thrust Bearing
b-Thrust Washer
c-Bearing Adaptor
d-Reverse Gear
e-Thrust Bearing
f-Thrust Washer (under
thrust bearing)
g-Bearing Adaptor
 Loading...