EasyManuals Logo

Mercury Optimax 150 User Manual

Mercury Optimax 150
522 pages
To Next Page IconTo Next Page
To Previous Page IconTo Previous Page
Page #347 background imageLoading...
Page #347 background image
POWER TRIM
Page 5B-42 90-855347R1 JANUARY 1999
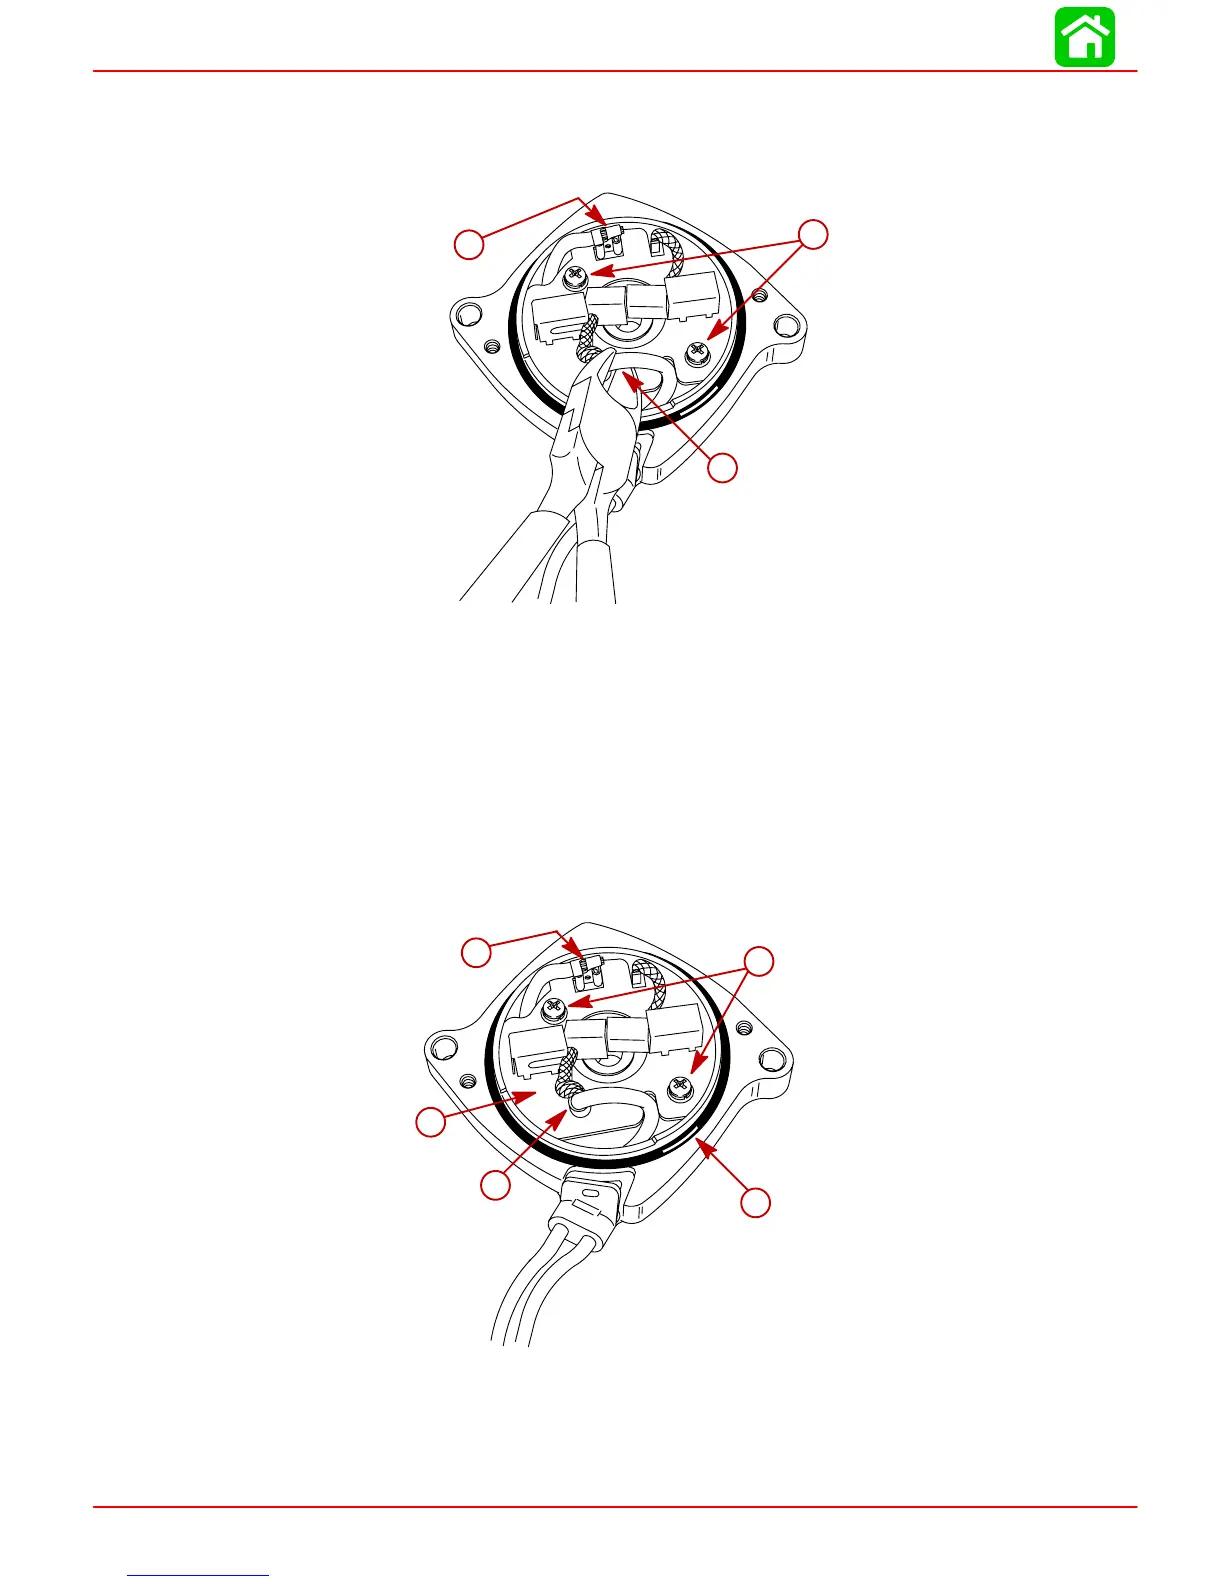
2. To replace brush card, disconnect spade terminal.
3. Cut crimped brush lead.
4. Remove 2 screws securing brush card to end cap.
a
b
c
a-Spade Terminal
b-Crimped Brush Lead
c-Screws
5. Install new brush card (BRUSH and SEAL KIT 828714A1).
6. Crimp metal connector onto motor lead and new brush lead.
7. Connect spade connector motor lead to brush card connector.
8. Secure brush card to end cap with 2 screws and lockwashers.
9. Inspect O-ring for cuts and abrasions. Replace O-ring as required (BRUSH and SEAL
KIT 828714A1).
53778
a
b
c
d
e
a-Brush Card
b-Metal Connector
c-Spade Connector
d-Screws and Lockwashers
e-O-ring

Table of Contents

Questions and Answers:

Question and Answer IconNeed help?

Do you have a question about the Mercury Optimax 150 and is the answer not in the manual?

Mercury Optimax 150 Specifications

General IconGeneral
Horsepower150 HP
Engine TypeV6
Alternator Output60 amp / 756 watt
StartingElectric
SteeringRemote
Displacement2.5 L
Fuel Induction System2-Stage Direct Fuel Injection (DFI)
Shaft Length20", 25"
Dry Weight431 lbs (20 in), 439 lbs (25 in)

Related product manuals