EasyManuals Logo

Mercury Optimax 150 User Manual

Mercury Optimax 150
522 pages
To Next Page IconTo Next Page
To Previous Page IconTo Previous Page
Page #348 background imageLoading...
Page #348 background image
POWER TRIM
90-855347R1 JANUARY 1999 Page 5B-43
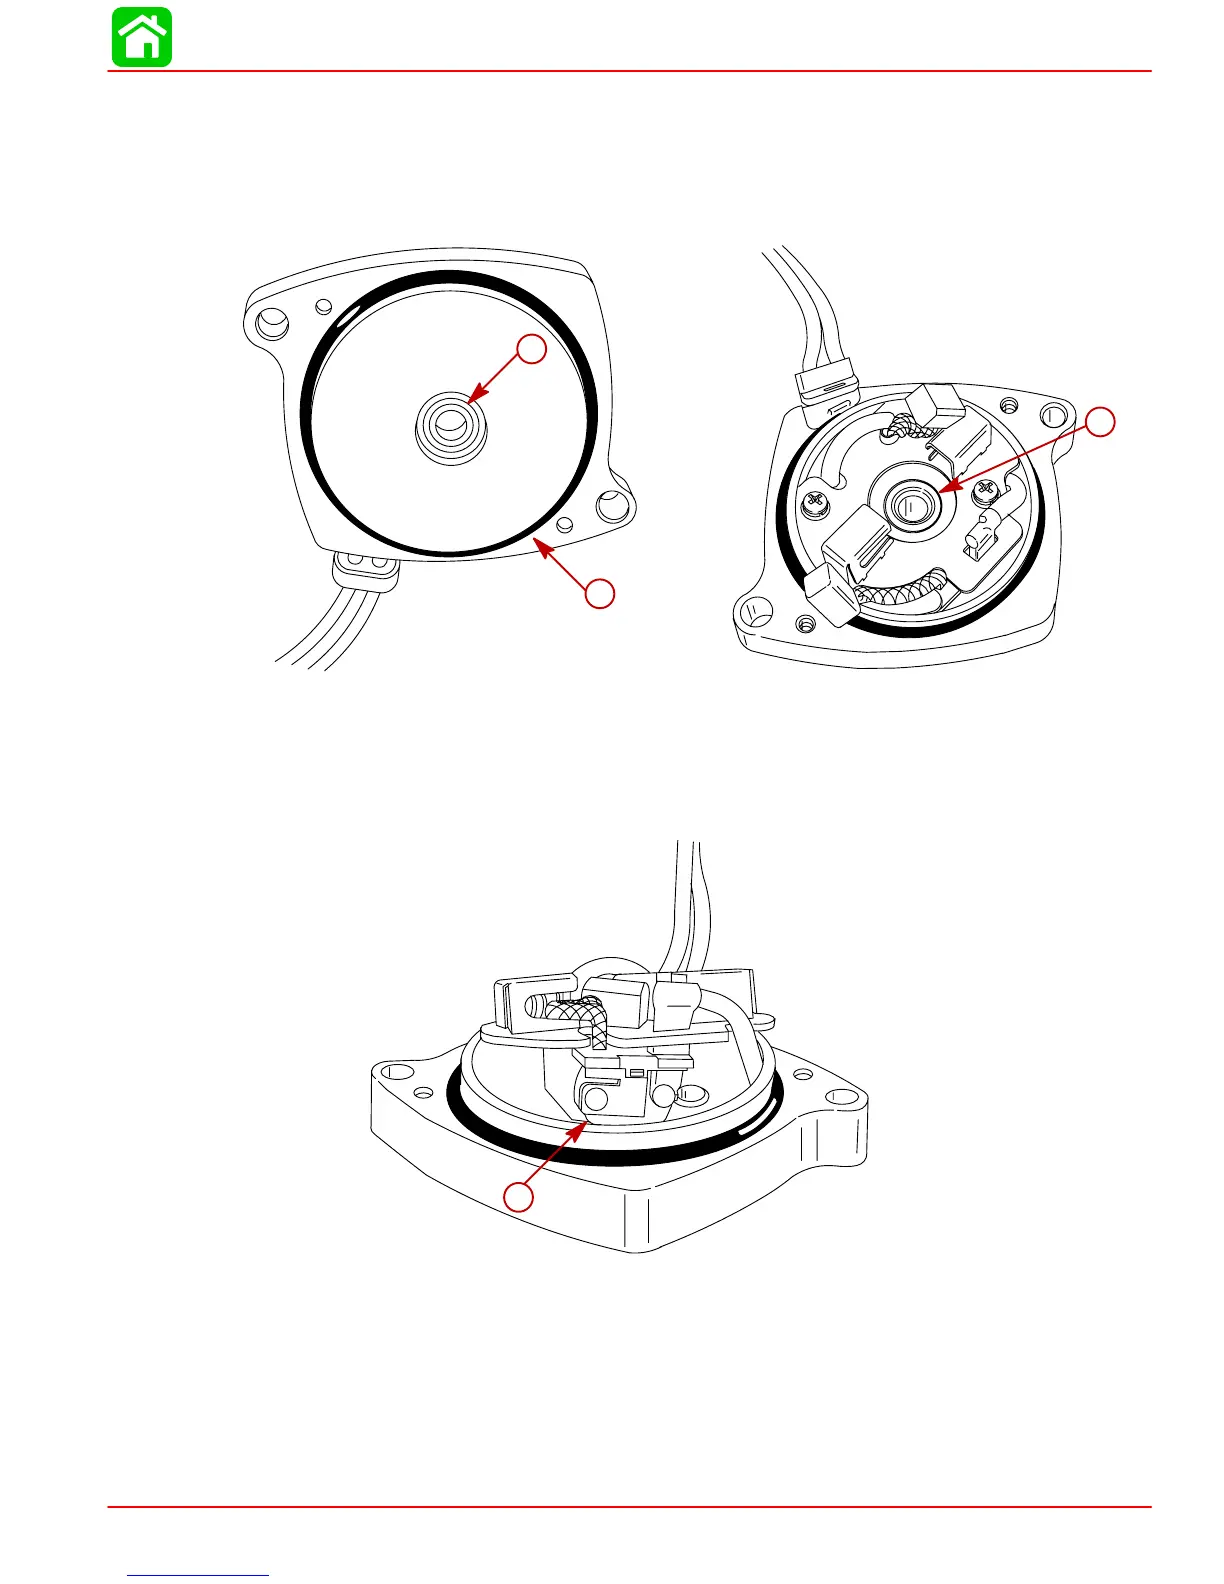
END CAP INSPECTION
1. Inspect seal and O-ring for cuts and abrasions. If replacement is required, install
BRUSH and SEAL KIT 828714A1.
2. Inspect bushing for wear. If bushing appears to be excessively worn – grooves,
scratches, etc. – install END FRAME ASSEMBLY (COMPLETE) 828715A1.
53785
c
53783
a
b
a-Seal (Apply 2-4-C w/Teflon to seal lips)
b-O-ring
c-Bushing
3. If trim motor is overheated, a thermoswitch located under brush card will open. Nor-
mally, this switch will reset itself within 1 minute.
53781
a
a-Thermoswitch

Table of Contents

Questions and Answers:

Question and Answer IconNeed help?

Do you have a question about the Mercury Optimax 150 and is the answer not in the manual?

Mercury Optimax 150 Specifications

General IconGeneral
Horsepower150 HP
Engine TypeV6
Alternator Output60 amp / 756 watt
StartingElectric
SteeringRemote
Displacement2.5 L
Fuel Induction System2-Stage Direct Fuel Injection (DFI)
Shaft Length20", 25"
Dry Weight431 lbs (20 in), 439 lbs (25 in)

Related product manuals