CL-Profiler operating instructions page 8 of 15
www.cl-profiler.com
To start or stop recording, click on the “START” or “STOP” buttons (4).
When recording is busy, a red blinking indicator is shown on the bottom
right hand side of the screen.
d - Save data
When a measurement is finished, it can be saved with the “Save” button
(5). A new window will pop-up which allows you to enter some additional
information about the measurement (machine name…). Also note that the
scale information is saved together with the data. If one zooms in to a
part of the graph (see further), that scale position is also saved.
e - Printing
For the linear measurement there are two reports available, the “Linear
graph” (6) and the “Radial graph” (7). These reports can be printed or
saved as JPEG files so that they can be included in your own reports. Make
sure a printer is installed before attempting to print.
Measurements can also be transferred to a different computer with a USB
stick.
Before printing, one can add additional information that belong to this
measurement by clicking on “Insert report text” (8). This is the same text
as in the pop-up window when saving the data.
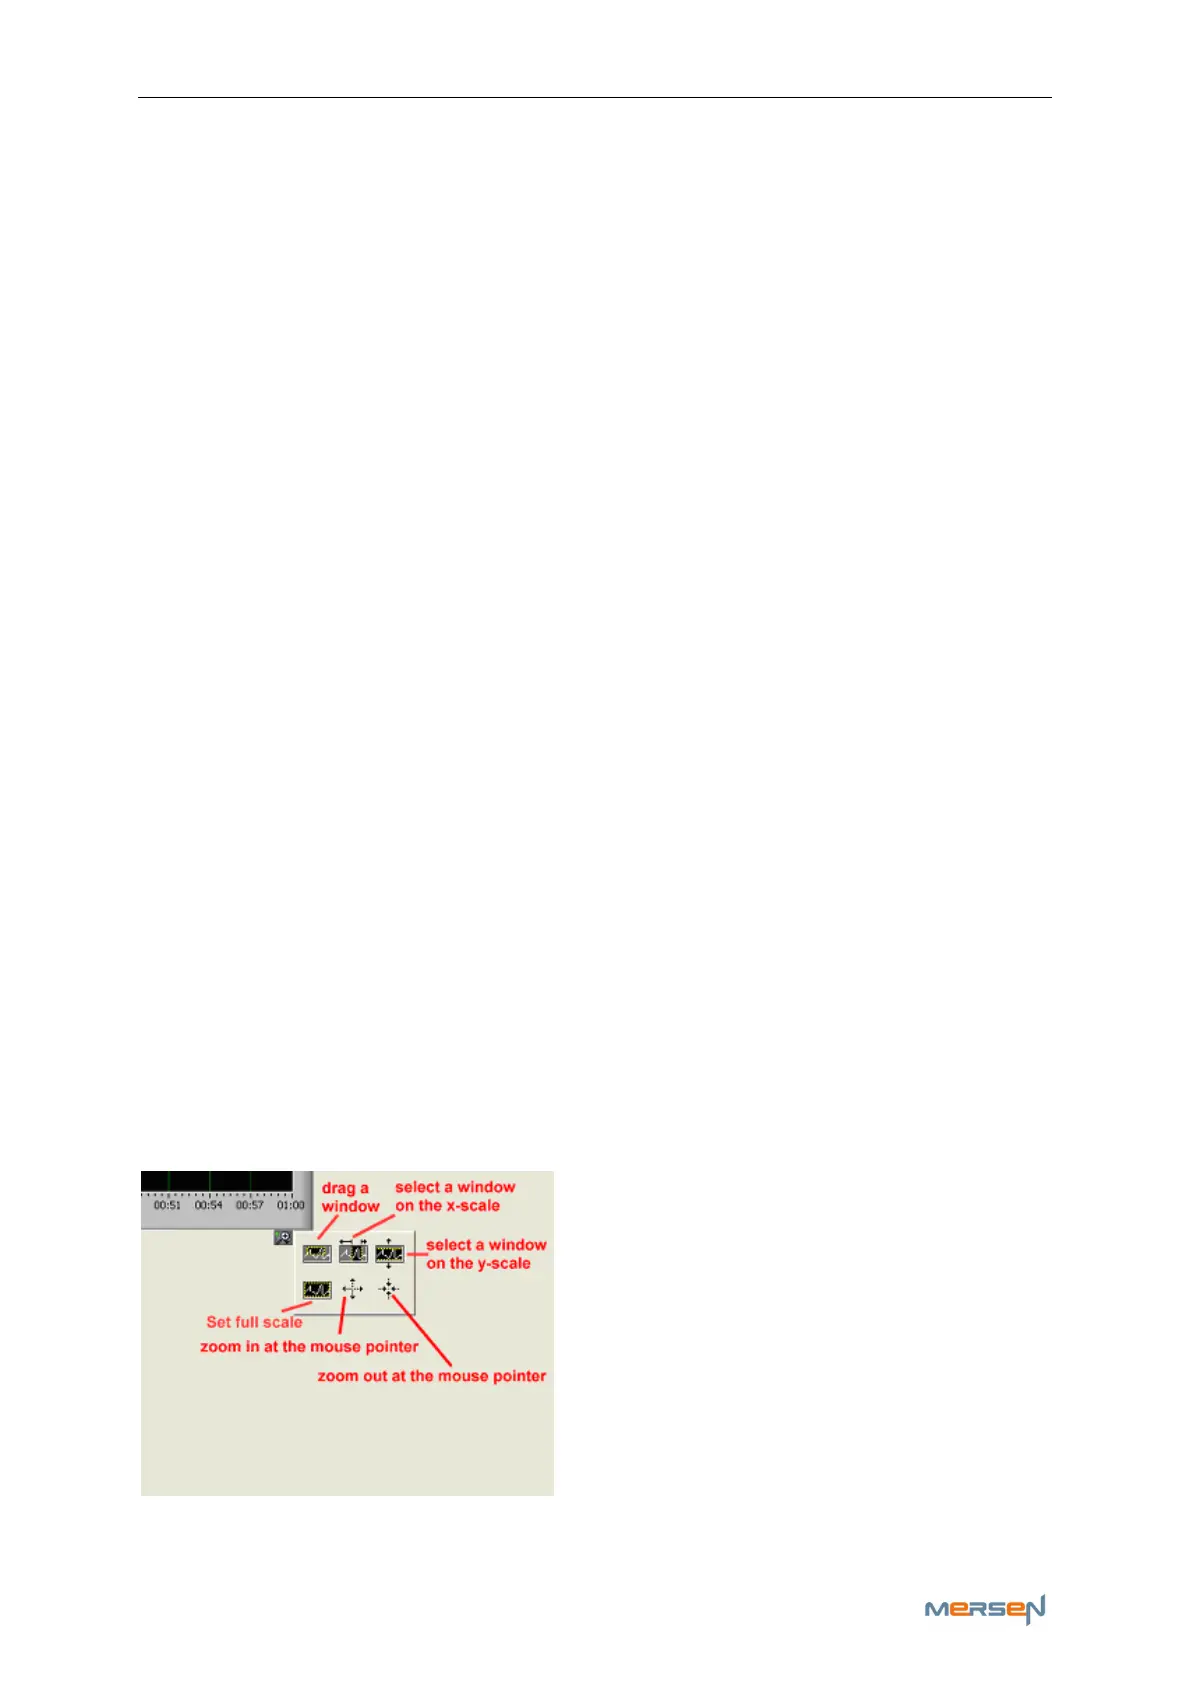
f - Graph
The graph (16) shows the current measurement. It is possible to zoom in,
on a part of the graph. This way one can, for example, take only that
piece of the X-scale that contains useful data. For example, if two rota-
tions of a device under test are recorded, you can zoom into a part so that
you get the data of only 1 rotation. When printing, only the part in which
you were interested will be printed.
The ZOOM tools are located above (10). Click on the magnifying glass to
see new options appear: