METEK Micro Rain Radar MRR-2 Page 17
2012-03-01 Valid for MRR Service Version 6.0.0.4 / Firmware 6.00
Installation Steps:
1. Install the MRR-PC according to the documents of the manufacturer.
2. Plug the tube socket (see Figure 1) of the RADAR antenna over the
attachment pole and clamp it with the M10 fixing bolt.
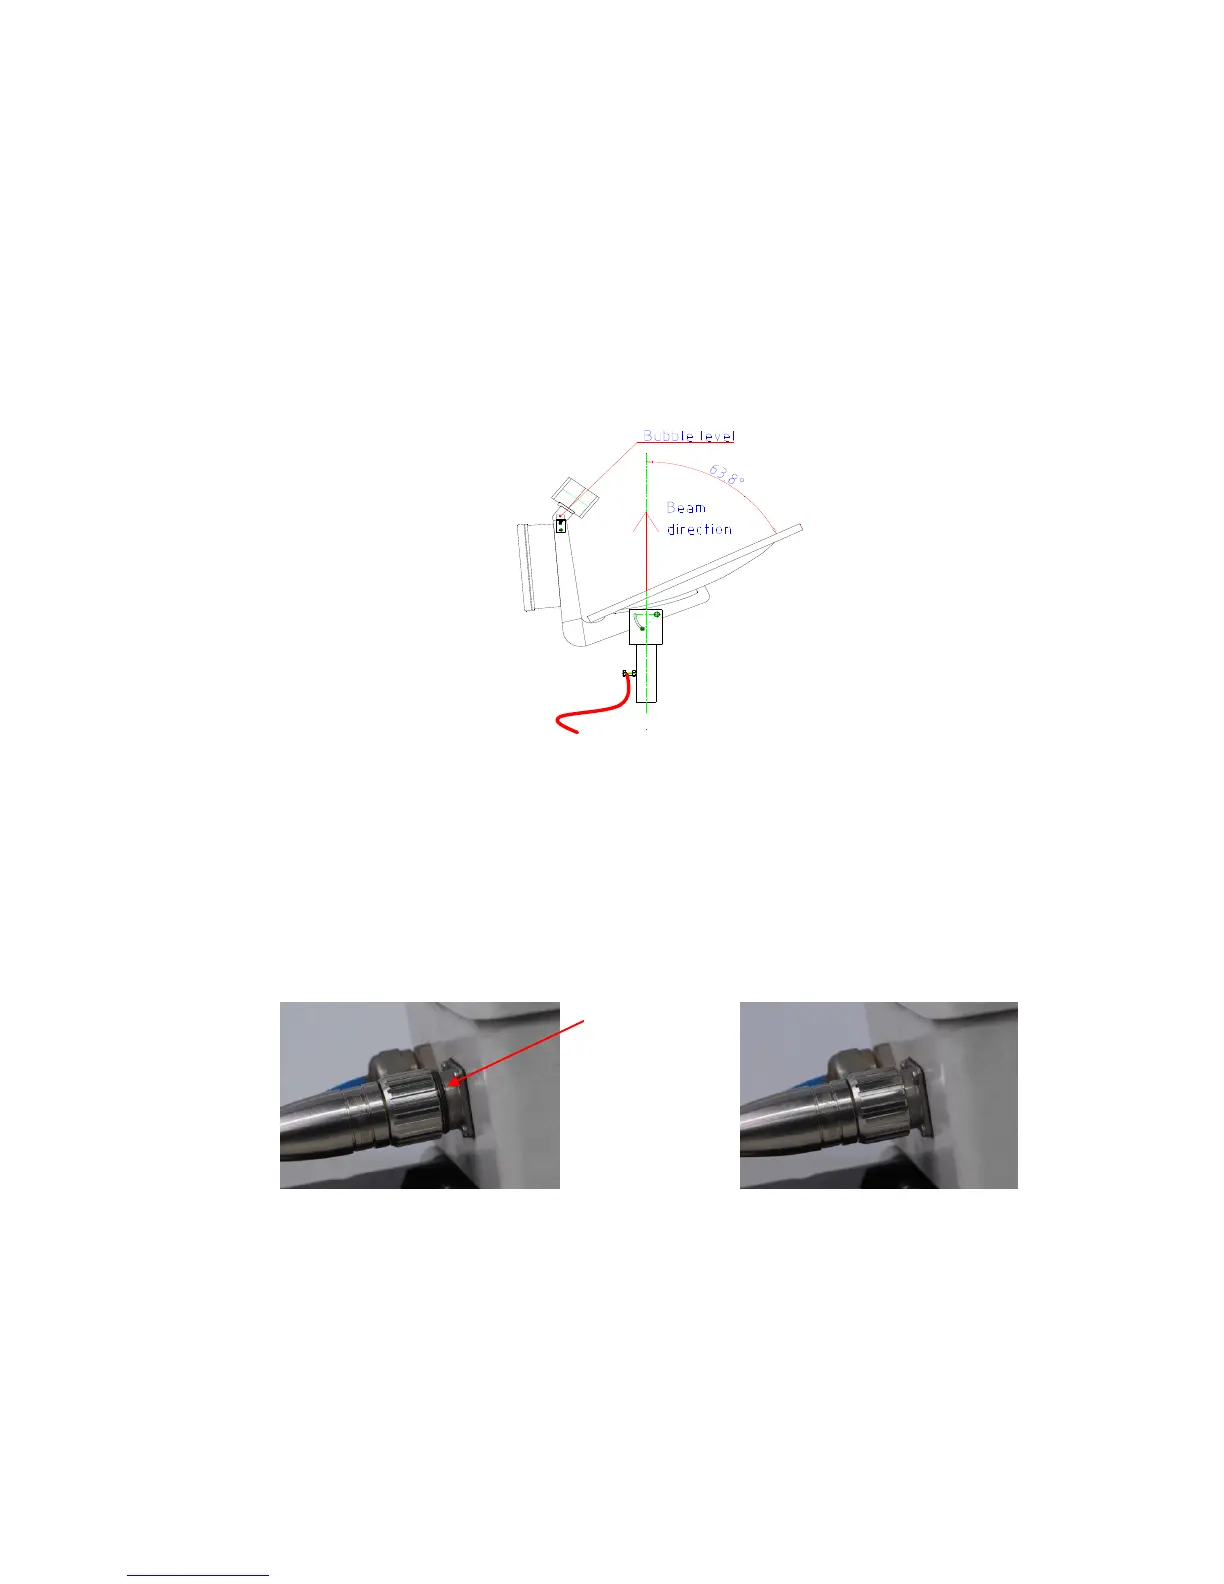
3. Check the vertical alignment of the antenna with the built in bubble level
(Figure 8).
Figure 8: Vertical alignment of the radar beam
4. Attach a ground wire to the fixing bolt for lightning protection after
mounting of the antenna (Figure 8).
5. Connect the control cable between RCPD and Junction Box. Ensure that
the nut cap is tightly screwed, If the black o-ring is visible the connection
will not be waterproof (see Figure 9).
Figure 9: Control cable connector
6. Connect serial cable (Figure 5) to the serial interface of the MRR-PC
which was selected in the operating system for the connection of the
MRR-2. If this serial port is unknown, it can be looked up in the
administration of the "services" in the operating system of the computer
and it can be changed accordingly there. See also installation of the
control program chapter 6.