25.6.2009 Rev. 3.0
Installation
12
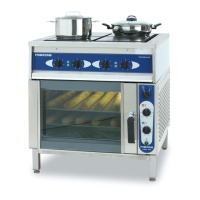
5.2.2 Installation of a Chef oven group
The appliances can be assembled to form combinations of two or three units by stacking
them on top of each other. The stand height for two units is 660 mm and for three units
200 mm. For assembly of the oven group a special spare parts kit is necessary. The kit can
be ordered separately. Code for the spare parts kit is 3752352. Refer to your local supplier
for details.
Assembly of the oven group can be carried out by an agent authorized by the manufactur-
er.
5.3 Positioning the appliance
When installing the appliance, care should be given to ensure that there is a free passage
of cooling air around the appliance and that there are no other sources of heat near the
cooling vents.
Because of the heat and steam arising during cooking, it is recommended to place the oven
under an exhaust hood.
It is important to install the appliance in a level, horizontal position. Tilting and uneven-
ness, however slight, may have an adverse effect on the cooking result.
The appliance must be placed on a flat surface and levelled into a horizontal position by
using the adjustment screws on the legs. For the best result, check horizontality by the
guide rails inside the oven.
To achieve a horizontal position, adjust the screws on the legs of the stand.
5.4 Electrical connections
Should maintenance require the appliance to be tested before all the protective coverings
are in place, please be particularly careful of the moving parts inside the casing as well as
of live parts.
To facilitate future maintenance and to increase safety, install a separate disconnection
switch for the oven in the immediate vicinity of the appliance. The switch should discon-
nect the appliance completely from the mains supply.
The supply cable inlet is in the back right-hand corner of the oven and the connection
point inside the oven. The side casing needs to be open to connect the oven to the mains.
All information needed to connect the appliance is to be found on the name plate, the con-
nection diagram and the installation drawing.
 Loading...