5
2. Installation
2.1 Preparing the Site
Select the site that meets the following requirements:
Characteristic Requirement
Temperature (0 to 40˚C) 32 to 104˚F
Humidity 5% ~ 90%, non-condensing
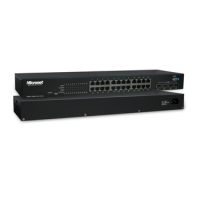
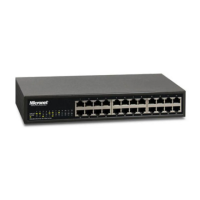
2.2 Settling the Switch
z Mounted to 19-inch standard rack
Locate the accessories provided in the product package. Use the rack-mount brackets and
screws to install the switch into any EIA 19” standard rack.
Step 1: Attach the brackets to each side of the chassis.
Step 2: Apply the screws to each side and secure them tightly.
Step 3: Carefully position the switch into the rack.
Step 4: Align the brackets to the side holes on the rack and use rack screws to secure the
chassis with the rack.
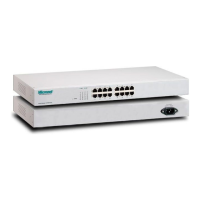
z Desktop or any flat surface
The switch can sit on desktop or any flat surface with adequate space and ventilation. If
you want to place it onto a shelf, make sure the shelf can withstand the weight of the
switch.
Step 1: Simply put the switch on the desired place.
Step 2: Ensure the switch receives good ventilation.
Step 3: Proceed to the “Connecting to Power” section.
2.3 Connecting to Power
Locate the provided AC power cord.
Step 1: Connect the AC power cord to the receptacle at the back of the switch.
Step 2: Attach the plug into a standard AC outlet with a voltage ranging from 100 to 240
VAC.
Step 3: The power LED on the front panel will come on then.
2.4 Connecting to Network
z Connecting the Ethernet to the Chassis:
Step 1: First, ensure the power of the switch (and end devices) is turned off.