9. USING THE PROGRAMMING BUTTONS
USER INTERFACE STRUCTURE
The user interface is structured as a sequence of several screens, which allow you to set the
parameters of the device and of the recording. The programming keypad contains 7 buttons
(the numbers refer to the “general description” section):
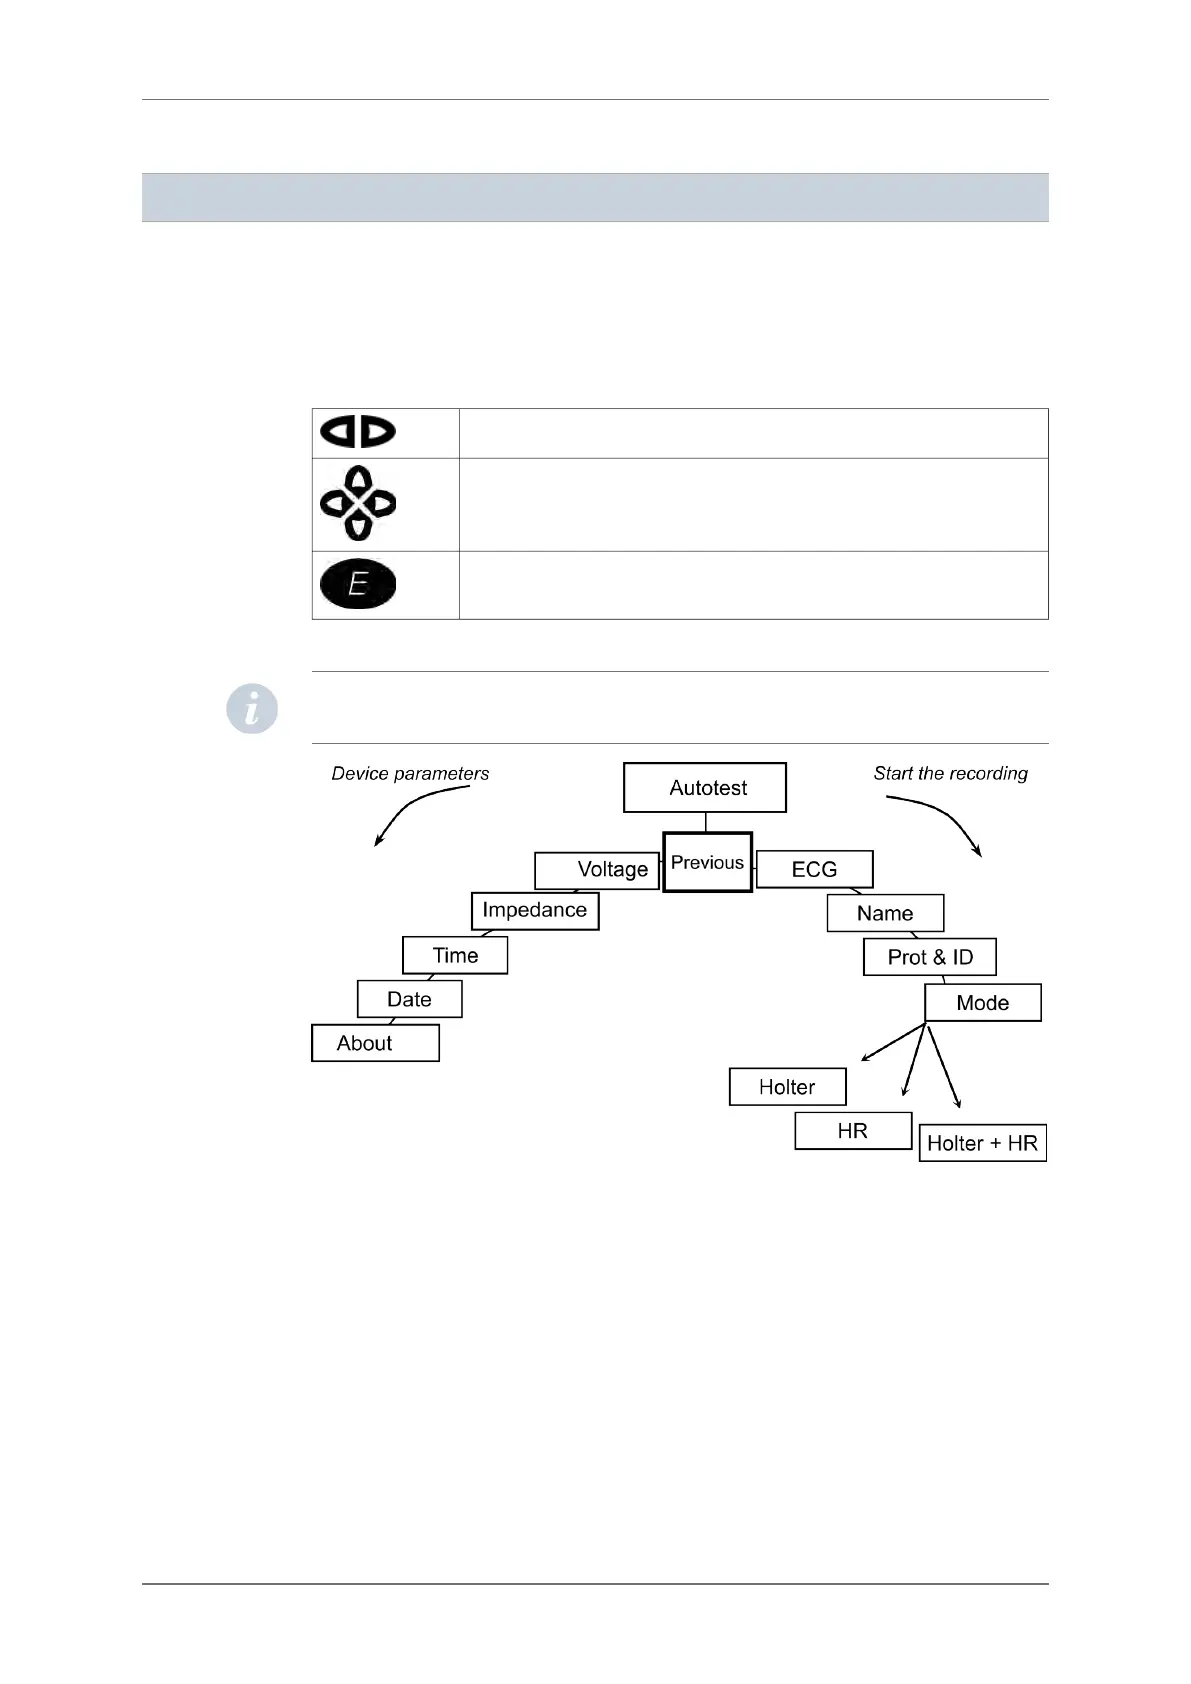
These buttons (2) are used to move from one screen to another.
These buttons (3) are used to move the cursor inside one screen and to modi-
fy the parameters of the screen.
This button (4) is used for final confirmation to start a recording. During the
recording it is also used as an event button by the patient.
The ON/OFF button (1) is placed on the back of the device under the back cover.
NOTE: The event button has a flat surface in order to avoid accidental activation of the
button and causing false patient events in the report.
After switching on the recorder and inserting a flash card, the device displays the name of
the last patient recorded on it. Moving to the left allows access to the device’s parameters
(date, time, voltage, contrast …). Moving to the right allows you to set the recording’s
parameters and to begin the recording. The following chapters will explain the details about
the SpiderView screens.
STARTING THE DEVICE
SWITCHING ON
In order to insert the battery, please refer to section 6.2 “Opening the battery cover”.
After inserting a battery and connecting the patient cable, press the On/Off button (1).
9.1.
9.2.
9.2.1.
9. USING THE PROGRAMMING BUTTONS
20 SpiderView – UA10709B