microTec
19
5. Installation, Assembly, Commissioning
5.1 Installation
Protect the instrument from:
• sources of heat such as fan heaters or hot air outlets ;
• extremely low temperatures;
• direct sunlight;
• excessive dust;
• moisture or rain;
• mechanical vibration or impacts;
• equipment which contain magnets or generate magnetic fields.
5.2 Transportation Locking Pieces and Securements
Remove all locking pieces and adhesive tape used for securement during transportation.
• Place the instrument on a rigid, vibration-free table or bench.
• Align the instrument on the table. Lift up the instrument a little at the front.
• Put the mains plug into the socket provided for this purpose.
• See to correct voltage of your unit and of the mains.
Important! Allways use a 3-conductor, grounded wall outlet.
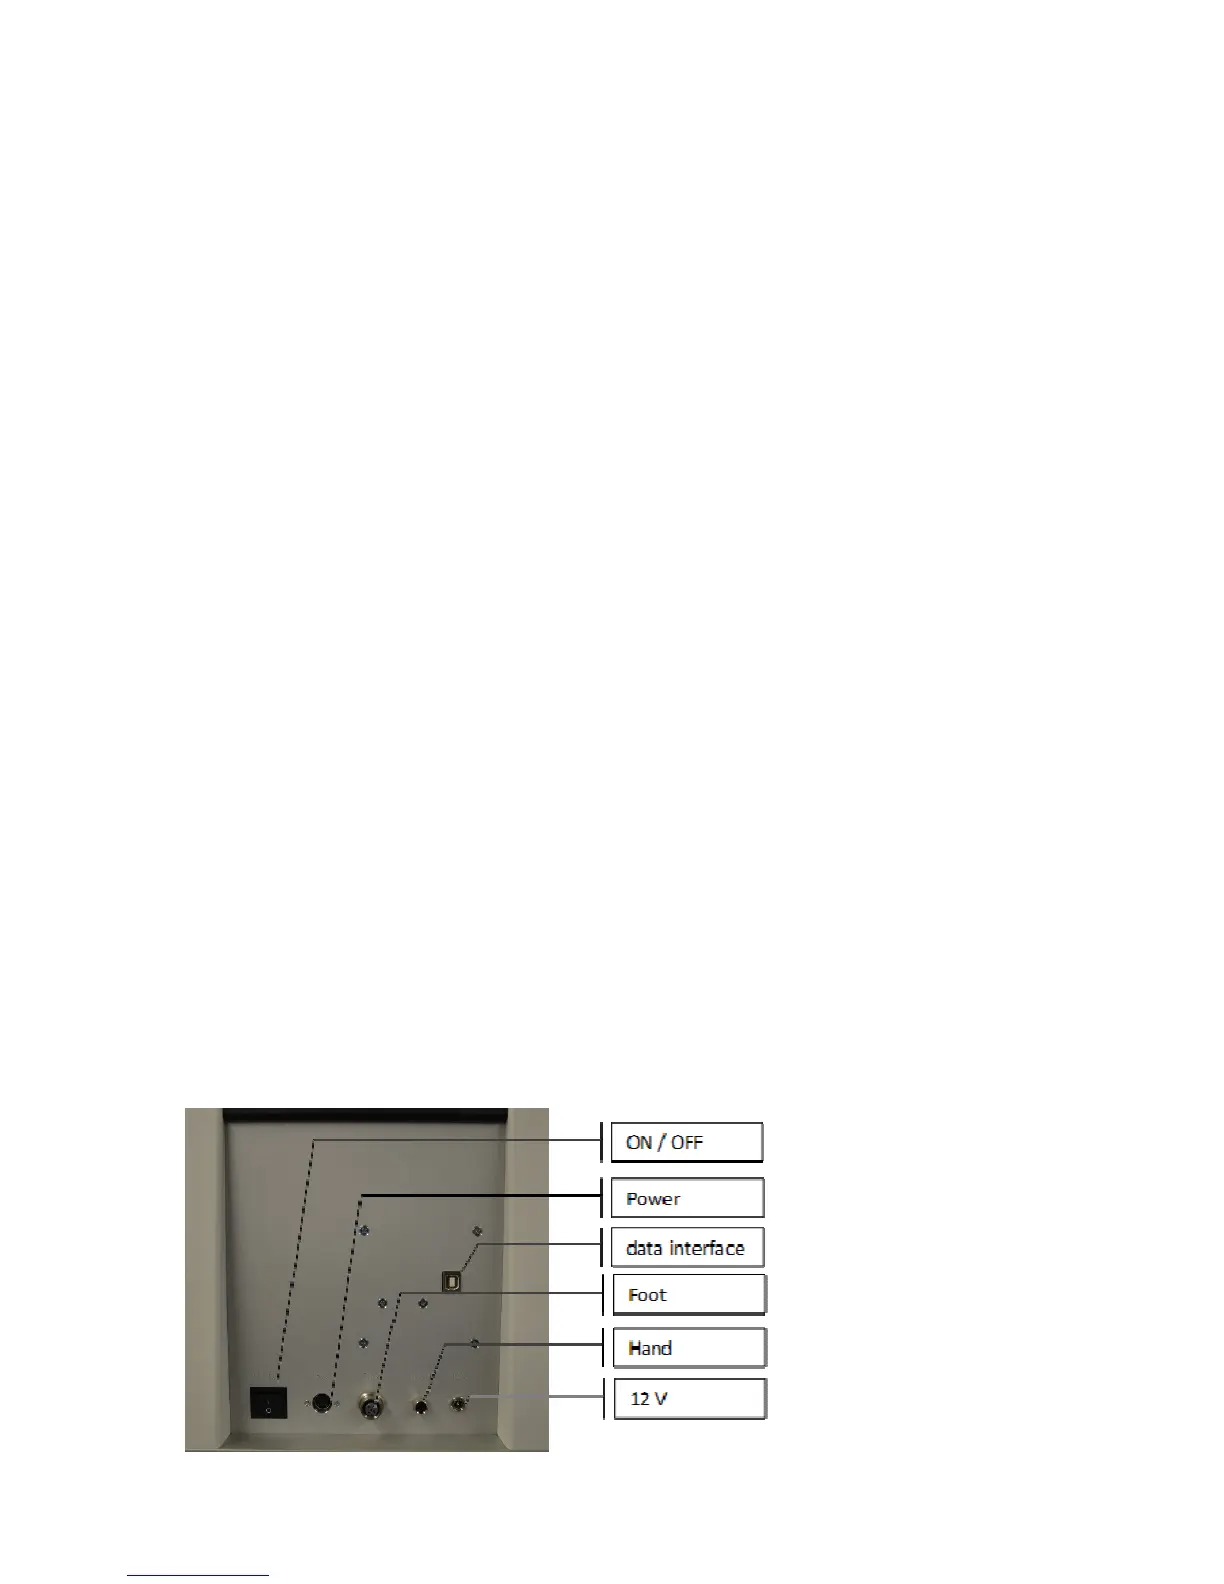
• Connect the hand control panel to the socket provided for this purpose at the
rotary microtome (see figure).
• Connect the optionally available foot switch.
• Connect the optionally available flush-mounted illumination.
5.2.1 Rearview of the rotary microtome
Picture 3