8 ScanMaker i900 Installing and Getting Started
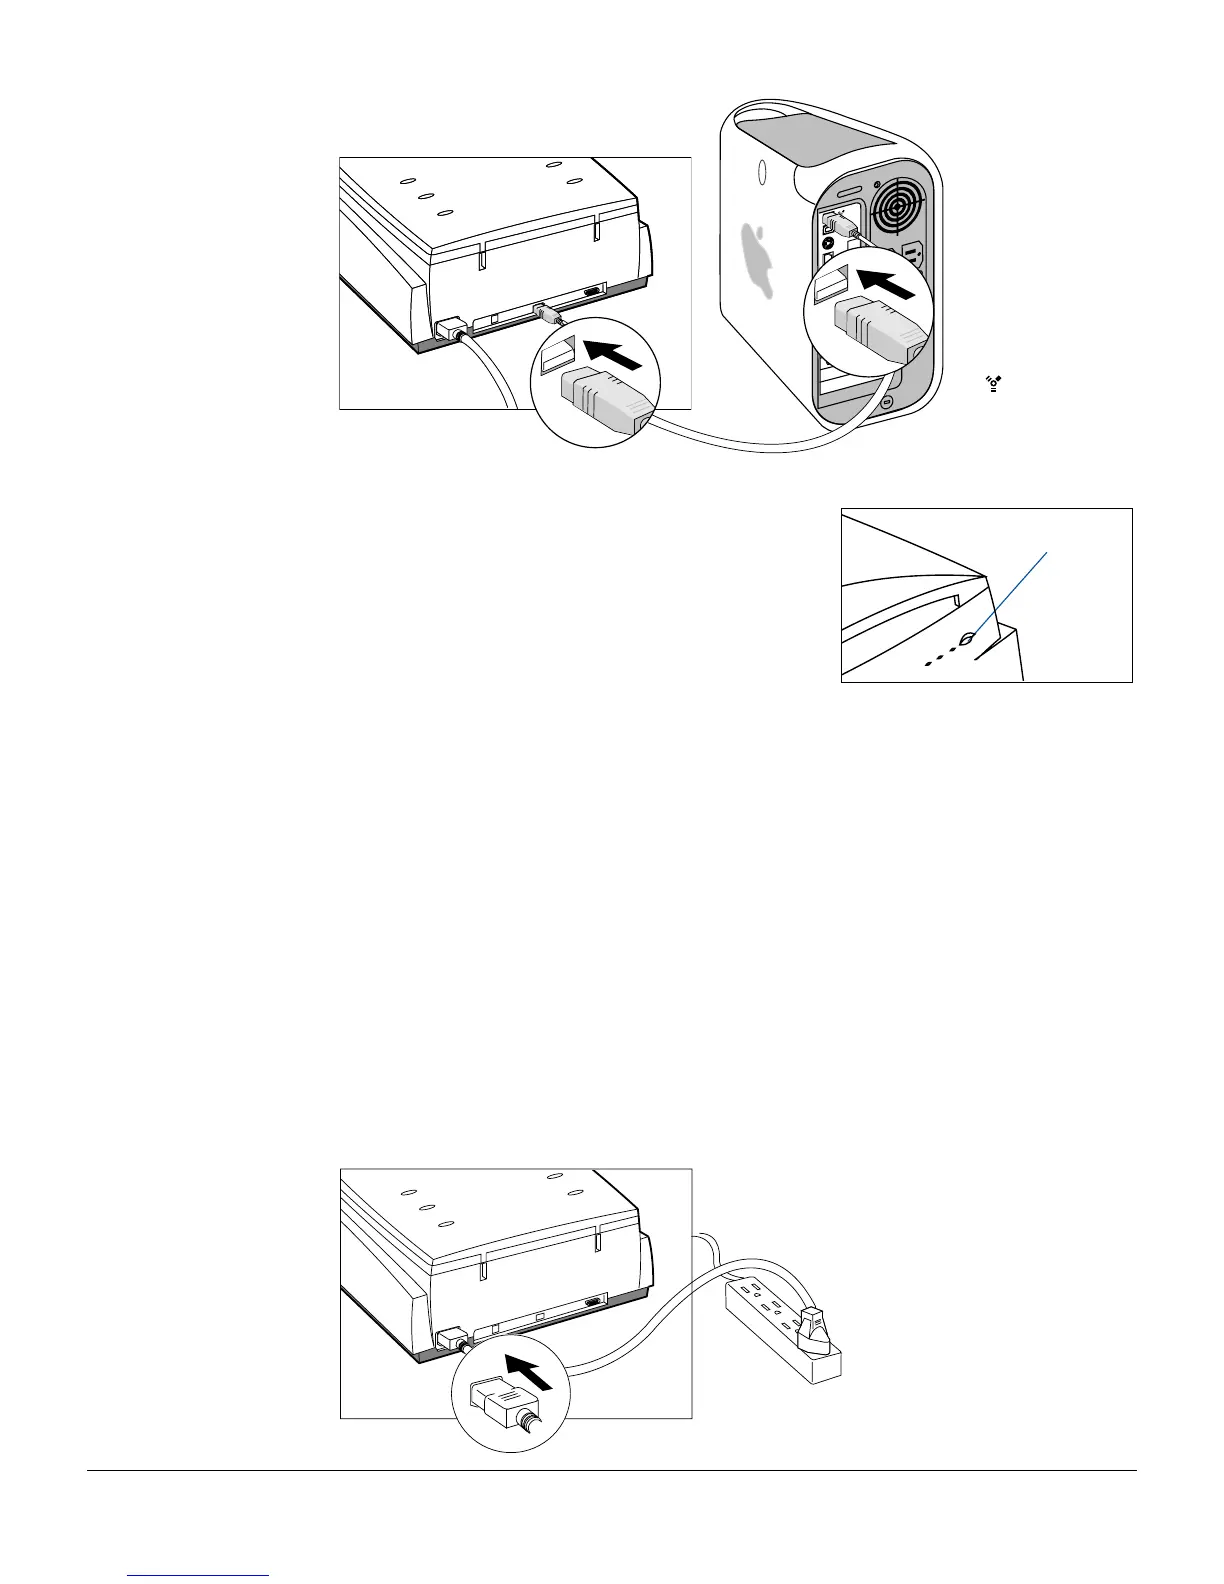
The latest
Macintosh
computers (i.e.,
G3, G4, G5, etc.)
are equipped with
a built-in FireWire
port, usually
labeled with the
“ ” logo.
3. Press the power button on the front panel of
the scanner, and wait for the lights to stop
blinking and stay on steady.
The scanner will be detected by your system
automatically.
For Mac users
(with a built-in
FireWire port)
Using the Hi-Speed USB Port
Check first to see if your computer system has Hi-Speed USB or USB 1.1 ports. If
both ports are present, connect the Hi-Speed cable to the Hi-Speed USB port (not to
the USB 1.1 port) to obtain faster scanning. If your computer does not have a Hi-
Speed USB port, install a Hi-Speed USB card to make use of the Hi-Speed USB port;
or as an alternative, use the USB 1.1 port instead. For more details on how to install a
Hi-Speed USB card in your computer, please refer to the documentation that came
with your purchased Hi-Speed USB card.
Follow the steps below to make the USB connection.
1. Plug the power cord into the back of the scanner, and plug the other end into a
power source (power surge protector highly recommended).
Note: Make sure no other
cable is connected to the
scanner except the power cord
at this point.
Power button