OM-225 216 Page 14
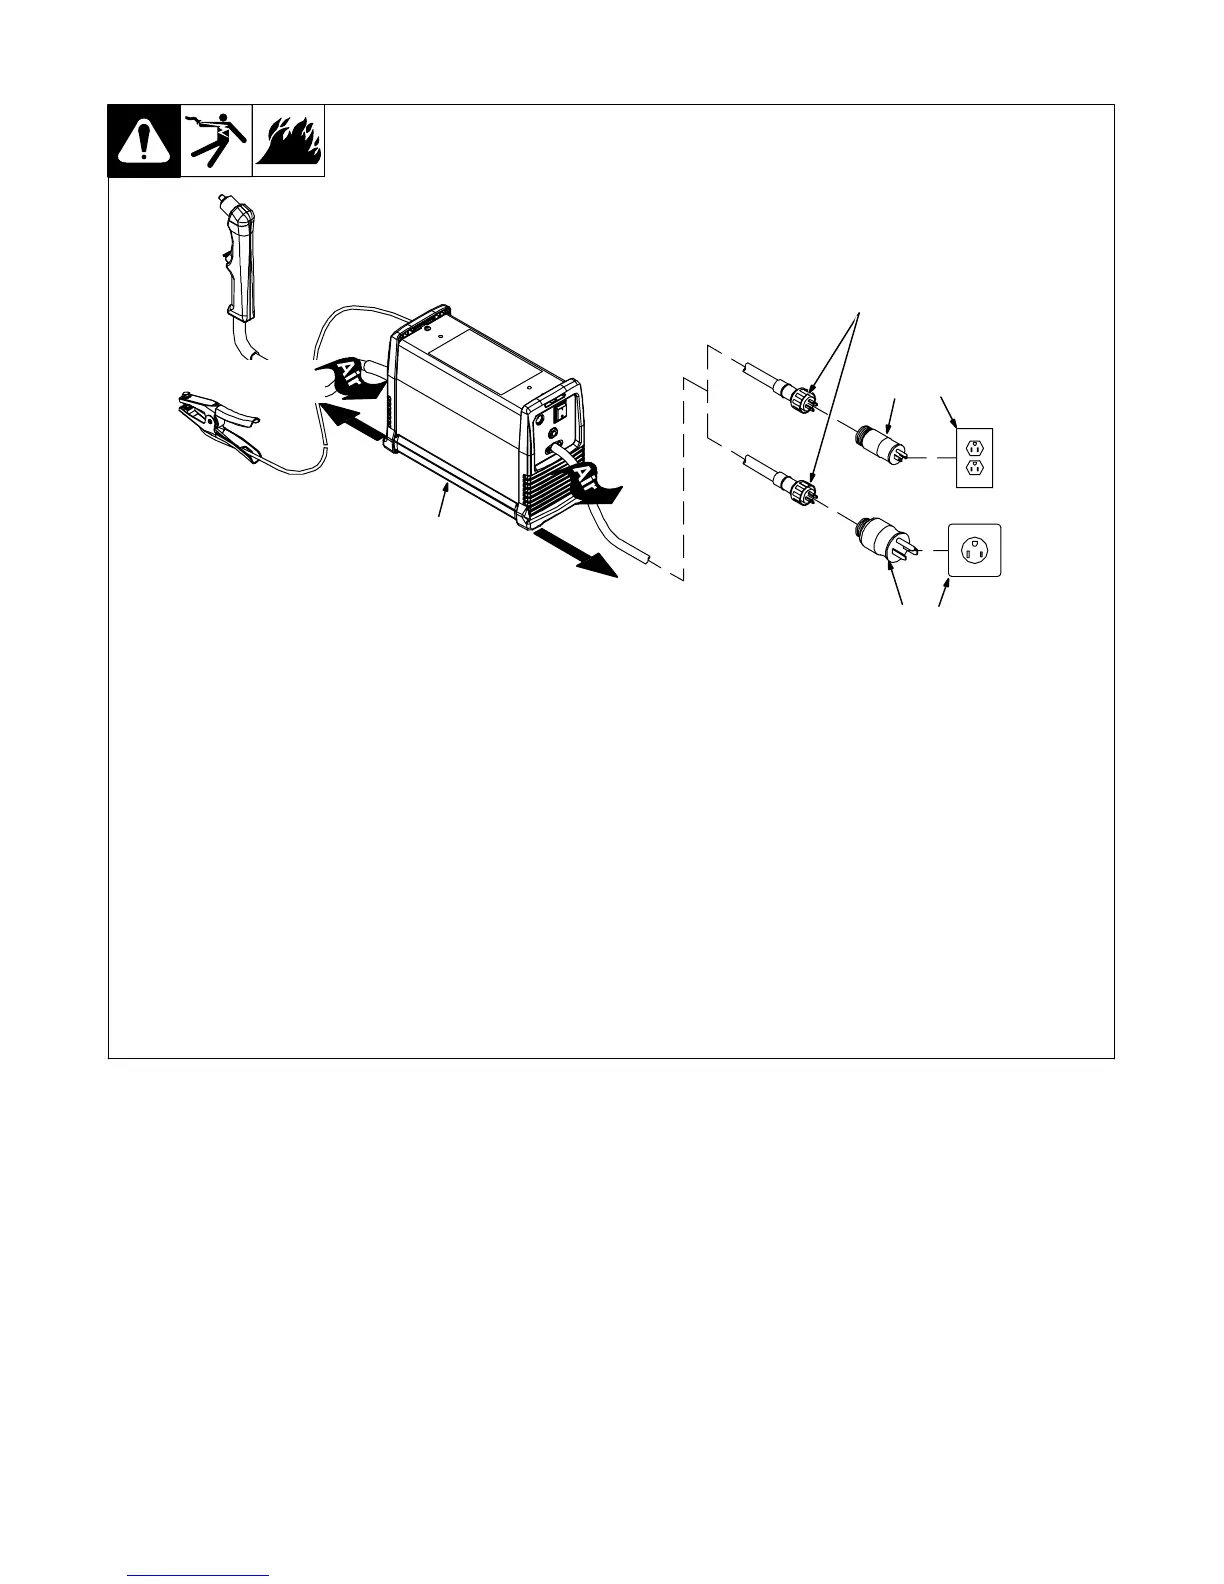
4-11. Connecting Input Power
Y Installation must meet all National
and Local Codes − have only
qualified persons make this
installation.
Y Special installation may be required
where gasoline or volatile liquids
are present − see NEC Article 511 or
CEC Section 20.
. The Auto-Line circuitry in this unit
automatically links the power source to
the primary voltage being applied,
either 115 or 230 VAC.
For 120 volts ac input power, a 15 or 20
ampere individual branch circuit protected
by time-delay fuses or circuit breaker is
required. For 240 volts ac input power, see
Section 4-8.
1 Power Cord Connector
2 Plug − NEMA Type 5−15P
3 Receptacle − NEMA Type 5−15R
(Customer Supplied)
4 Plug − NEMA Type 6−50P
5 Receptacle − NEMA Type 6−50R
(Customer Supplied)
Select plug for power supply receptacle
available at site. Install plug onto power
cord adapter. As threaded collar is tight-
ened, push plug onto adapter until collar is
completely tight.
Connect plug to receptacle.
18 in
(460 mm)
804 504-A
32
1
4
5
Y Do Not cut off power cord connector and rewire. The power cord
connector and plugs will work with standard NEMA receptacles.
Modifying power cord, connector, and plugs will void product
warranty.
. Serial Number/Rating Label
located on bottom of base;
use label to determine input
power for unit.
18 in
(460 mm)
 Loading...