OM-260430 Page 17
SECTION 4 – INSTALLATION
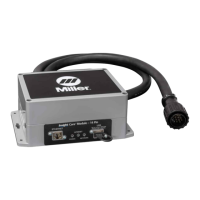
4-1. Insight Core Quick Installation Guide
Step 1. Download and print Network Connectivity Survey from https://insight.millerwelds.com/download. Have form completed by IT
department.
Step 2. Install Insight Core Configuration Utility from https://insight.millerwelds.com/download to a PC. See Section 4-3.
Step 3. Open Insight Core Configuration Utility using icon that was created on desktop (see Figure 4-9)
Step 4. Update firmware if newer revision is available. Skip to step 5 if firmware is current. See Section 4-5.
a. Click the link text here in Configuration Utility. Download newest firmware files from website.
b. Click Locate Files in Configuration Utility and follow prompts.
Step 5. Using the completed Network Connectivity Survey, fill in the connection information. See Section 4-7.
F
If using static addressing, the PC must be connected to the Insight Core with an Ethernet cable at this point. Follow instructions in Section
4-7.
Step 6. Insert USB drive into PC.
Step 7. Click Save to save firmware and connection information to USB drive.
Step 8. Remove USB drive from PC and take it to Insight Core device to be updated and connected.
Step 9. Insert USB drive into Insight Core Device and turn on welding power source.
a. The Network LED (yellow) will flash multiple times. This means that data is being transferred to Insight Core device and files will be written to
USB drive for registration.
b. If the Network LED does not flash, try using a different USB drive. This means data was not transferred between the Insight Core device and
the USB drive.
Step 10. Once device is connected to the network (yellow LED is on) and to the internet (green LED is on), remove the USB drive.
F
If connecting more than one Insight Core, repeat Steps 9 and 10 for each device with the same USB drive.
Step 11. Take the USB drive back to a computer that is connected to the internet.
Step 12. Open a web browser on the computer and browse to https://insight.millerwelds.com/ .
Step 13. Click First Time Set Up.
Step 14. Enter data in every field. To find Core Device Serial Number and License Key, see Step 15.
Step 15. Insert USB drive into computer and open to view files and folders. See Section 4-9.
Step 16. Open the Device License Key folder.
F
One .TXT file will be written for each device being installed.
Step 17. Open .TXT file associated with the serial number to be registered.
Step 18. Copy and paste Serial Number and License Key from .TXT file to corresponding fields on registration webpage.
Step 19. Click Save.
 Loading...