© 2009 MIMAKI ENGINEERING CO.,LTD.
4.2.15 P.1
1
2
3
4
5
6
7
8
R.1.1
Maintenance Manual > Adjustment Items > Adjustment Function > PRINT/CUT POS.
Model CJV30/TPC Issued 2008.08.04 Revised 2008.09.17 F/W ver. 1.20 Remark
1.1
4.2.15 PRINT/CUT POS.
Outline
Correct the mechanical position aberration of the print head and the nozzle, and raise the precision of printing and
cutting while the mark sensor is not used.
The machine draws registration marks with the print head and cut head, reads the positions of the marks with the
mark sensor and corrects the position error automatically.
Procedure
1. Select [PRINT/CUT POS.] from the operation menu.
2. Set the origin at the distance of 40 mm or more from the inner
edge of the rightmost pinch roller and press [ENTER].
3. Press [ENTER] to start the adjustment.
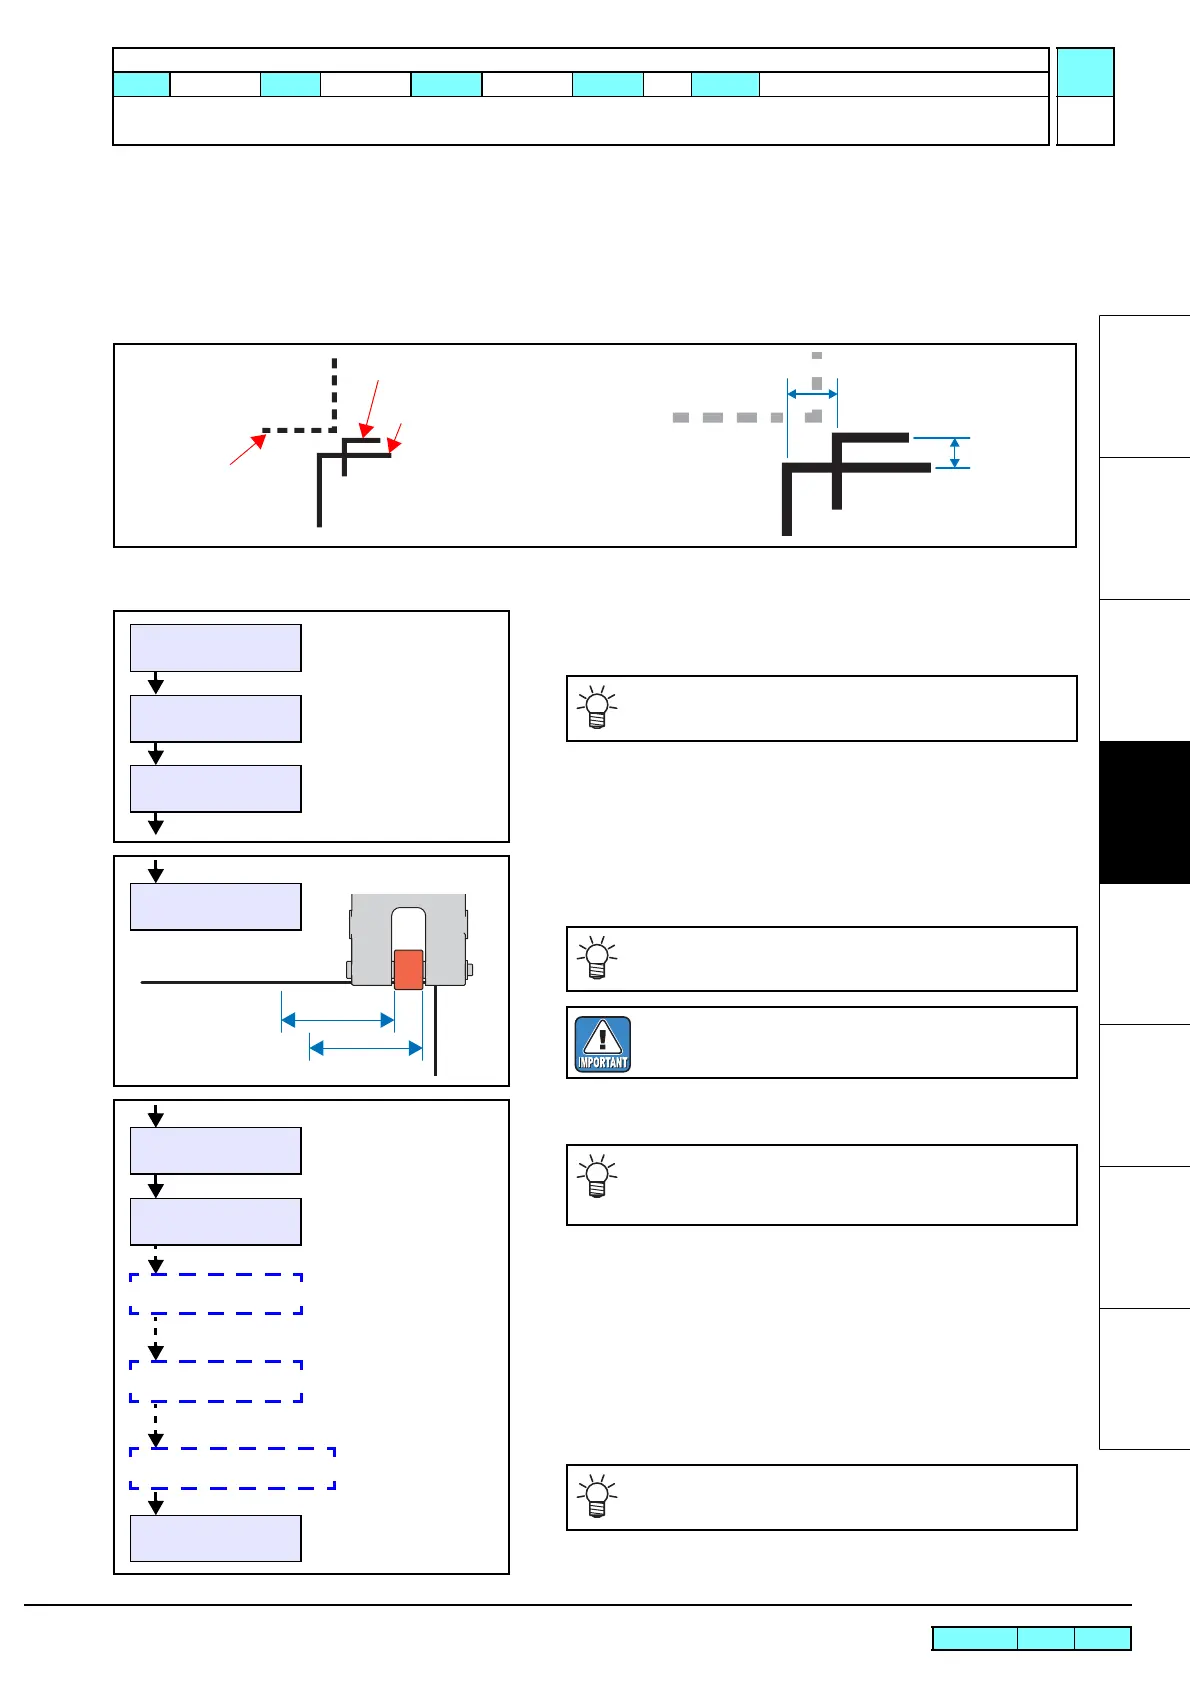
The correction values are determined from the positional
difference between the mark , which is drawn at the corner of
, and the mark .
4. Check the correction values on the LCD and then press
[ENTER] to register correction values and complete the
adjustment.
X correction value
Y correction
value
Print pattern
(One side: 1 inch long)
Drawing pattern with pen
(One side: 1/2 inch long)
Drawing pattern with pen
(One side: 1 inch long)
* The marks and are drawn with the
pen to visually check the correction value.
The correction value can be set even
without the drawing with the pen tool.
<LOCAL.1> [#01]
FUNCTION
#ADJUST <ent>
#ADJUST
PRINT/CUT POS. <ent>
Before starting the adjustment, check to see that the
connection unit is connected to the printing head.
40 mm or more
(When EXPANDS = ON)
40 mm or more
PRINT/CUT POS.
ORIGIN SET :ent
When EXPANDS is set to ON, set the origin 40 mm or
more away from the outer edge of the pinch roller.
The adjustment is not made precisely unless the
origin is set properly.
#PRINT/CUT POS. /CUT
PRINT START :ent
PRINTING
Mark drawn
(Print Head)
Switching to cutter head
Mark drawn
(Cut Head)
Position of mark detected
Mark drawn and correction
values calculated (Cut Head)
#PRINT/CUT POS. /CUT
Y= 0.0 X= 0.0
If a mark detection error occurs, execute “4.2.11
[PHOTO SENSOR] SENSOR LV.” and perform this
adjustment again.
Pressing [END] will terminate the adjustment without
registering the correction values.

 Loading...


