© 2009 MIMAKI ENGINEERING CO.,LTD.
6.2.2 P.2
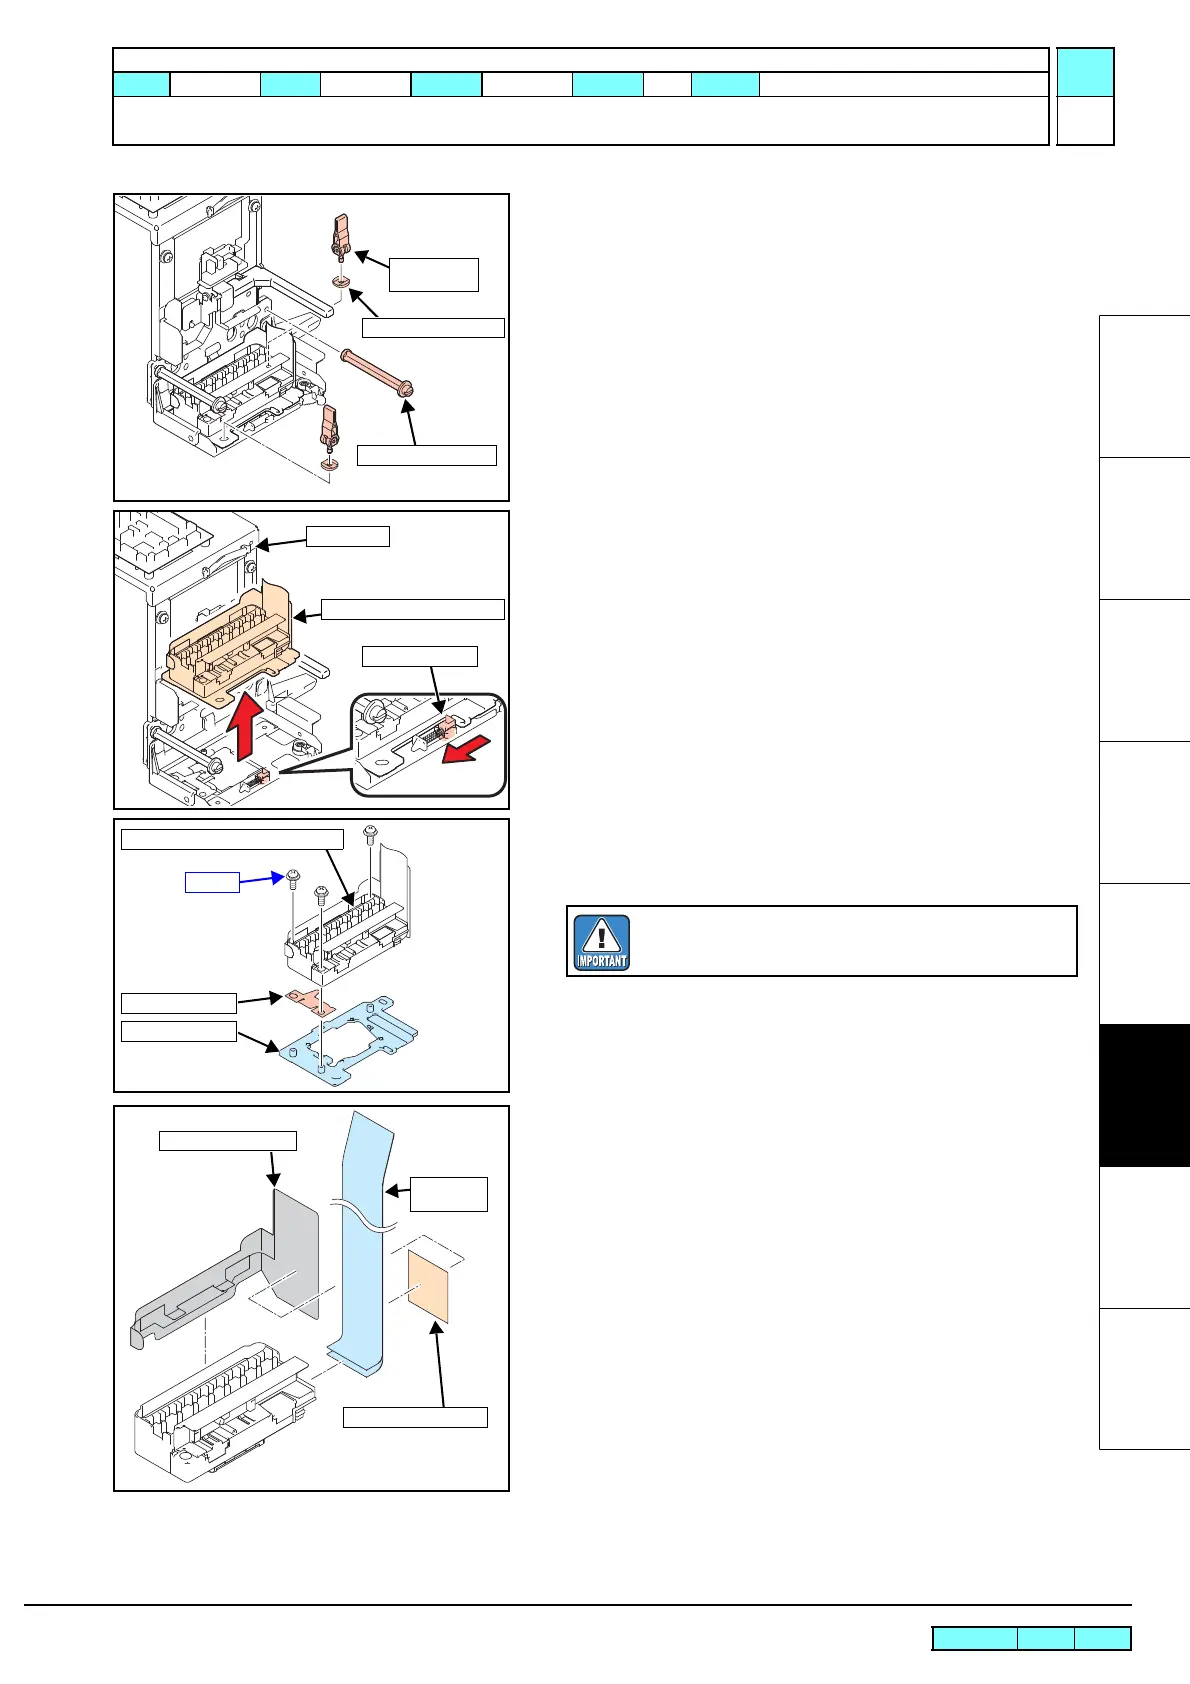
6.2.2 Removing of Head Unit
1
2
3
4
5
6
7
8
7. Unscrew the right head lock screw, and remove the AD
locking levers located on the near left towards you and at the
right recess.
8. Remove the clamp of the head FFC assy. While moving the
AD pusher to the left, pull directly up the IH47V-2-G head
unit assy and remove it.
9. Remove the screws and then the AD plate from the IH47V-2-G
head unit assy.
10. Remove head unit holder B and then the FFC and the head
memory cable from the connector.
AD Locking
Lever
Head Lock Screw
AD Locking Spacer
AD pusher
IH47V-2-G Head Unit Assy
Clamp
Head Earth Plate
AD Plate
* Take care not
to drop
Screw
IH47V-2-G Head Unit Assy
Take care for the head earth plate not to drop
between the print head and the AD plate.
Head Unit Holder B
Head FFC
Assy
Acetate Fabric Tape
R.1.0
Maintenance Manual > Disassembly and Reassembly > Ink-related Parts > Removing of Head Unit
Model CJV30/TPC Issued 2008.08.04 Revised F/W ver. 1.00 Remark
1.0

 Loading...


