© 2009 MIMAKI ENGINEERING CO.,LTD.
6.3.1 P.1
1
2
3
4
5
6
7
8
R.1.0
Maintenance Manual > Disassembly and Reassembly > Cut Head Carriage > Pen Assy and LED Pointer
Model CJV30/TPC Issued 2008.08.04 Revised F/W ver. 1.00 Remark
1.0
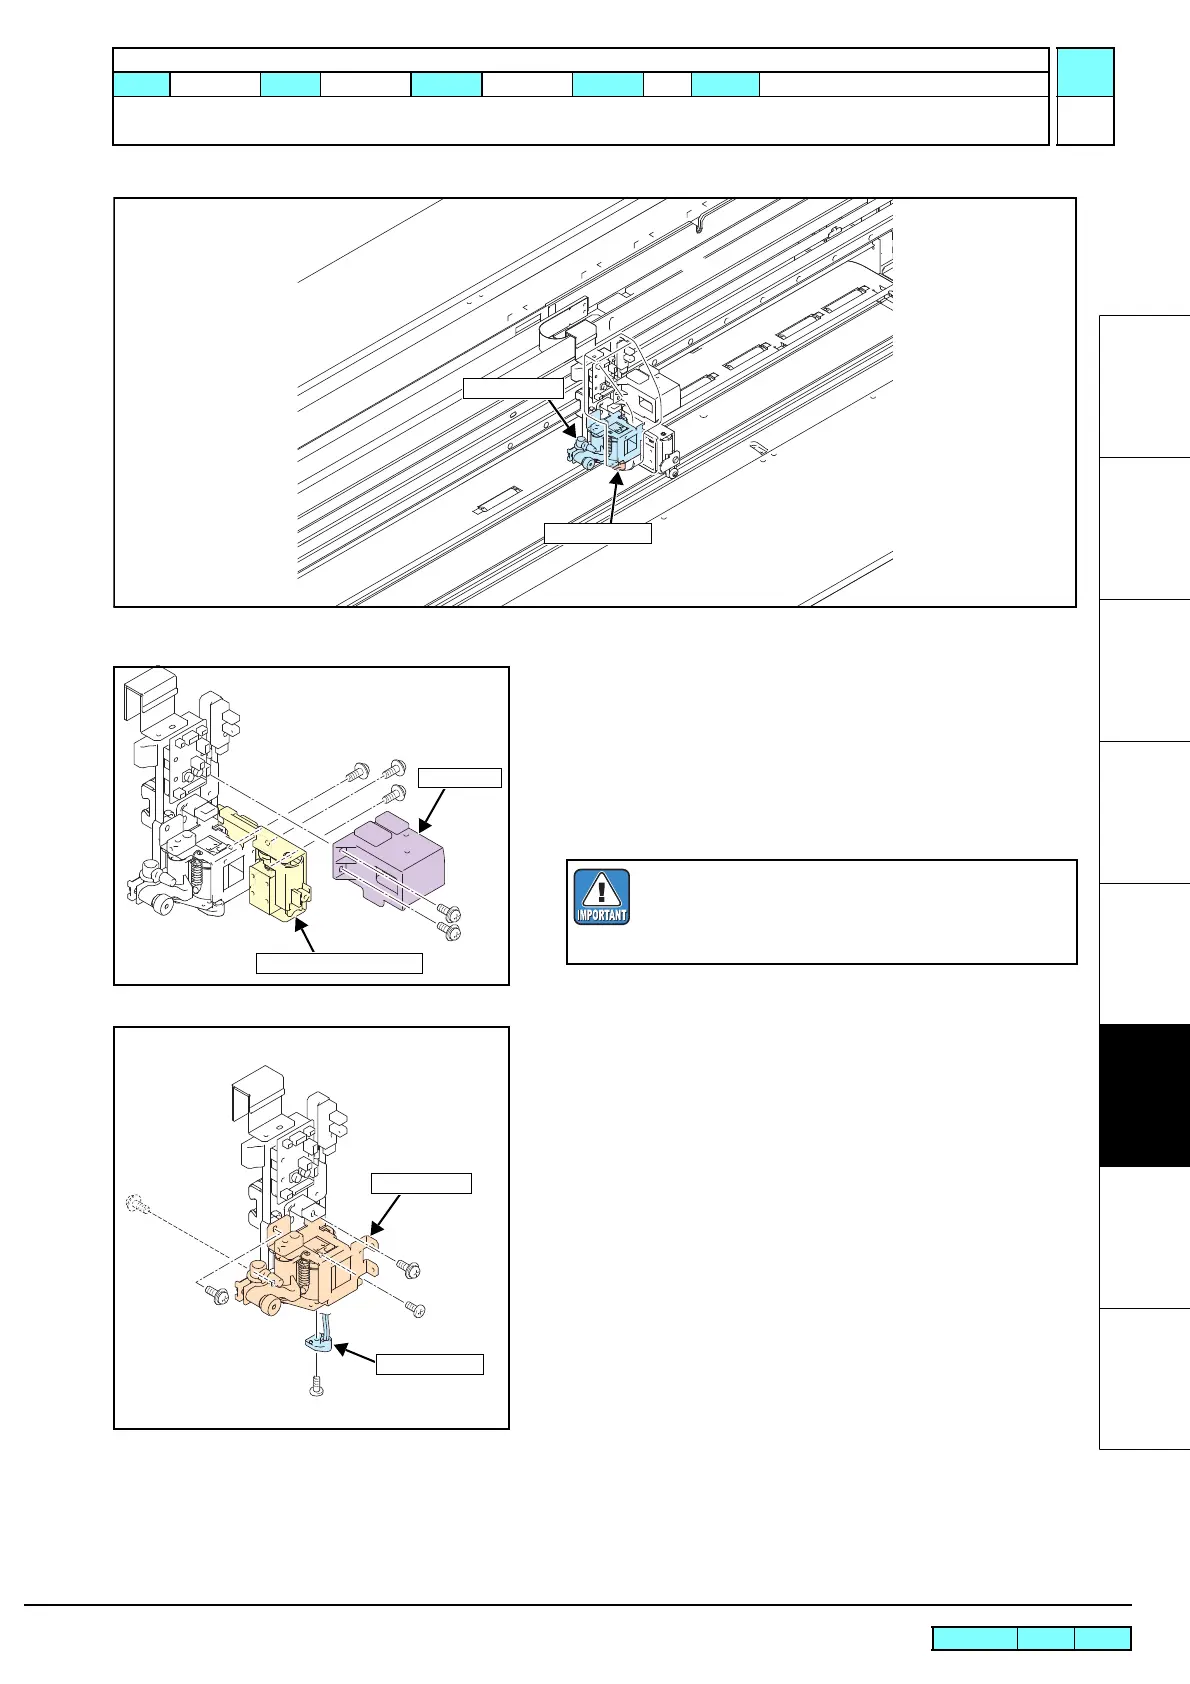
6.3.1 Pen Assy and LED Pointer
Work procedures
1. Remove the following covers.
• C Head cover
• CY cover F
2. Move the cutting carriage on the platen.
3. Remove the S-guide, and then the auto cutter assy.
4. Remove screws from the rear and the front of the printer to take
off the pen assy.
5. Remove the connector from PCB and also LED pointer from
the pen assy.
6. Reverse the disassembly procedure for reassembly.
Take care not to change the orientation of the hook of
the whirl-stop SP.
Changing the orientation will change the pen
pressure and the pen landing values.

 Loading...


