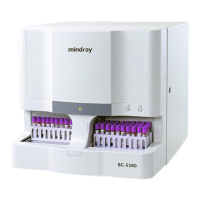
7-34 7 Service and Maitenance
6
WARNING
There may be residual water in the syringe connector. Do not
drop water onto the analyzing unit.
Grab the Tee with one hand and the syringe connector with the other
hand and unscrew (counter-clockwise) the syringe. Exercise caution so
that the gasket on the syringe does not drop out and if it does, store it in a
clean place for later installation.
NOTE
You should replace the gasket with a new one after removing
and installing the syringe for about 2-3 times. Otherwise,
sealingness of the fluidic path and sampling precision may be
influenced.
7 Unscrew (counter-clockwise) the plunger guide cap and pinch the plunger
button to gently pull the plunger assembly from the syringe.
8 Pinch the new plunger assembly by the plunger button and carefully
insert the plunger tip into the syringe and push it all the way to the end.
Screw (clockwise) the plunger guide cap until secure.
9 Immerse the syringe connector into deionized water. Pinch the plunger
button, pull it to aspirate half syringe of deionized water and then push it
to expel the deionized water and the air from the syringe.
10
Grab the Tee with one hand and the syringe connector with the other
hand. Screw (clockwise) the syringe into the Tee until secure.
11
Place the syringe on the holder. Install space bars and fix the retaining
screws.
CAUTION
The upper edge of the upper space bar must reach the
seventh line of the scale on the syringe.
When fixing retaining screws, be sure to tighten them
alternately with equilibrium force.
12
Screw (clockwise) the lower retaining screw until secure.
13
Place the Power back to ON.
14
Enter the Alignment screen of the operating software and set the Vol. (R.
Syringe) to 450ul. Click R. Syringe Aspirate. After the syringe finishes
the motion, click R. Syringe Dispense. You may repeat this action
several times.
Pay attention to bubbles during the aspiration/dispensing process.
If there are bubbles observed during the process, they may be caused by
the air leak between the syringe and the Tee. Uninstall the syringe and
re-install it. If the bubbles are found again, please remove air bubbles
referring to 7.6.8 Removing Air Bubbles for details.